Method 1. Fill and Sign PDF Using SwifDoo PDF
When it comes to all-in-one PDF tools, SwifDoo PDF is definitely worth mentioning. More than a PDF editor to edit scanned documents and PDF files with various useful editing features, SwifDoo PDF serves other purposes. You can use it to password-protect PDF files or unlock them for editing. Meanwhile, it can function as a PDF converter to convert PDF to and from various formats, such as CAD, HTML, Word, Excel, EPUB, etc.
What’s more, SwifDoo PDF enables you to translate PDFs, rearrange PDF pages, annotate PDFs, and more. Click the button below to access this wonderful PDF tool and explore its features. I am confident that you will find the features you need among the many features offered by SwifDoo PDF.
Why Choose SwifDoo PDF to Fill out and Sign a PDF
Instead of jumping between different web tools and risking your formatting, using a comprehensive desktop suite like SwifDoo PDF makes your paperwork much easier to handle. This software combines form filling, professional editing, and signature management tools into a single, clean workspace. It offers an excellent solution for anyone trying to learn how to fill out a pdf form without printing or scanning physical sheets.
Besides, SwifDoo PDF enables you to fill out a non-fillable PDF form by adding text overlays, check marks, cross marks, or black circle marks. Additionally, with the editing features offered by SwifDoo PDF, you can easily correct any false information or add other details to the PDF.
After filling out a PDF, SwifDoo PDF provides you with options to add a digital signature or add a signature by drawing or uploading a picture. Just follow the steps below to fill out and sign a PDF using SwifDoo PDF.
How to Complete and Sign a PDF with SwifDoo PDF
Stage 1. Install and launch SwifDoo PDF.
After obtaining the installation package of this PDF form filler, double-click it and follow the on-screen prompts to install it on your PC. Then launch it.
Stage 2. Import and fill the target PDF.
Step 1: Click the Open option to upload the PDF form you want to fill out and sign.
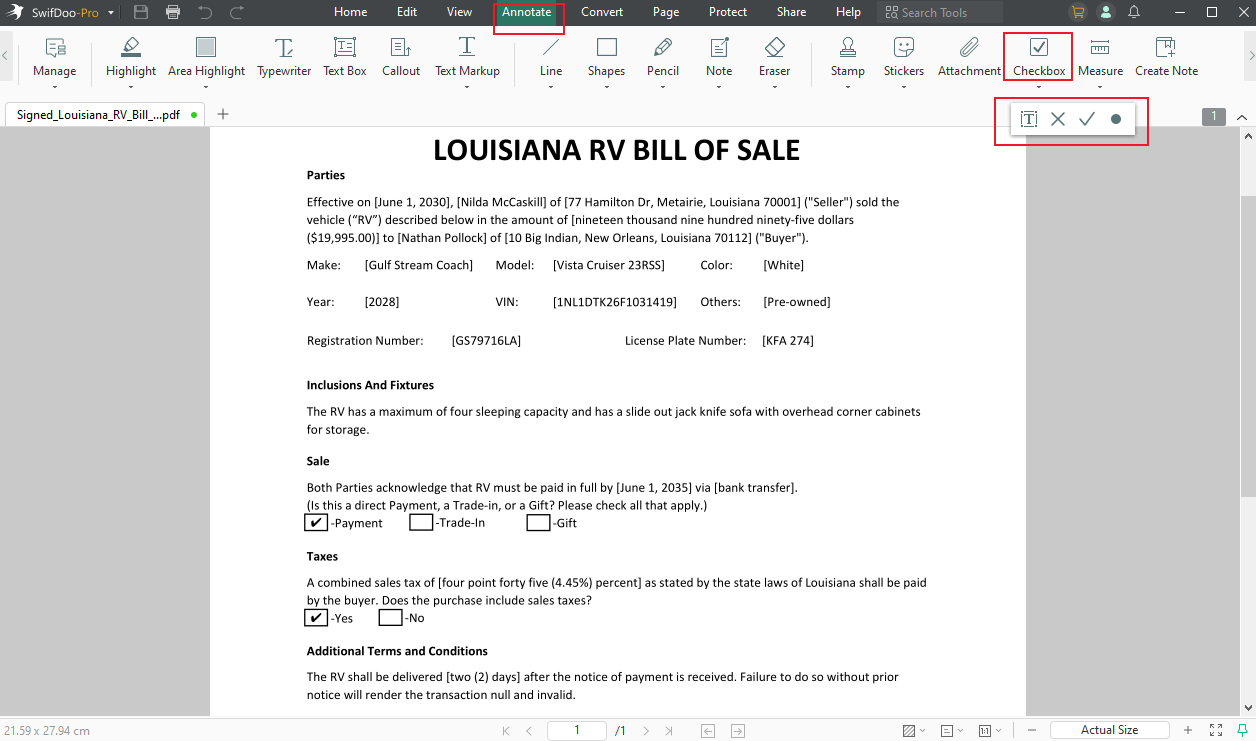
Step 2: Switch to the Annotate tab, click on Checkbox, and select from Text, Cross, Check, and Black Circle options.
Step 3: Then move the cursor to where you want to fill and click on it. Optionally, you can add stamps, shapes, notes, or other elements to your PDF form.
Stage 3. Sign the PDF.
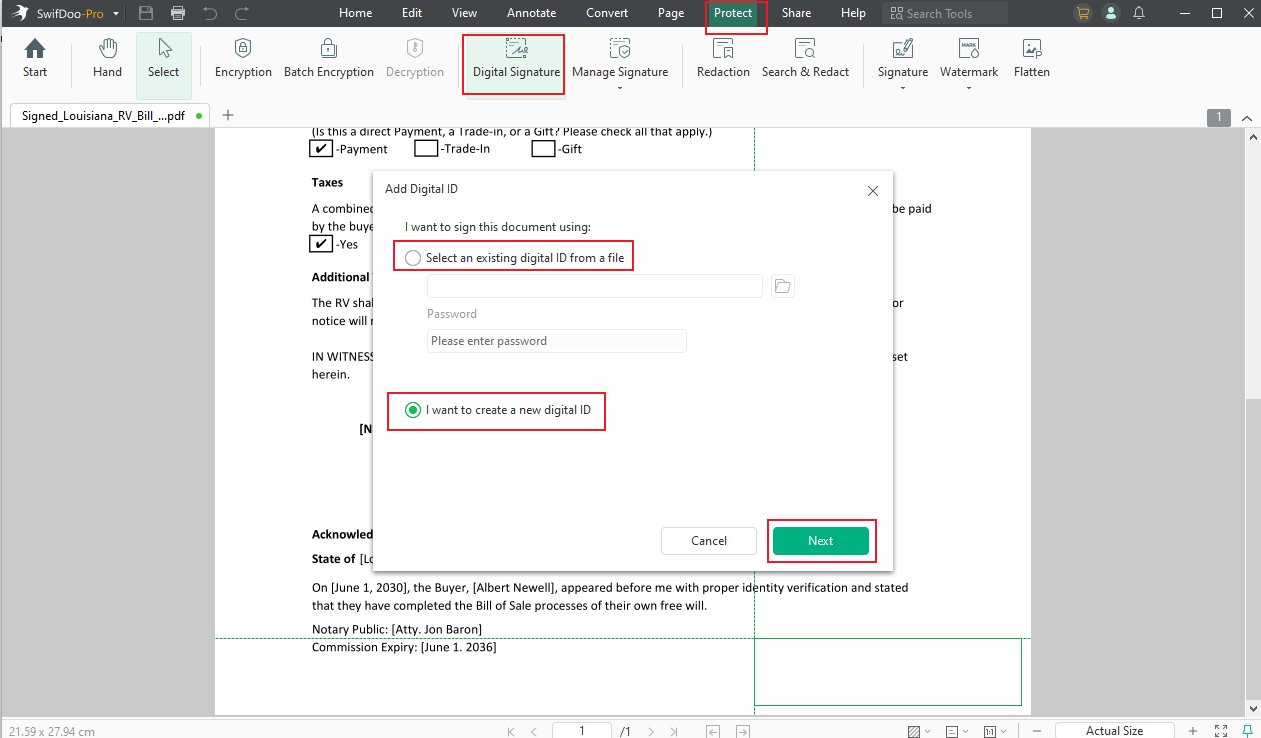
Switch from the Annotate tab to the Protect tab. Here are two options for you to sign the filled PDF.
Option 1: Add a digital signature
Hit on Digital Signature and click on the PDF to choose a proper position to add the signature.
- If you don’t have a digital signature, you can click the “I want to create a new digital ID” option to create a new digital signature and follow the on-screen instructions to add it.
- If there is, you can tick the “Select an existing digital ID from a file” option, click the folder icon to select it, enter the password, and click Sign.
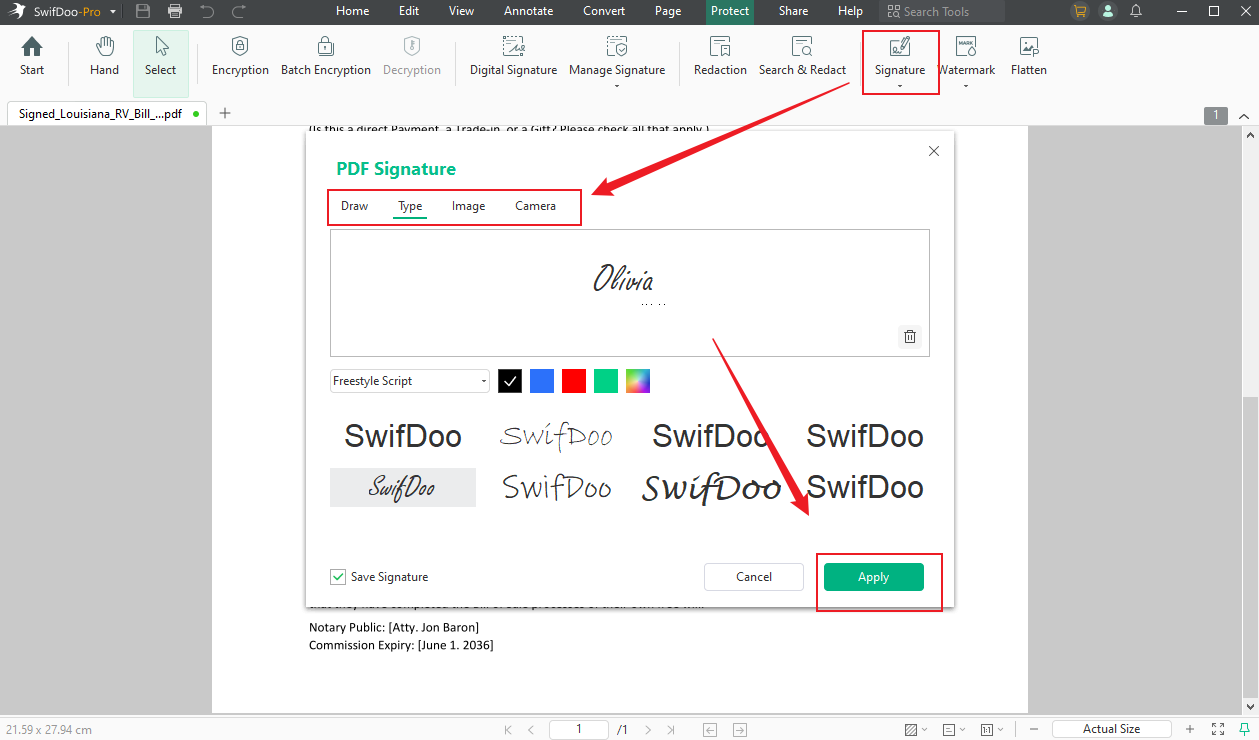
Option 2. Sign the PDF electronically
Step 1: Click the Signature option and choose the Create New Signature option. Here, you can select to create a new signature by drawing, typing, uploading an image, or shooting a photo.
Step 2: Then, click Apply and place the e-signature on the PDF.
How to Fill out a PDF Form with SwifDoo PDF?
SwifDoo PDF offers specific function to help you fill out a PDF easily. Here is how to do that.
Step 1: Still, click the button to download and install SwifDoo PDF and open the program after that.
Step 2: Open your PDF file and switch to the Form tab.
Step 3: The program will mention that you can highlight the interactive form fields in the document. Click Highlight Fields if you need.
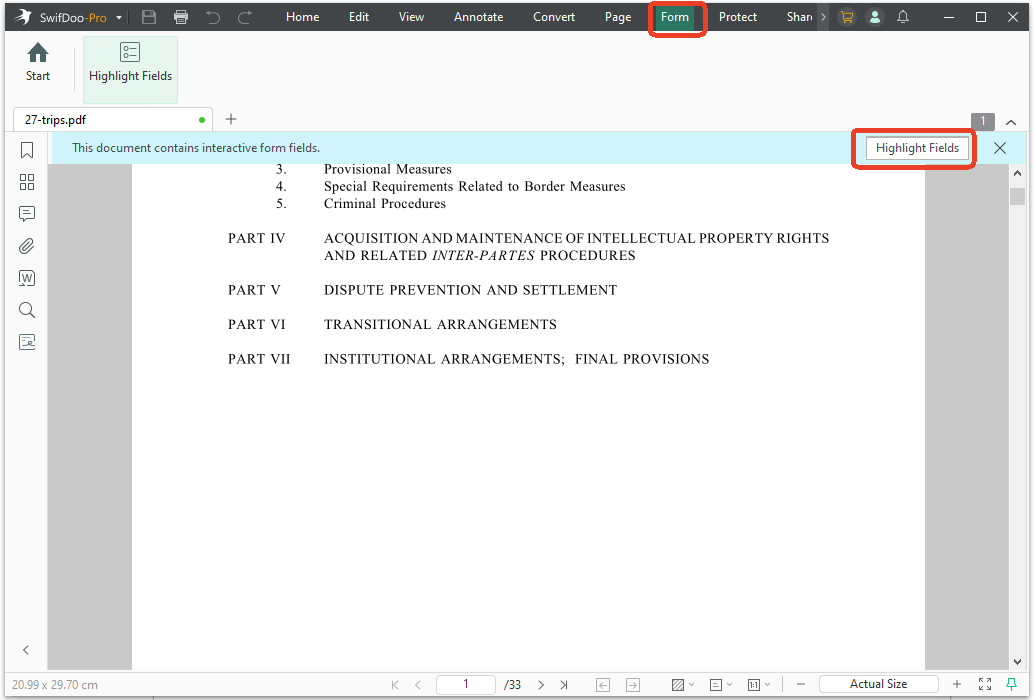
Then, you can fill out the form as you want.
Method 2. Fill and Sign PDF via Preview
Preview is a Mac built-in tool for viewing and printing images and PDFs. With Preview, you can easily fill in and sign PDF forms. Here’s how:
Step 1: Locate the target PDF form in Finder, right-click on it, and choose to open it with Preview.
Step 2: In the toolbar, click the Markup option (a pen icon) to open the annotation tools menu. Select the Text option and click where you want to fill in the PDF file.
Step 3: Click the Signature option and select the Create Signature option. You can select the Trackpad option to sign with your finger, use the camera to shoot the signature photo, or sign on your iPhone or iPad. Next, click on the target position to add the signature.
Step 4: Click the File option and choose the Save option.
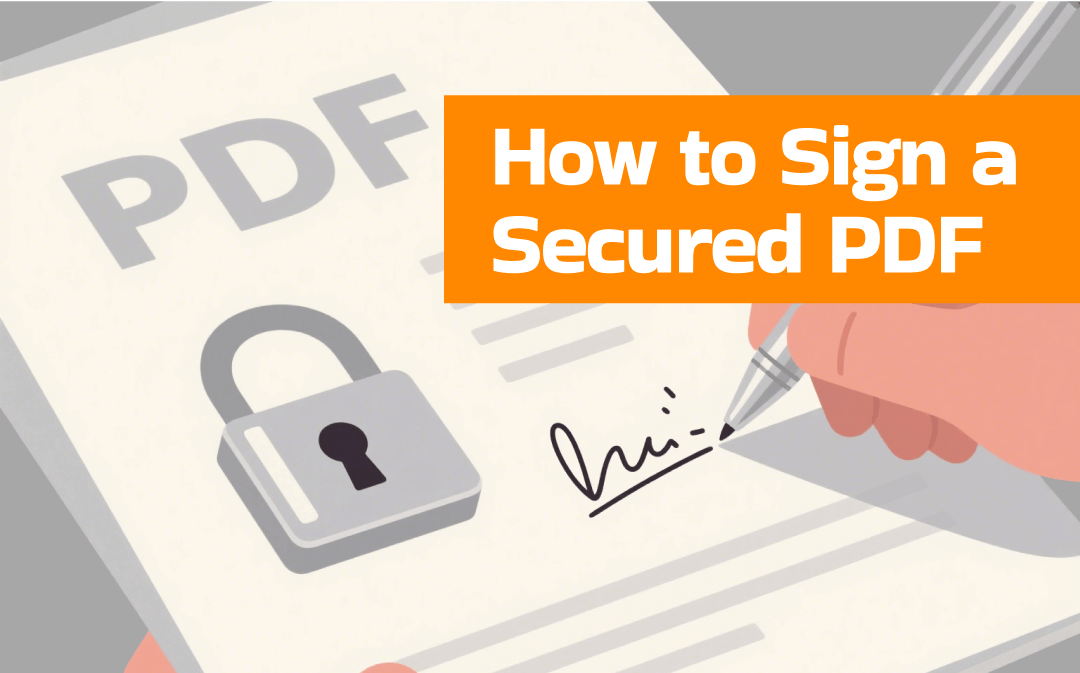
Ultimate Guide on How to Sign a Secured PDF in 4 Methods
Can you sign a protected PDF file? How to sign a secured PDF? This useful article will show you four methods to sign protected PDFs with ease.
READ MORE >Method 3. Fill and Sign PDF via Acrobat Online
How can you fill and sign a PDF online? Choosing and using a safe and reliable tool is essential. Adobe Acrobat is known as a professional PDF program. If you don’t want to download and install its desktop version, you can try its web version. In addition to supporting filling and signing PDFs, Acrobat Online enables you to compress PDFs, insert PDF pages, convert various formats to PDF, and more.
Step 1: Access the Acrobat Online website. Please note that you need to sign in to Acrobat in advance. Otherwise, you’ll fail to upload PDFs to Acrobat.
Step 2: Scroll down to choose the Fill & Sign option and click the Try for free button.
Step 3: Click on Select a file to load the PDF document you need to fill out and sign. Next, you can fill in the PDF file.
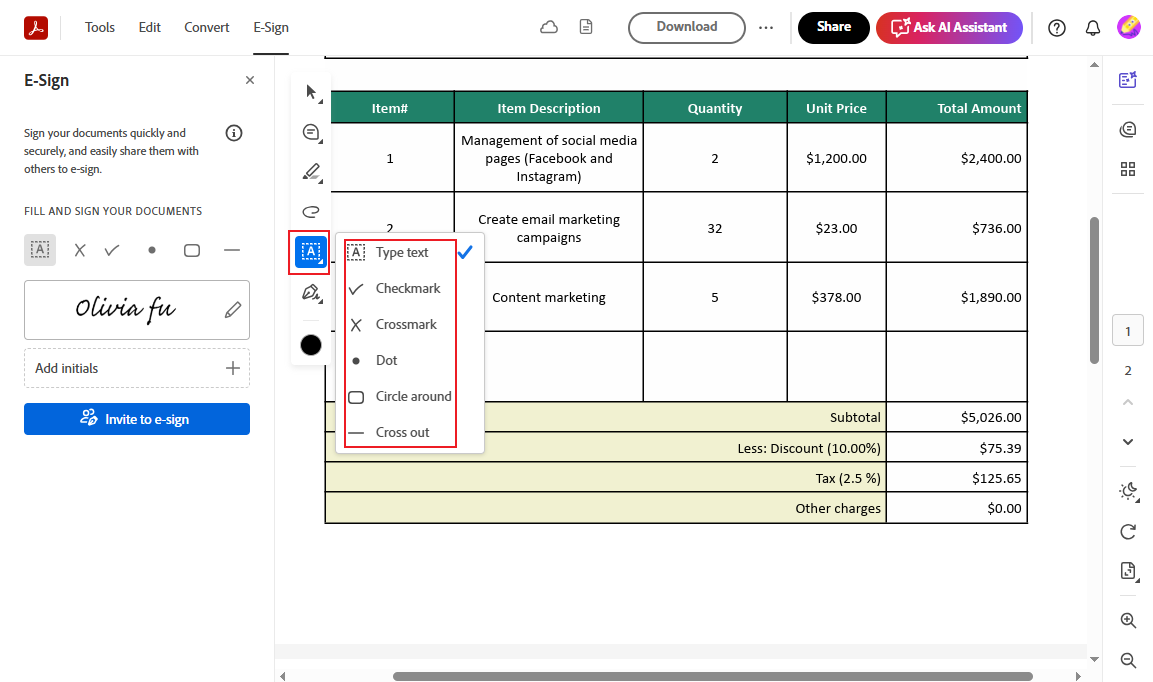
If the PDF file author has specified the fields you can fill in, you can directly click on the fields to start filling in. When you hover the cursor over the fillable area, there will be a black rectangle around this area.
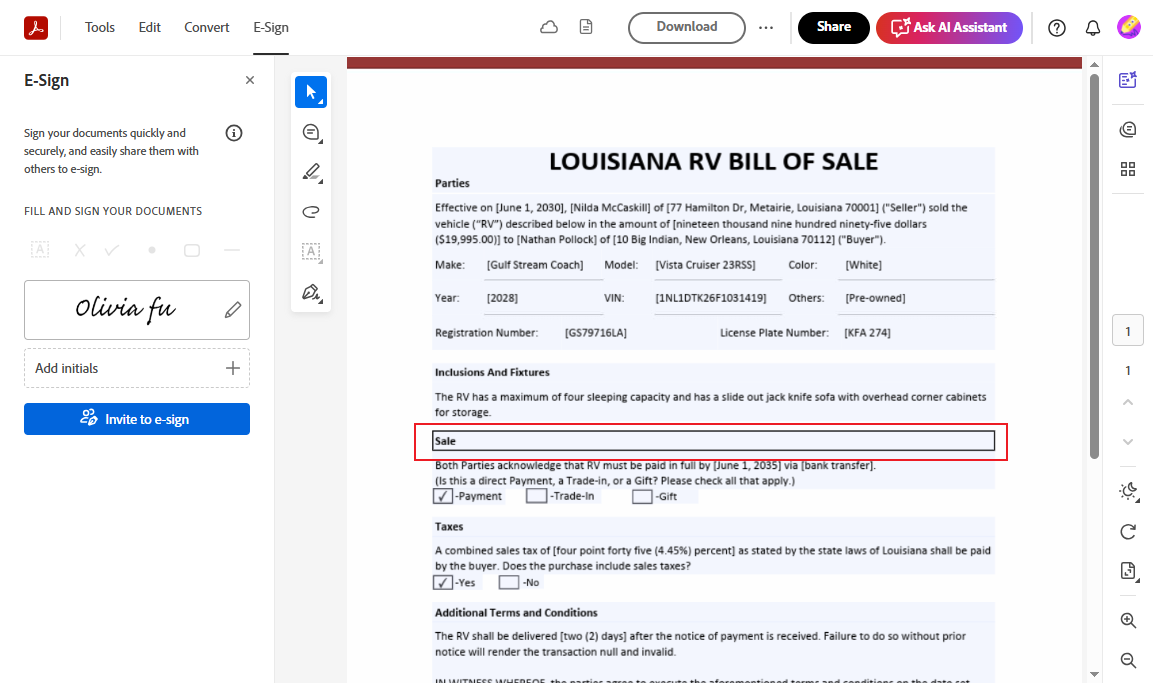
If not, click the Fill in form fields icon framed in the screenshot. Here are six options for you, including Type text, Checkmark, Crossmark, Dot, Circle around, and Cross out. Take the Type text option as an example. You need to select the field you want to fill in and add a text box to enter the target content.
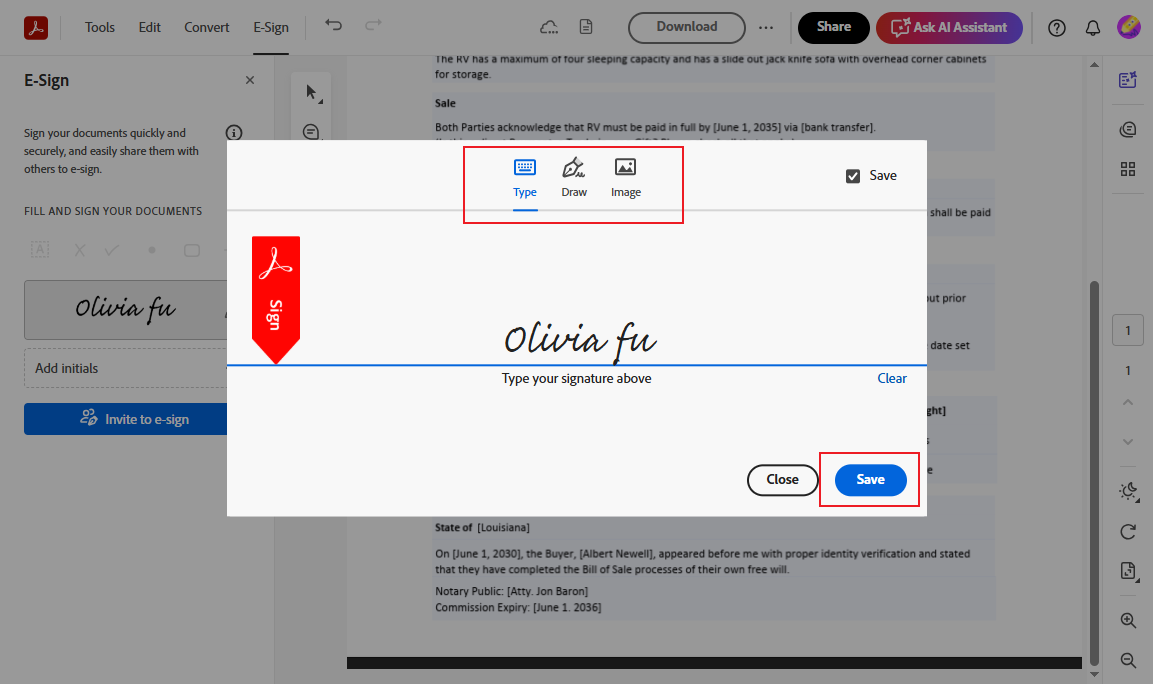
Step 4: In the left panel, click the Edit your signature icon (a pen icon). Next, you can select to type your name, draw your signature, or upload a picture as your signature.
Step 5: Click Save and place the signature in the target position. Optionally, you can adjust its font size. Finally, click the Download button to save the filled and signed PDF.
Method 4. Fill and Sign PDF via Smallpdf
Smallpdf is an online PDF platform that can handle various PDF tasks and problems on Windows, Mac, Android, iOS, and Linux devices. For instance, you can use it to view and edit PDFs, convert to and from PDFs, flatten PDFs, fill and sign PDFs, and more. Let’s learn how to fill out and sign a PDF using Smallpdf.
Step 1: Go to the Smallpdf website, open the Tools list, and select the Sign PDF option.
Step 2: Click CHOOSE FILES to upload the target PDF form. Alternatively, you can click the inverted arrow next to CHOOSE FILES to choose upload files from Dropbox, Google Drive, or OneDrive.
Step 3: A window will pop up to offer two options: Sign myself and Get signature from others. Here, I choose the Sign myself option as an example. Then, you can fill in the PDF.
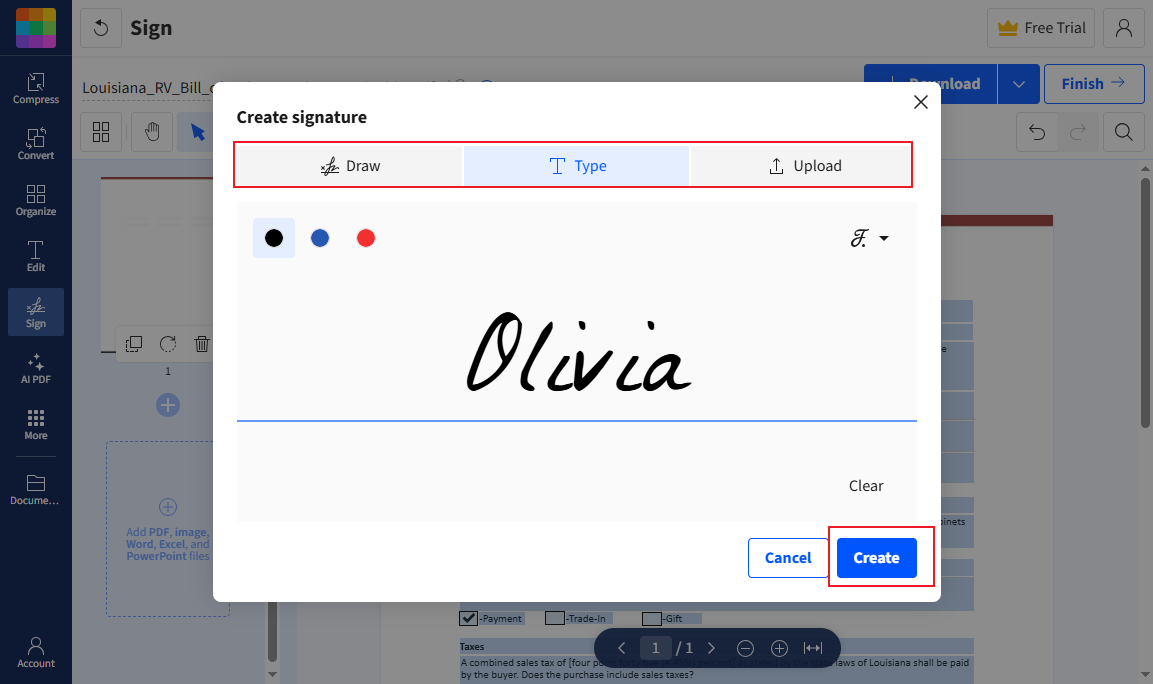
Step 4: Next, you can click the Sign button and choose the New signature option. Here, you can choose to create a new signature from drawing, typing, or uploading. Then, click Create and drop the signature to the proper position. You can adjust its size according to your needs.
Step 5: At last, click the Download button in the top right.
To Wrap Things Up
For those of you who frequently work with PDF forms, using a reliable tool to fill and sign them is crucial for streamlining the work process and enhancing work efficiency. In the above content, I have shown you four easy and useful methods. Whether you need to complete and sign a PDF document on Windows, Mac, or other devices, the above four methods can meet your needs.