Knowing how to scan from a printer to your computer lets you preserve documents digitally and create editable PDFs whenever necessary. It streamlines your workflow, improves productivity, and ensures your documents are protected and accessible anytime. No matter where you are— home, school, or work— this skill is essential and highly practical.
Preparation for Scanning
Prior to scanning, double-check that all devices and settings are ready for smooth operation. Taking a few basic steps ensures your scans come out error-free and high quality.
Before you start scanning, here’s a checklist of items to have ready.
- A working printer or all-in-one scanner
- Installed printer/scanner drivers
- A stable USB or Wi-Fi connection (to link your printer and computer)
- The document or photo you want to scan
- A scanning software or a built-in scanning tool on your computer
- A computer (Windows or macOS)
How to Scan from Printer to Computer (Windows 10/11)
Learning how to scan a document from printer to computer on Windows 10/11 is easier than many users expect. Whether you're using built-in tools, manufacturer software, or multifunction printers, Windows offers several convenient ways to transfer physical documents into digital files.
This section covers all the methods so you can pick the one that suits your setup and needs.
Method 1. Using SwifDoo PDF
Best For: Users who require a full-featured PDF solution with strong scanning and editing functions.
SwifDoo PDF offers a comprehensive solution for managing every PDF-related task. The robust tool makes it easy to create PDFs from a scanner while also offering a wide range of conversion and editing features. You can quickly convert PDFs to Word, Excel, JPG, or other formats, making handling documents straightforward. Its built-in OCR technology also helps convert scanned images into searchable, editable text, significantly improving productivity.
Learn how to scan from a printer to your computer using SwifDoo PDF.
Step 1. Download SwifDoo PDF and set it up on your Windows PC. Next, connect it to your printer for scanning documents.
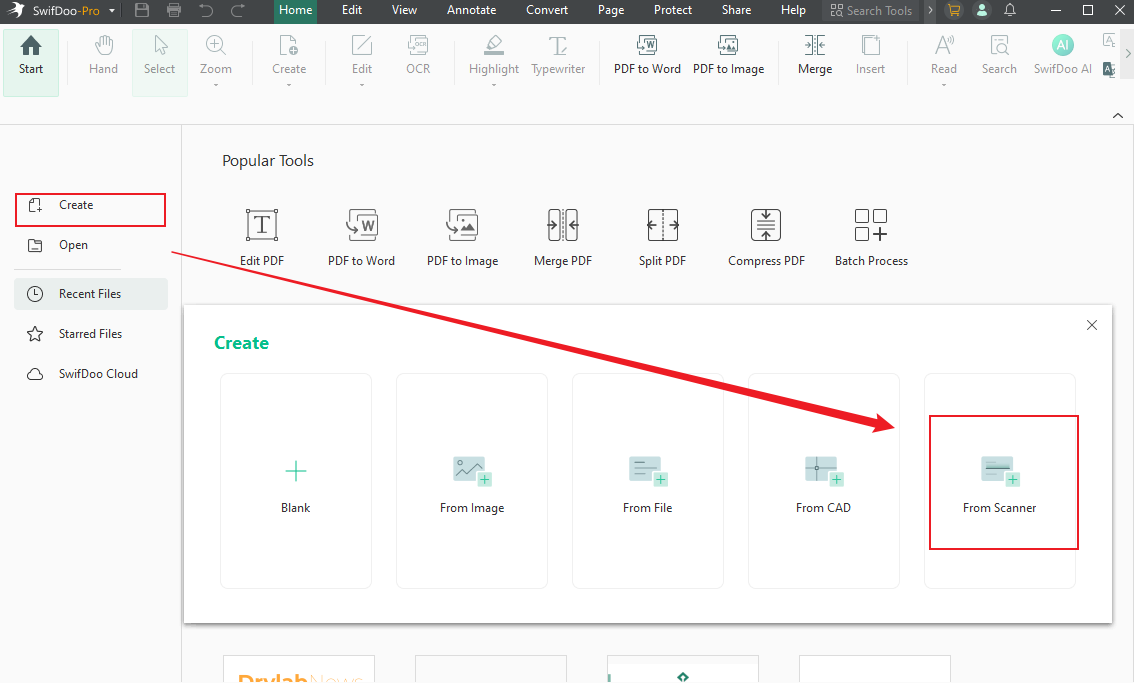
Step 2. Tap Create on the homepage. And choose From Scanner on the main screen.
Step 3. Select the connected scanner and tailor the related settings.
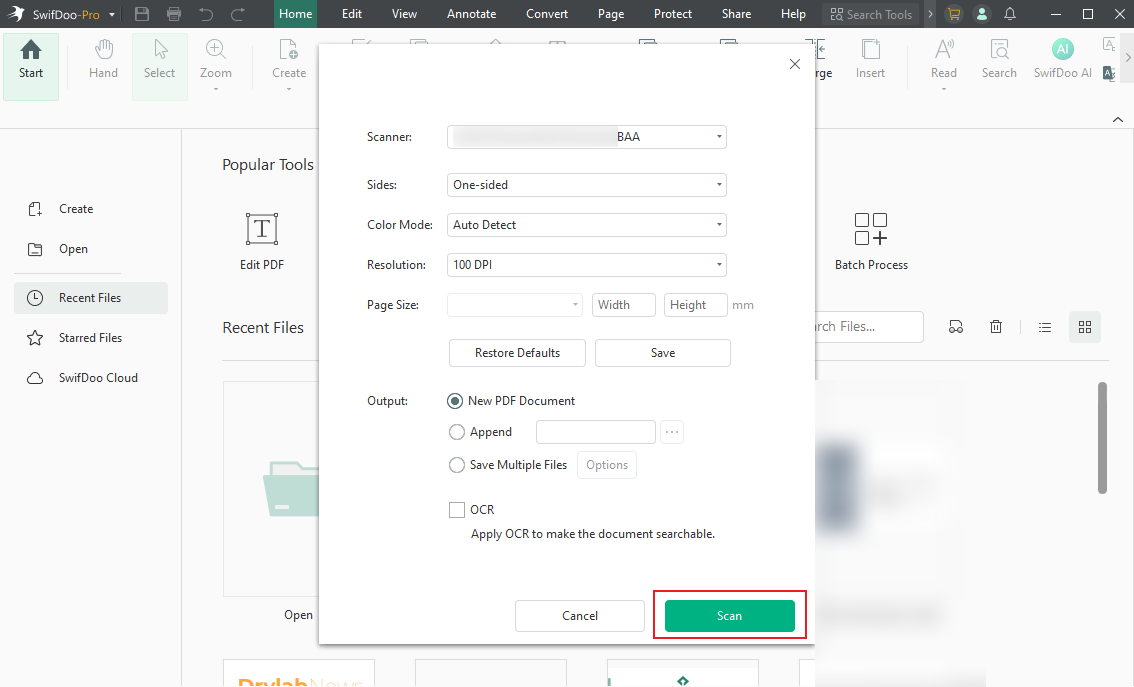
Step 4. Click Scan to scan your document. If needed, you can also use the tool to edit scanned PDFs.
Method 2. Using the Windows Scan App
Best For: Quick, easy document scanning with built-in Windows software.
The Windows Scan app is a simple, built-in tool that lets you work on Windows 10/11 without installing extra software. It supports multiple file formats, including PNG, JPEG, TIFF, Bitmap, or PDF, making it convenient to scan photos and documents directly to your computer with just a few clicks.
Discover how to scan from a printer to a computer on Windows using the Windows Scan app.
Step 1. Download the Windows Scan app from the Microsoft Store. Once done, launch it.
Connect your printer to your computer, ensuring it is turned on. Then, select your scanner.
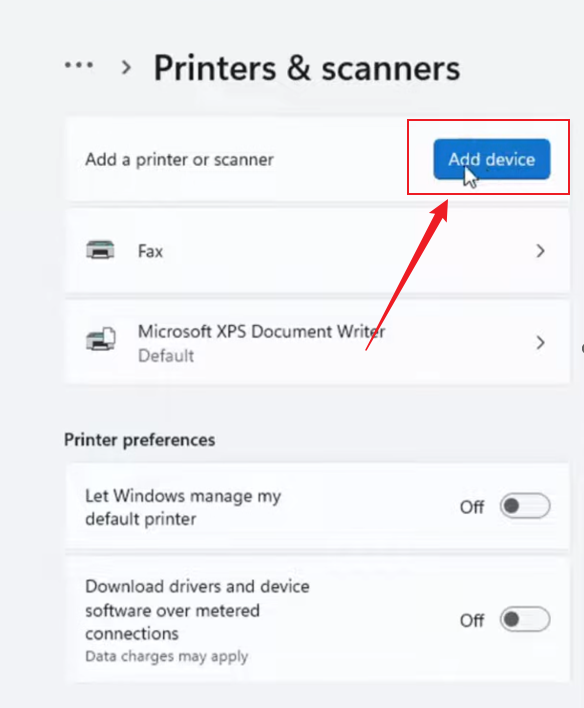
If you do not see your scanner, move to Windows Settings and select Devices. Then click Printers & Scanners and select Add a printer or scanner. Wait until your device finds nearby printers, and tap Add device.
Step 2. Select the source field to choose between Flatbed (scan a single document) or Feeder (scan multiple pages at once). Select your file types, such as PDF, XPS, PNG, JPEG, etc.
Step 3. Click Show more to adjust additional settings. Ensure to change the storage folder by tapping Save file to. Use File Explorer to select a new save location.
Step 4. Place the document face down in your scanner. Launch Windows Scan and click the Scan icon to start. Scanning of the document will commence on your printer. When the scan finishes, you’ll receive a pop-up alert.
Click View to view your scan. Alternatively, open the destination folder, like My Scans or Pictures, to locate your files.
Method 3. Using Windows Fax and Scan
Best For: Users looking for a classic scanning solution with essential functions.
Windows Fax and Scan is a native tool that lets you scan documents easily without extra software. It provides a simple interface for capturing, saving, and organizing scanned files, making it a dependable option for everyday scanning tasks.
Learn how to use Windows Fax and Scan to scan your documents.
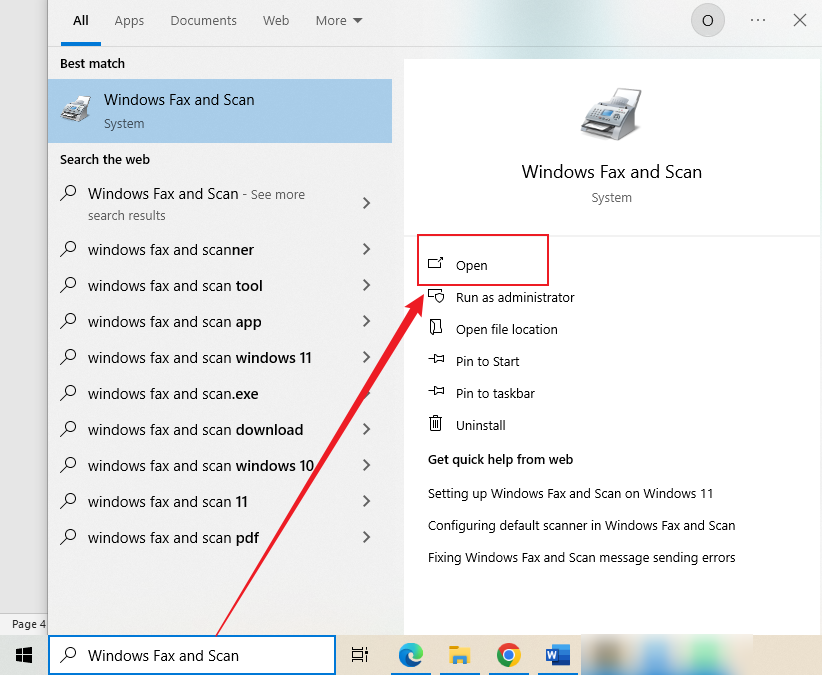
Step 1. Click the Start menu. Then type "Windows Fax and Scan" in the search box.
Click on it once it appears in the list.
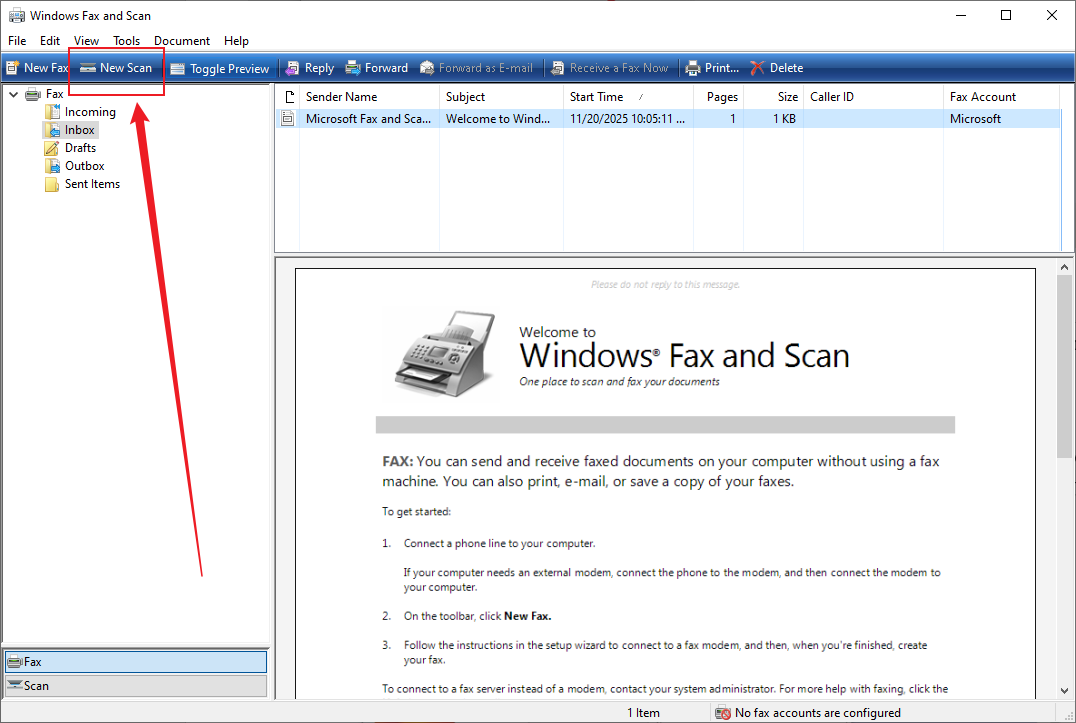
Step 2. After launching Windows Fax and Scan, click New Scan in the upper-left corner. A new window with scanning options will automatically open.
Step 3. You’ll see your scanner’s name at the top; ensure it’s selected. Next, choose the type of document you’re scanning, such as a photo or a document. Also, select the color format, such as color, grayscale, or black-and-white.
Step 4. Before you scan, adjust the scan settings, such as resolution. Once done, click Preview to see a sample of your scan.
Once everything looks good, click Scan to start scanning your document. After scanning, the documents will appear in the Windows Fax and Scan window.
To save your document, right-click the scan image and choose Save As. Pick a location on your computer, name your file, and hit Save.
Method 4. Using Manufacture Software
Best For: Users who want comprehensive scanning options optimized for their printer.
Printer-specific software often comes with devices, allowing smoother and more precise scanning to a computer. Often, they offer advanced controls, smoother compatibility, and automatic updates optimized for your device. Using these programs guarantees better scan quality and a smoother workflow.
Before you start scanning, here’s a checklist of items to have ready.
- Canon IJ Scan Utility
- Epson Scan 2
- HP Scan
- Brother iPrint&Scan
- Samsung Easy Document Creator
How to Scan a Document from Printer to Computer on Mac
Learning how to scan documents from printer to computer on Mac is straightforward—all thanks to macOS’s built-in tools and seamless device integration. macOS allows you to convert physical pages into digital files, whether you have an all-in-one printer, AirPrint device, or manufacturer software.
In this section, we’ll explore the available methods so you can choose the one that best fits your workflow.
Method 1. Scan Using Preview
Best For: Fast, straightforward scanning and basic editing with macOS built-in utilities.
Preview also serves as a simple PDF scanner, allowing easy document digitization. Its simple interface lets you scan a book to PDF or any other document without extra software. Plus, the built-in features allow Mac users to capture, view, and organize scanned files with minimal effort.
Check out how to scan from a printer to a computer using Preview on your Mac.
Step 1. Put the document to be scanned onto the scanner glass.
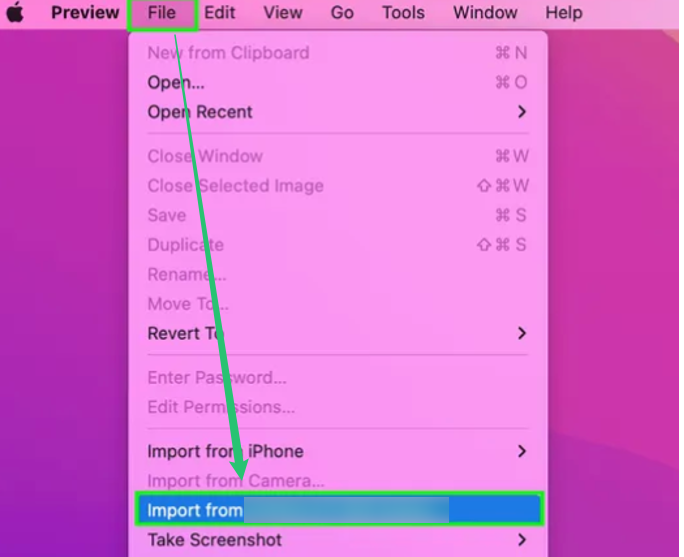
Step 2. Then, launch the Preview app. Click on File, then select Import from Scanner.
Note. Your scanner name will automatically display.
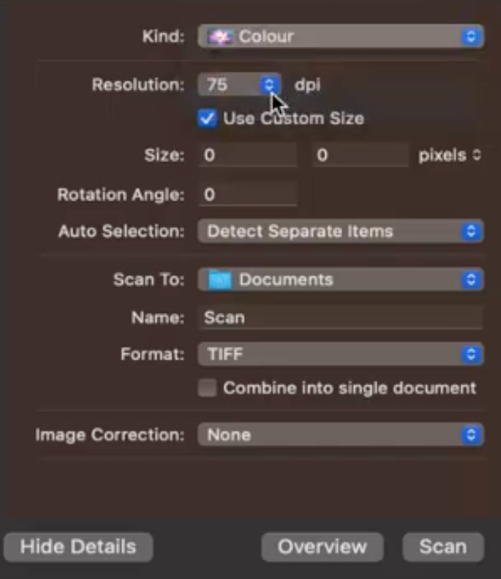
Step 3. Click Show Details to gain more control over your scan. The scanner will automatically scan your document as a preview. You can fine-tune the settings on the right side of the screen.
Tap the Kind dropdown menu and select Text, Black and White, or Color. Additionally, choose the resolution and adjust the size as needed. Then, choose a file format.
Step 4. Once satisfied with the settings, click Scan.
Method 2. Scan Using System Settings
Best For: Users seeking a straightforward, native Mac tool for speedy scanning.
Scanning via System Settings is a quick and easy method. It enables direct access to your printer or scanner without extra programs. Furthermore, it’s a practical choice for those seeking fast, stress-free scanning on Mac.
Learn how to scan from your printer to your computer using System Settings.
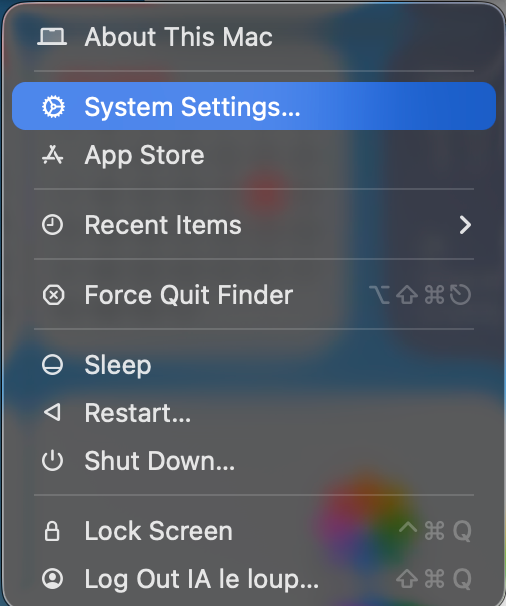
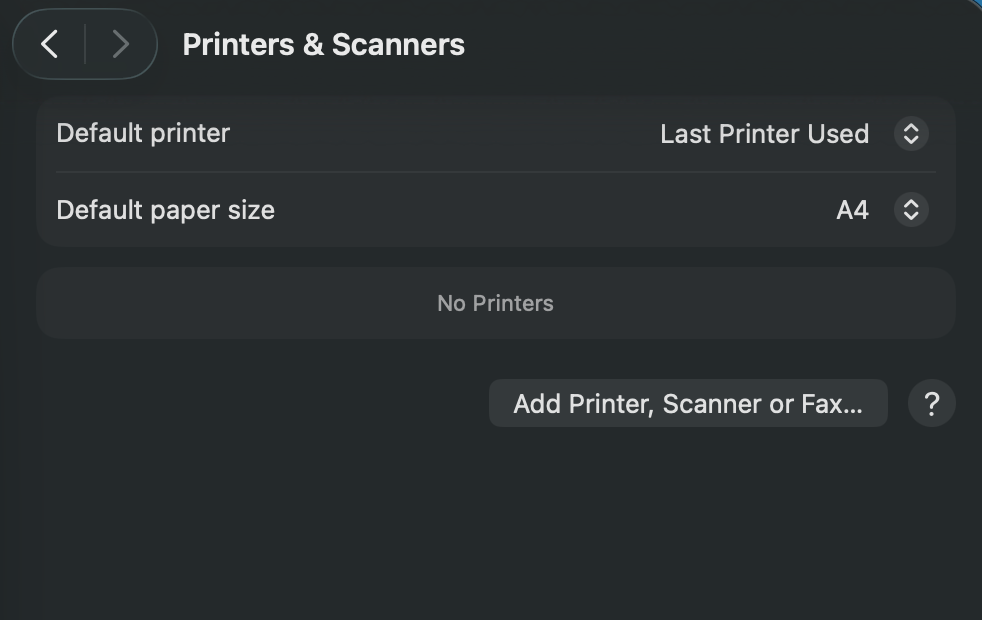
Step 1. Access the Apple menu, select System Settings, and go to Printers & Scanners. Next, select Add Printer, Scanner, or Fax…
Step 2. Then connect your scanner to your Mac using a cable or Wi-Fi. Choose your scanner and press Add.
Step 3. Lay the document face-down on the scanner. And open the Preview app.
Step 4. From the top menu, go to File and select Import from Scanner… to choose your scanner. Set your scanning options and click Scan.
Likewise, manufacturer software can be used to scan documents directly to a Mac.
How to Scan Using the Printer’s Control Panel
Certain printers let you scan documents straight from their touchscreen or buttons, without using a computer. This feature lets you choose the scan type, file format, and destination directly on the device. This option is convenient for quick scanning without launching software on your computer.
Find out how to scan a Windows computer from the printer control panel.
Step 1. Set your paper face-down on the scanner or feed it into the Automatic Document Feeder.
Ensure your printer is turned on and linked to your computer through USB or Wi‑Fi.
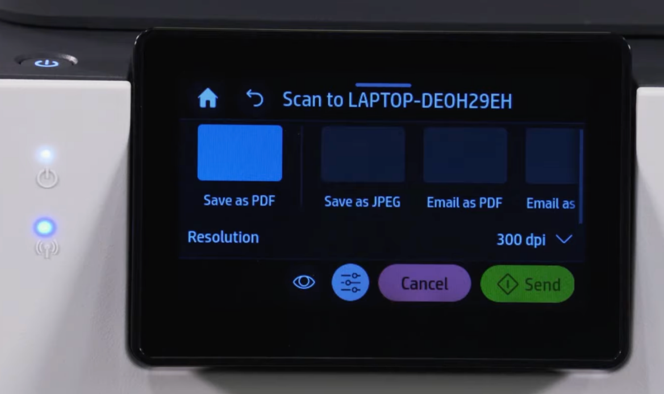
Step 2. Tap the Scan icon or option on your printer’s touchscreen or control buttons. Select the option labeled Scan to Computer or Computer, based on your model.
Step 3. Then pick your computer's name from the list of available devices. Also, choose your desired format (PDF or JPEG), color mode, and other preferences.
Step 4. After confirming your settings, press the Start or Send button to scan. The scan will appear on your computer, allowing you to open and save it.
Bottom Line
As we finish this guide, it’s evident that learning to digitize documents is practical and empowering. Learning how to scan from printer to computer gives you flexible options on both Windows and macOS. Feel free to use built-in tools or third-party software to handle any scanning needs. Whether you rely on system utilities, manufacturer apps, or advanced PDF programs, each method helps you capture, organize, and convert files efficiently for smoother document management.