What You Need to Prepare Before Starting
Before attempting to scan from a Canon printer to your computer, make sure all connections and settings are properly configured to prevent any issues. Getting everything ready in advance makes the scanning process effortless and time-saving. Having the right tools and a stable connection allows you to begin scanning effortlessly and efficiently.
Here’s what you need to prepare before starting.
- A Canon printer with scanning capability
- The document you want to scan
- Installed Canon drivers or IJ Scan Utility
- A working USB or Wi-Fi connection
- A computer (Windows or macOS)
How to Scan From Canon Printer to Computer
Knowing how the scanning features work on Windows and Mac makes transferring documents from a Canon printer simple. Scanning enables fast digitization of documents, making them easy to save, share, or edit. Canon provides multiple built-in options to make the process flexible. This section covers four versatile approaches for scanning using multiple software options and settings. These approaches work seamlessly across both operating systems.
Method 1. Using the Scan Feature of SwifDoo PDF
For anyone handling digital documents, SwifDoo PDF offers a seamless way to scan to PDF from a Canon printer. The software allows you to create PDFs from scanners, simplifying the process of scanning both individual papers and books. You can even scan a book to PDF with clear, high-quality output. This method makes handling documents easier and functions smoothly across most Canon models.
Here’s a quick method to scan from Canon printer to computer with SwifDoo PDF in just moments.
Step 1. Install SwifDoo PDF on your Windows PC by downloading it first. Next, connect it to the Canon printer for scanning documents.
Step 2. Click Create on the homepage and choose From Scanner.

Step 3. Select the connected scanner (Canon printer). And customize the relative settings.
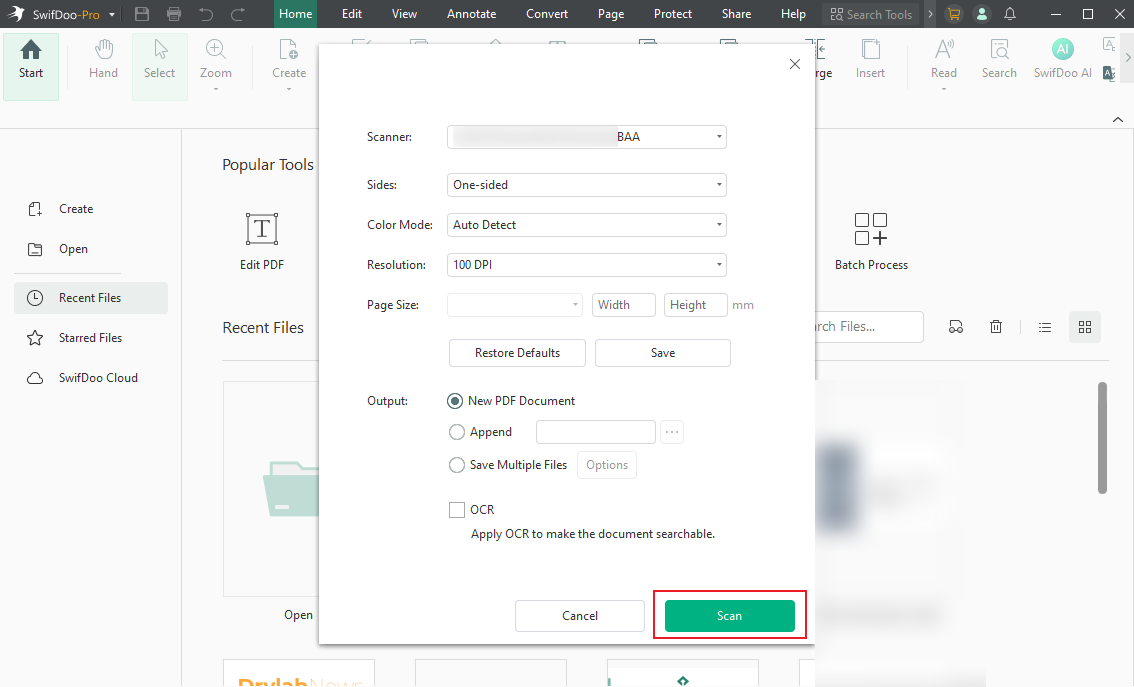
Step 4. Next, click on Scan to scan to PDF.
SwifDoo PDF automatically scans files with the scanner and converts them directly to PDFs.
Other Main Features of SwifDoo PDF:
- OCR PDFs to make scanned files searchable and editable.
- Convert scanned PDF to Word, PowerPoint, Excel, and image formats.
- Edit scanned documents with text, annotations, and markup tools.
- Highlight, comment, and review PDFs for collaboration.
- Merge, split, and compress lengthy documents for better organization.
- Add electronic/digital signatures, passwords, and permission controls to prevent unauthorized access.
- Includes SwifDoo AI to accurately summarize, translate, rewrite, proofread, analyze, and chat with PDF files.
Method 2. Using Canon IJ Scan Utility
Canon IJ Scan Utility makes it effortless to manage scanning operations on Windows and Mac. For anyone asking, “How do I scan a document from a Canon printer to my computer?”, this tool delivers quick results. It supports multiple formats and automatic adjustments.
Discover how to scan from a Canon printer to your computer using Canon IJ Scan Utility.
Step 1. Access Canon’s official website to download the IJ Scan Utility. Don’t forget to install the newest drivers for your printer.
Step 2. Launch the app on your PC. Multiple scanning modes are available, such as Photo, Auto, Document, and Custom.
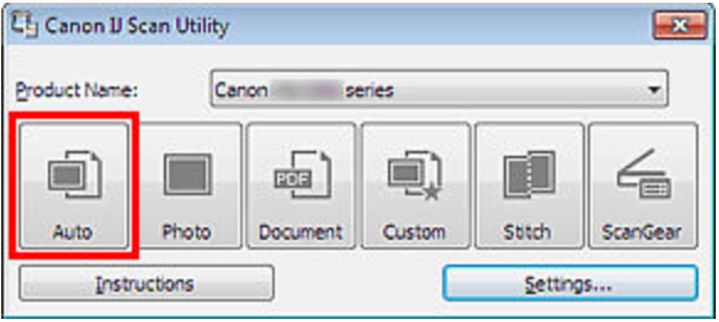
Step 3. Decide on the Scan Mode for your scan.
- Auto: Adapts scanning settings to the document type automatically.
- Document: Ideal for scanning text documents and multi-page PDFs.
- Photo: Top quality for image scans.
Step 4. Select the scan resolution, format, color mode, and storage destination.
Step 5. Lay paper face down. You can also load it into the ADF. And then hit Scan. Once done, locate the scanned file.
Method 3. Scanning Directly From the Canon Printer Control Panel
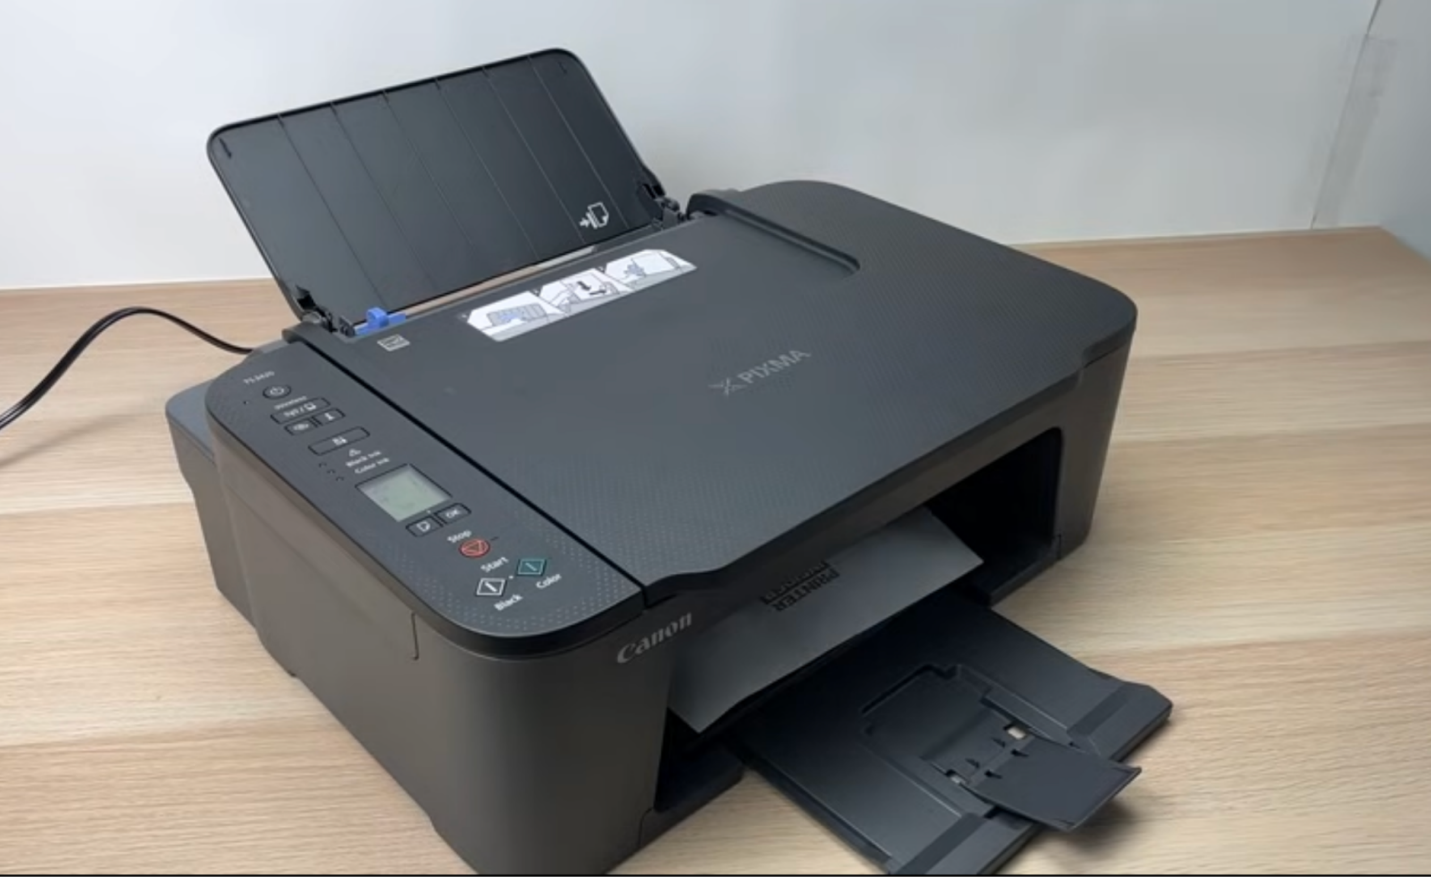
Many Canon printers let you start a scan directly on the device, eliminating the need to use your computer. This makes the process fast, convenient, and ideal for quick tasks. Using the built-in control panel, you can scan documents directly to your PC or email.
Check out how to scan directly from the device (Canon Printer Control Panel) itself.
Step 1. Hit the Scan button to access your printer’s Control Panel.
Step 2. Select whether to scan to PC, USB, or email.
Step 3. Select the desired scanning mode—Photo, Document, or Auto.
Step 4. Choose the desired file type, resolution, and color options.
Scan 5. Tap Start. Your scanned file will save to the selected destination.
Method 4. Using the Scan Feature of the Preview App
The Preview app on Mac provides an effortless way to digitize documents. Perfect for Canon printer users, this method lets you scan directly from your printer without extra software. It supports various settings and formats, making it a convenient choice for quick, high-quality scans.
Find out how to scan from the Canon printer to your computer via Preview.
Step 1. Place the document on the scanner.
For a flatbed scanner, place the document or photo face down on the glass.
If you have an automatic document feeder, place the pages in the feeder.
Step 2. Next, open the Preview app on your Mac and go to the File menu. Select Import from Scanner and choose the Canon scanner from the list.
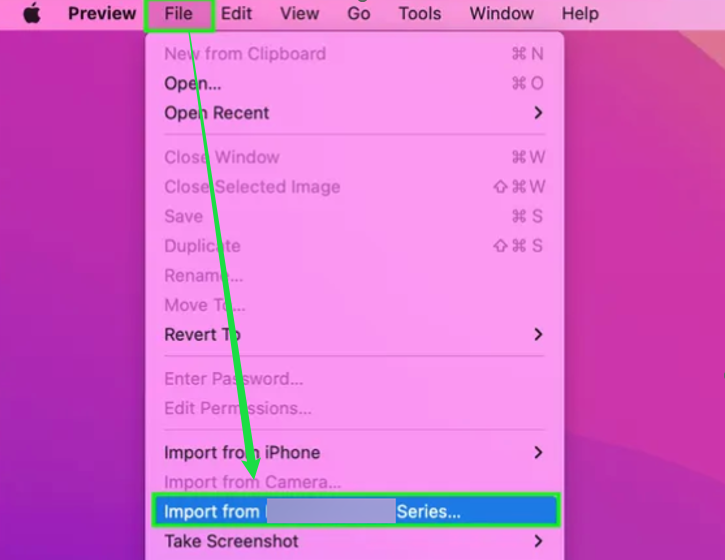
Note. Ensure the Canon Printer is connected and set up, so you see the scanner.
Step 3. In the Import dialog box, click Show Details to see all options. Select Scan Mode, then choose a Kind.
Step 4. Choose the desired rotation, file type, and image correction before scanning.
Step 5. Press the Scan button to begin scanning. The scanner will handle each page individually. The scan automatically shows up in Preview when done.

How to Customize Canon Scan Settings for Best Results
Adjusting your Canon scan settings helps achieve the highest quality and accuracy for each document. Fine-tuning resolution, color mode, and file type helps produce sharper, clearer scans. Fine-tuning scan options produces clean, high-quality files for both text and images.
Follow these steps to optimize your Canon printer settings for better scans.
- Resolution.
Increase the DPI for sharper and clearer scans.
Settings we recommend:
- Text: 300 dpi.
- Photos: 600 dpi.
- Color Mode (Options).
Choose the appropriate color mode for your document.
- Text-only documents: Select Black & White to reduce file size.
- Colored text: Select Clor or Grayscale.
- File Types (Format).
Save scans as:
- PDFs for documents (multi-page documents and easy sharing).
- JPEG for photos.
- PNG for graphics and line art.
- Scan Mode.
Choose a specific scan mode.
- Flatbed: For single pages or photos.
- Document Feeder: Ideal for fast multi-page scanning.
- Image Correction.
Turn on features like auto-crop, brightness, and contrast to automatically improve scan clarity.
- Save Location and File Naming.
Set default save paths.
Organize scanned files with keywords and folders.
Wrapping Up
Learning how to scan a document from a Canon printer to computer is simpler than ever thanks to the many available methods. Whether you use SwifDoo PDF, Canon IJ Scan Utility, the printer’s control panel, or Mac’s Preview app, each method provides convenience and flexibility. Following this guide lets you confidently digitize documents quickly, efficiently, and with high quality every time.