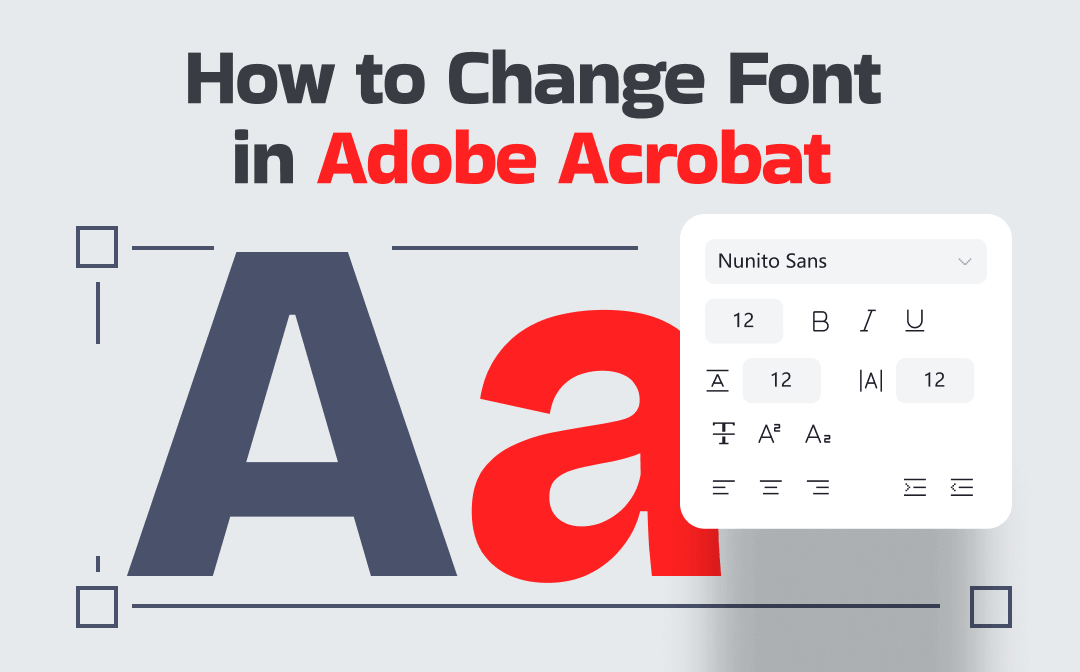
Adobe Acrobat is a powerful PDF editor widely used for viewing, creating, and modifying PDF files. Its powerful text-editing feature enables changes directly in PDFs, eliminating the need for the original source document. Whether you want to correct a typo or adjust the layout, Acrobat makes editing simple and fast. Furthermore, Adobe Acrobat allows you to easily change PDF text size and font to improve the document’s presentation.
In the next section, we’ll explore two simple options to change font using Adobe Acrobat’s built-in tools.
Change Font in Existing PDF File via Adobe Acrobat
Getting started with editing requires knowing how to change text formatting in your PDF. Luckily, Adobe Acrobat makes it easy to modify fonts directly within the document. It is beneficial when you’re working with an existing PDF and need to update the text style. Whether you want a sleek new style or consistent formatting, changing the font improves both the look and readability of your file.
This is how you can update the font in an existing PDF through Adobe Acrobat.
Step 1. Open Adobe Acrobat Pro DC or later and go to File > Open. Then, choose your PDF document.
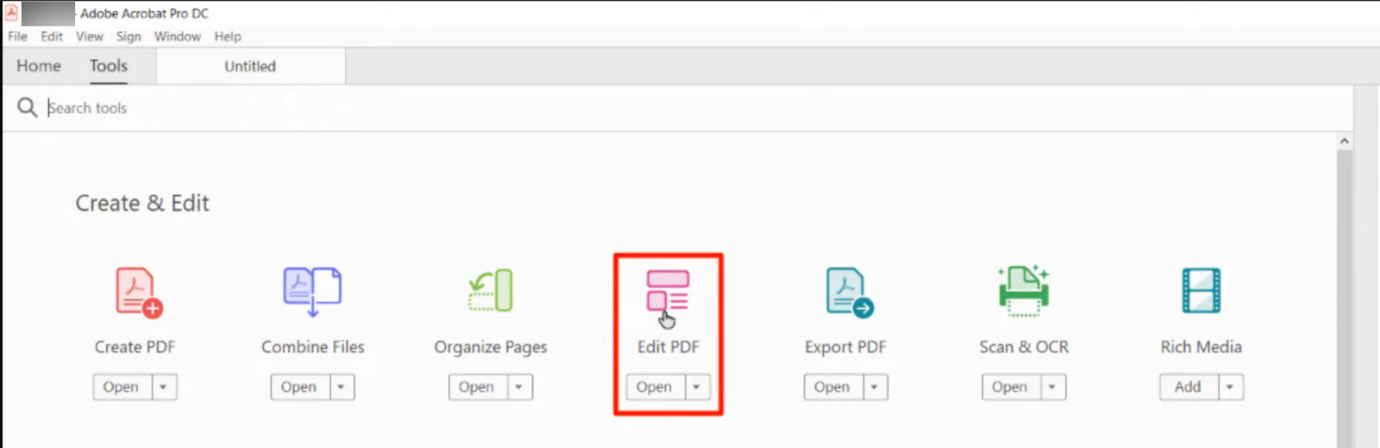
Step 2. From the top toolbar, click Tools and choose Edit PDF.
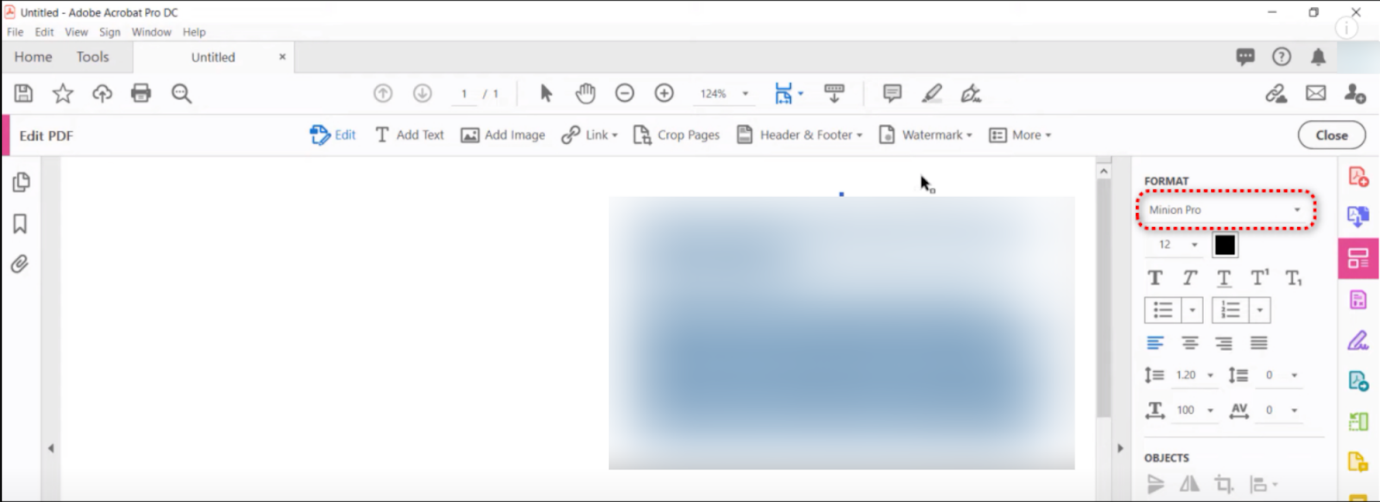
Step 3. Click and drag to highlight the text portion you want to change. To select all text and modify the font, Windows users should use Ctrl + A, while Mac users use Cmd + A.
Similarly, you can use Edit > Find to locate the instances.
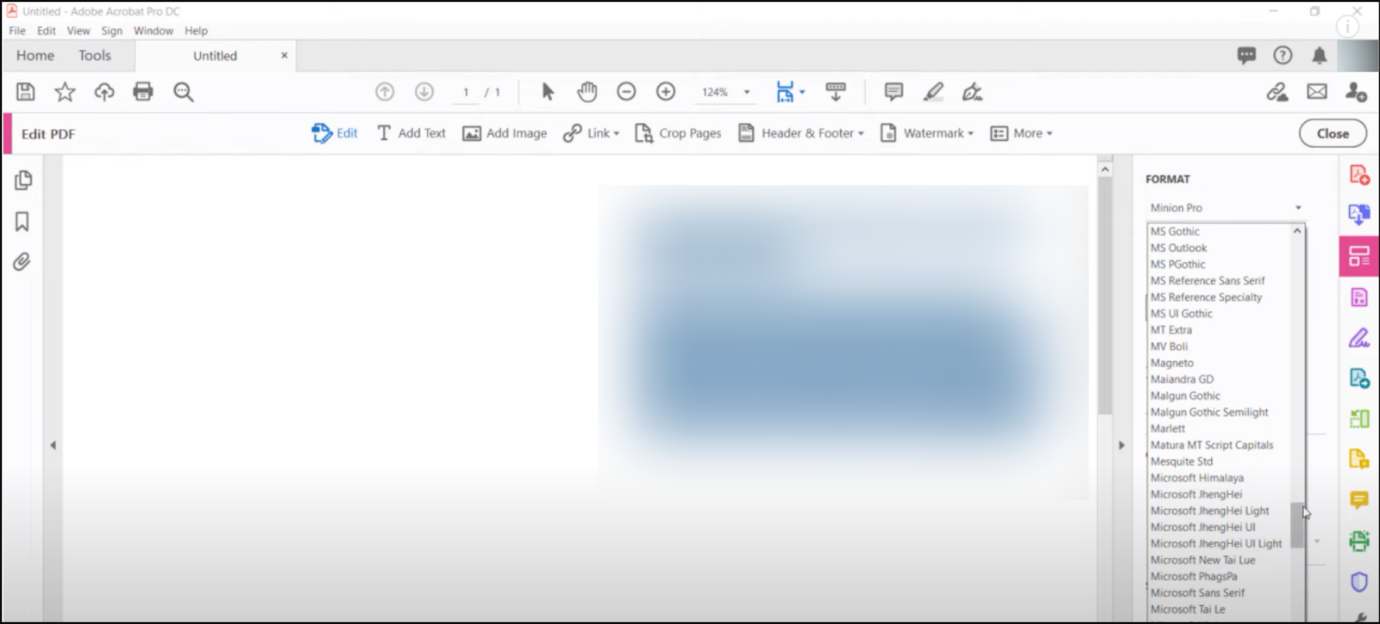
Step 4. While the text is selected, click the Format panel.
Step 5. After making the necessary adjustments, take a moment to preview the document. To keep your edits, go to File and choose either Save or Save As.
How to Change the Default Font in Adobe Acrobat
As you continue working with PDFs, customizing default settings can make editing more efficient. To keep your PDFs visually consistent and save time, consider setting a default font in Adobe Acrobat if you edit files often. This is especially helpful when adding new text or using tools like "Add Text" or "Fill & Sign." Adobe Acrobat allows you to easily customize these settings.
Check out how to change the default font in Adobe Acrobat.
Step 1. Select Menu (or Acrobat on Mac) > Preferences.
Step 2. Next, choose the Content Editing option.
Step 3. Select an option from the Default font for Add Text dropdown menu. Then, select the Font Size dropdown menu to select the font size.
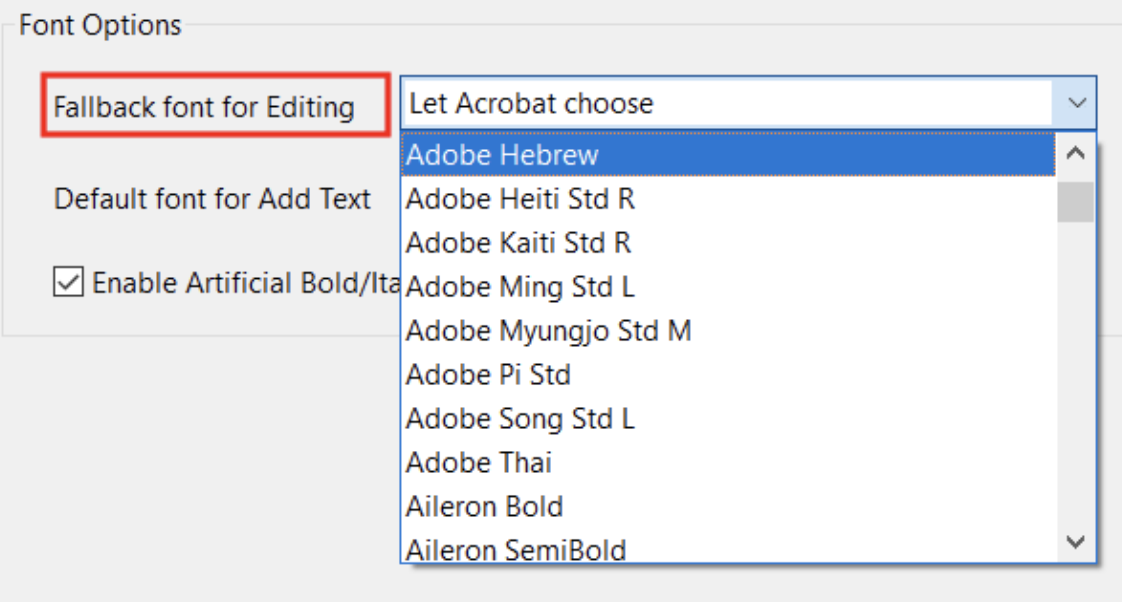
Step 4. Now, go to the Fallback font for Editing dropdown menu. And select an option to set a fallback font for text editing.
Step 5. Finally, click OK to save the changes.
A Budget-Friendly Method to Change Font in PDFs
Unfortunately, the free version of Adobe Acrobat doesn’t support font changes. The feature is exclusively available in the paid subscription version only. But it can be too expensive for casual users. In such a case, we recommend using a reliable and cost-effective Adobe Acrobat alternative to change the PDF font.
SwifDoo PDF gives you the tools you need to change font in PDF smoothly. Whether you need to change the font style, size, or color of the text, this versatile PDF editor can be your best pick. SwifDoo lets you format PDF text to italicize and bold the content of your PDF without hassle. Additionally, it helps view, edit, compress, merge, and split PDF files. Not only can you edit scanned documents, but you can also annotate them to suit your needs. All things considered, SwifDoo PDF is a reliable, all-in-one platform for managing PDF files efficiently.
Here are the detailed steps to change the font in a PDF file using SwifDoo PDF.
Step 1. Download and install SwifDoo PDF. After that, click “Open” to bring your PDF document into the workspace.
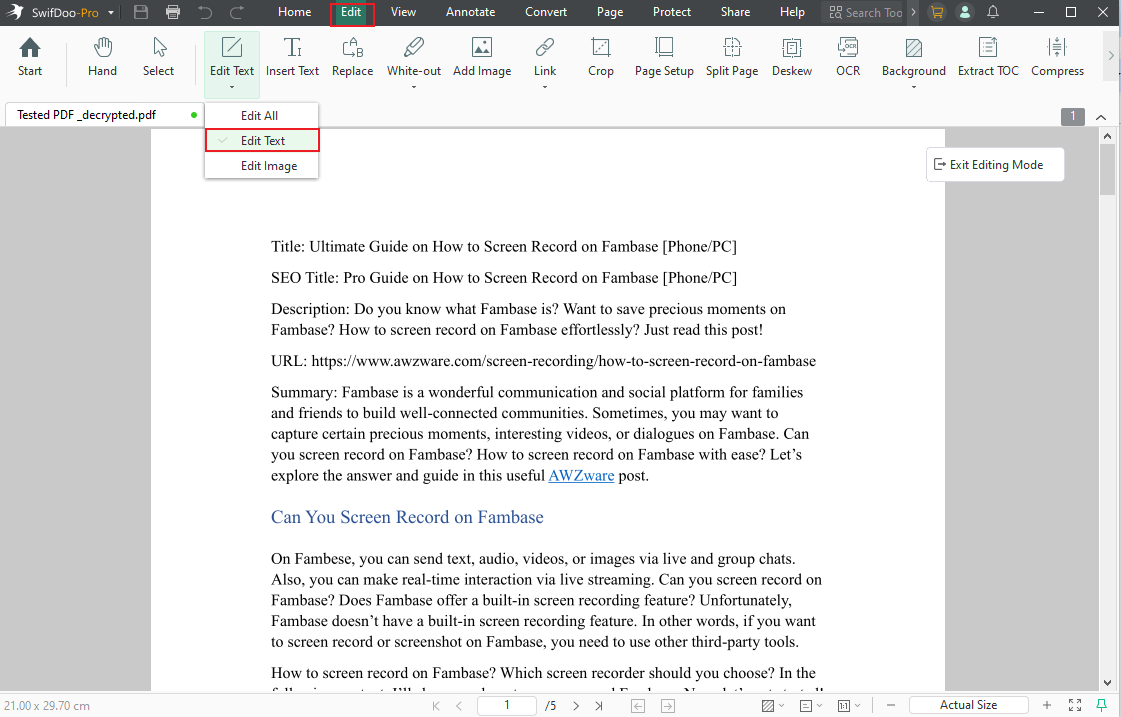
Step 2. After your PDF opens, go to the top menu bar. And then choose Edit. Click Edit Text in the secondary menu and select Edit Text again to activate the text boxes.
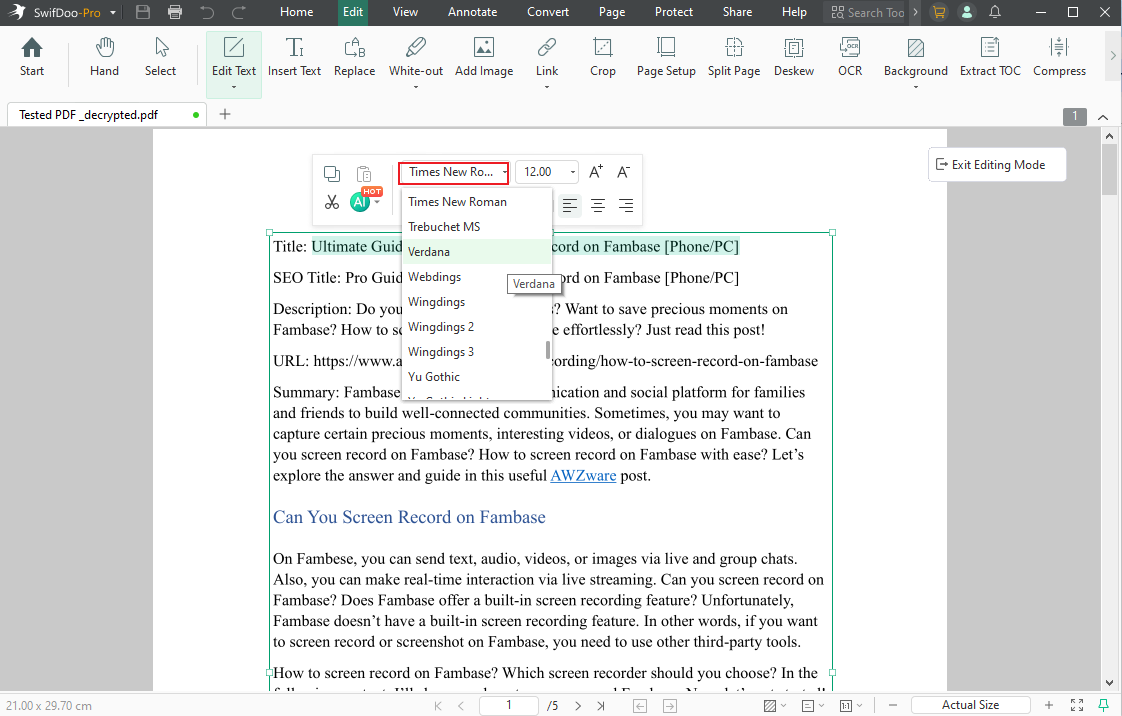
Step 3. In the floating Edit menu that appears, position your cursor on the current font, then pick your desired font from the dropdown menu. Similarly, you can change the font size.
Step 4. Save the PDF. You will now notice that the font has been successfully updated.
Wrapping Up
Knowing how to adjust fonts in your PDFs boosts both clarity and visual attractiveness. Here, we've explored Adobe Acrobat’s capabilities. And we've highlighted the two best ways to change fonts. Nevertheless, learning how to change font in SwifDoo PDF gives you a hassle-free alternative. Offering a cost-effective way to change PDF font using SwifDoo PDF, this tool suits those who want powerful features without high costs. Whether adjusting text size or style, SwifDoo PDF is a smart, affordable choice for managing fonts with ease.