
Why Convert HEIC to JPG on Mac
To ensure images are widely viewable and simple to share, many users decide to convert HEIC to JPG without losing quality. JPG is supported across almost all devices, apps, and websites, making it a practical choice for personal and professional use.
Here are a few benefits of converting HEIC to JPG on Mac.
- Universal Compatibility: JPG is accepted by virtually every device, software, and social media service.
- Easy Sharing: JPGs are commonly accepted for emails, chat apps, and online platforms.
- Editing Flexibility: Most photo editing and graphic design programs favor JPG over HEIC.
- Printing Convenience: Printing with JPG is smooth and free from compatibility issues.
- Backup and Storage: Non-Apple devices can easily view and access JPG files.
- Faster Uploads: JPG files generally take less time to upload than HEIC.
Built-in Way to Convert HEIC to JPG on Mac in Preview
Mac users can use the Preview app to effortlessly convert HEIC to JPG on Mac with no extra software required, saving time and hassle. As a free HEIC to JPG converter, it allows you to manage individual photos easily and efficiently. Preview lets you batch convert HEIC to JPG on Mac for free, providing a quick and convenient way to handle multiple images without complications. Additionally, Preview maintains image quality while making the process quick and simple.
Let's learn how to convert HEIC to JPG in macOS Preview in a few clicks.
Step 1. Simply double-click the HEIC file to have it open in Preview. You may also right-click the image, go to Open With, and select Preview.

Step 2. Once the image is open in Preview, move to the top menu bar, click File, then select Export....
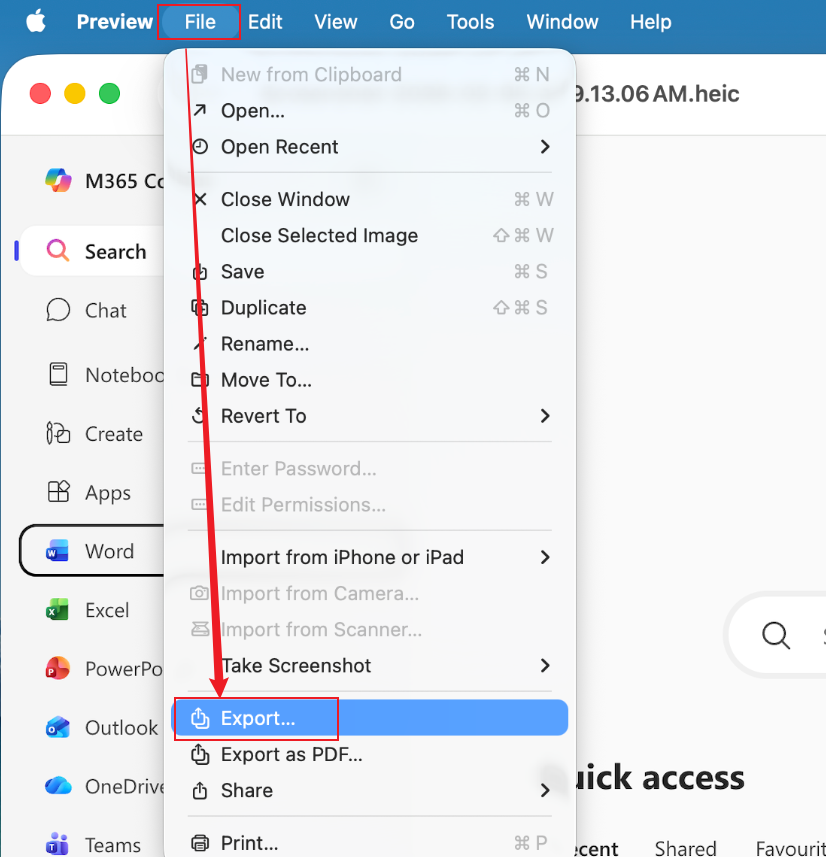
Step 3. In the dialog box, open the Format dropdown and choose JPEG.
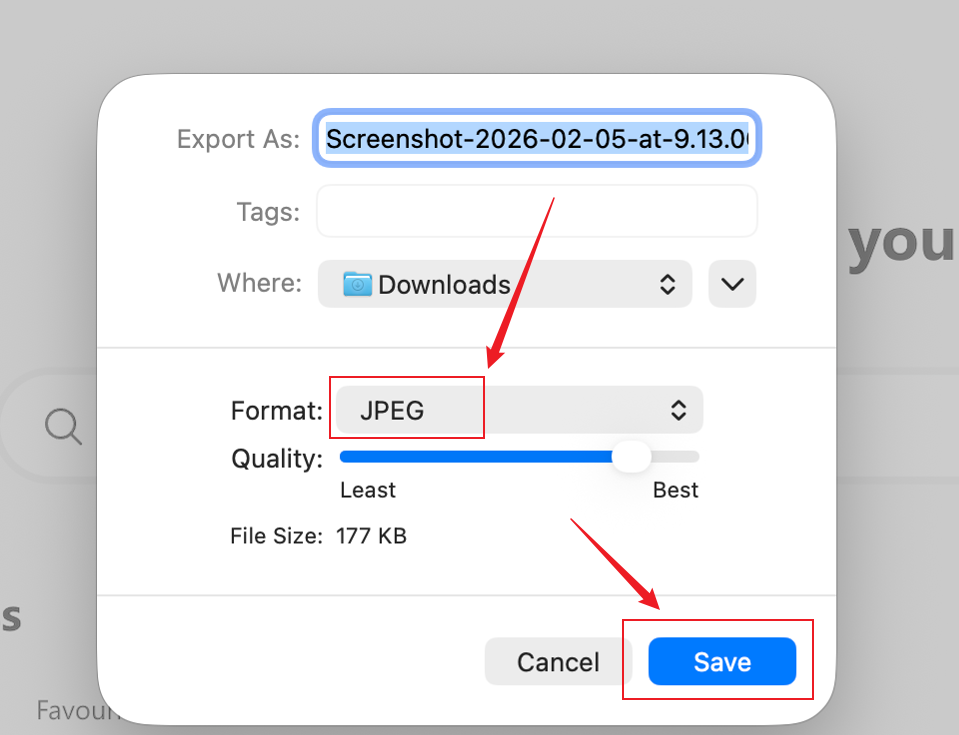
Note. Adjust the quality slider if desired; it may affect the file size. The ‘Least’ quality produces a smaller file, and moving the slider toward ‘Best’ increases the file size.
Step 4. After making the necessary adjustments, choose a file location in the Where dropdown, and click Save.
How to Batch Convert HEIC to JPG on Mac with Preview
Step 1. Navigate to your folder and choose all the .heic images you want to convert to JPG.
Right-click the image, go to Open With, and pick Preview.

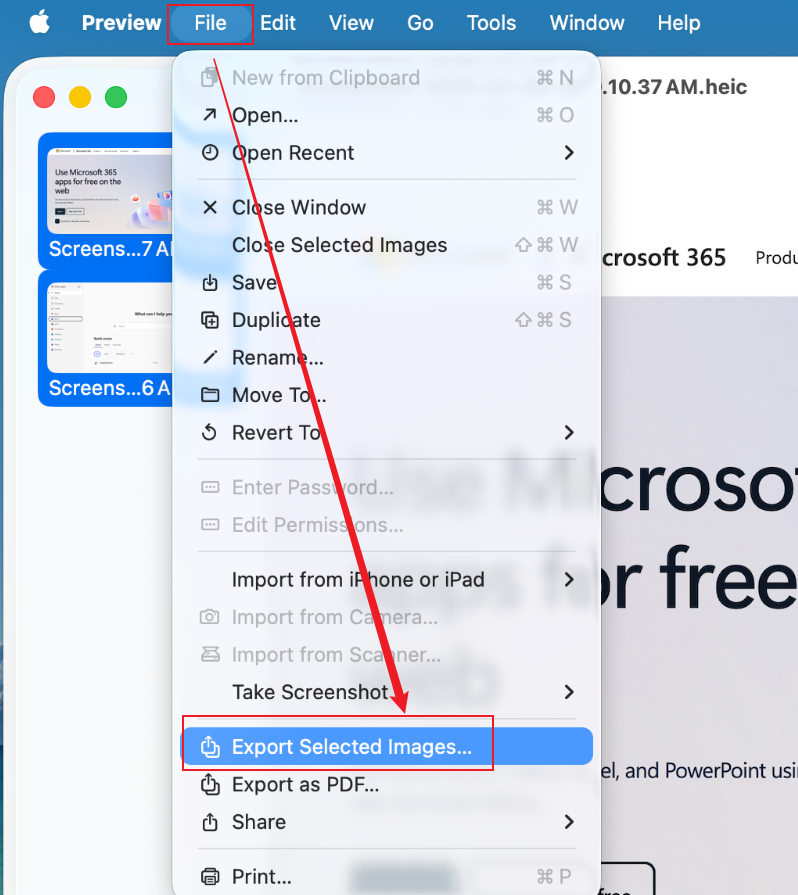
Step 2. Inside Preview, use the left sidebar thumbnails and hit Command + A to highlight every image.
Step 3. After that, open the File menu in the top bar and click Export Selected Images…
Step 4. In the appearing window, click the Show Options button at the bottom. Then, in the Format dropdown menu, select JPEG.
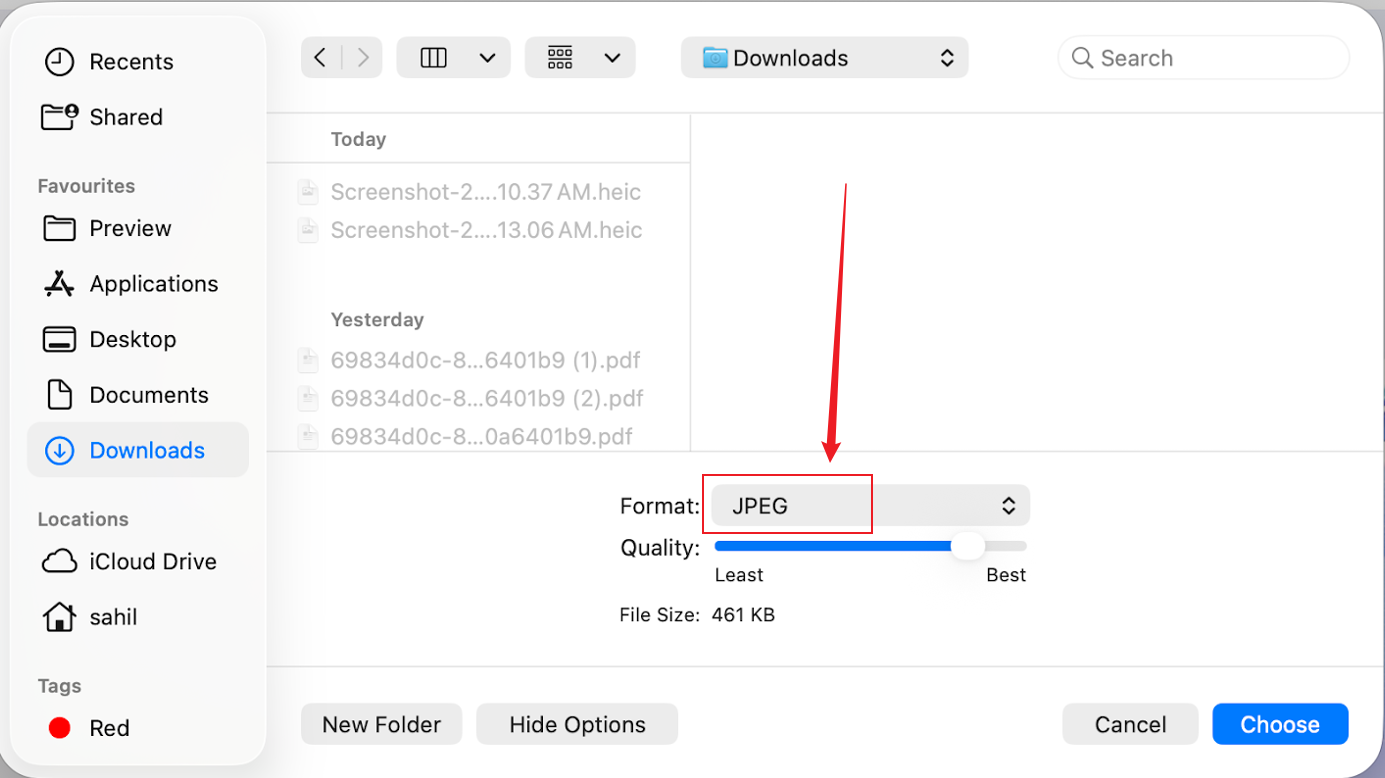
Adjust the image quality slider from Least to Lossless.
Step 5. After selecting all options, pick a destination folder at the top and click Choose in the bottom-right corner.
How to Convert HEIC to JPG on Mac Using Finder
For users seeking speed and simplicity, macOS allows you to convert HEIC to JPG directly in Finder with no extra software needed. This method is fast, intuitive, and ideal for processing images directly from your folders. However, this technique is limited to macOS Ventura and later versions.
Let’s take a look at how to convert HEIC to JPG on Mac using Finder in just a few clicks.
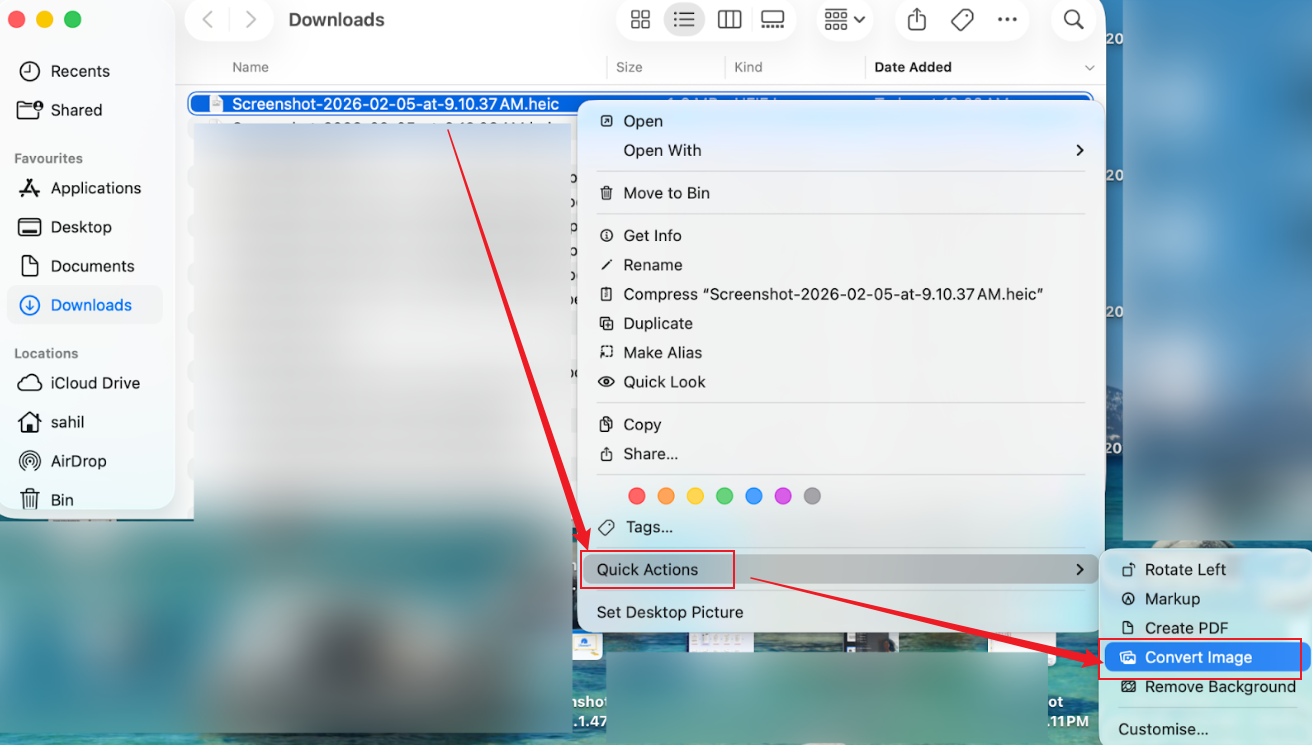
Step 1. Open Finder on your Mac. Then, go to the HEIC file(s) you wish to convert.
Then, right-click (or Control-click) on the file(s).
Step 2. Select Quick Actions at the bottom of the context menu and choose Convert Image.
Step 3. In the dialog box that opens, choose JPEG from the Format options. Also, select the Image Size: Actual size/Large/Medium/Small.
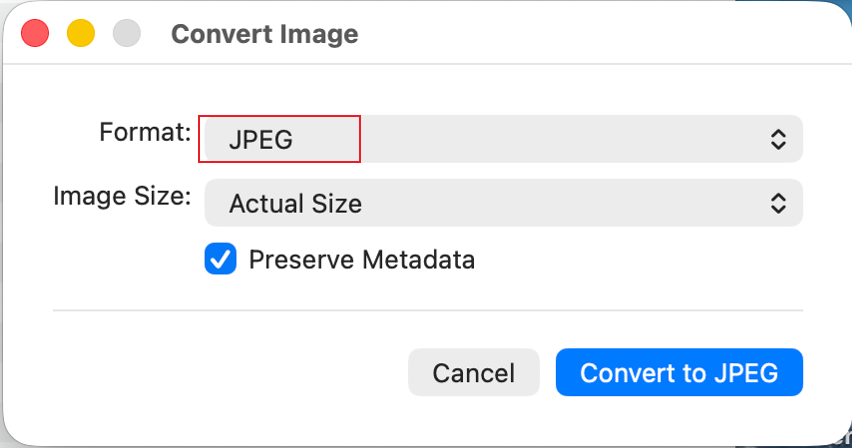
Step 4. Then click Convert to JPEG.
How to Convert HEIC to JPG on Mac with FreeConvert Online
FreeConvert is a web-based solution that lets you convert images directly on Mac without installing extra software. You can easily convert HEIC to PNG, JPG, TIFF, BMP, etc., making it adaptable for many image workflows. Being an online PDF converter that handles images as well, it’s convenient for fast and easy work. With FreeConvert, you can batch convert HEIC to JPG online in Mac, saving effort when working with several images simultaneously.
Learn how to convert HEIC to JPG on Mac online with FreeConvert in just a handful of clicks.
Step 1. Open your web browser. And go to the FreeConvert HEIC to JPG converter.
Step 2. Click the Choose Files button to select your HEIC files from your Mac Dropbox, Google Drive, or OneDrive.
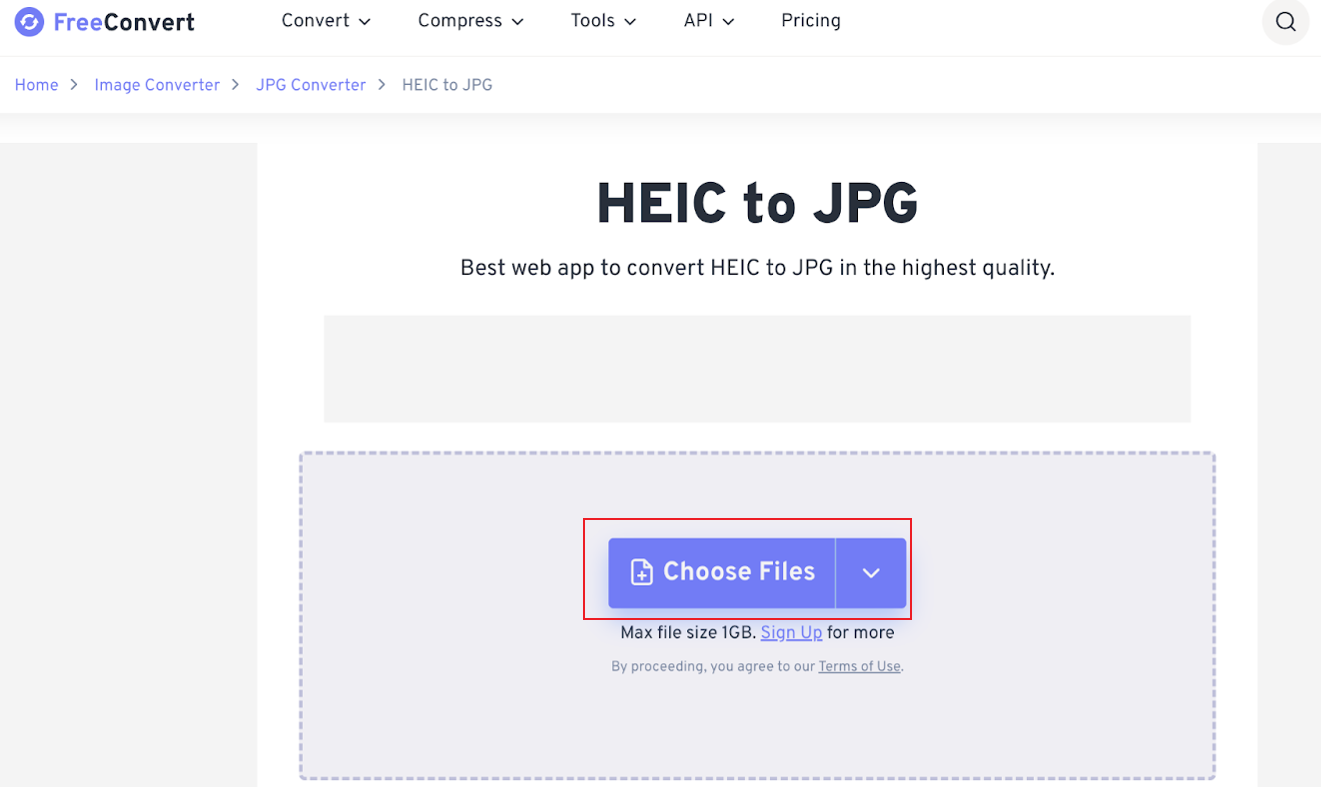
Note. Click Add More Files if you need to convert several HEIC files simultaneously.
Step 3. Ensure the Output format is set to JPG. You can hit the gear icon to open advanced settings and tweak file size along with other settings. Once done, click the Convert button to begin the process.
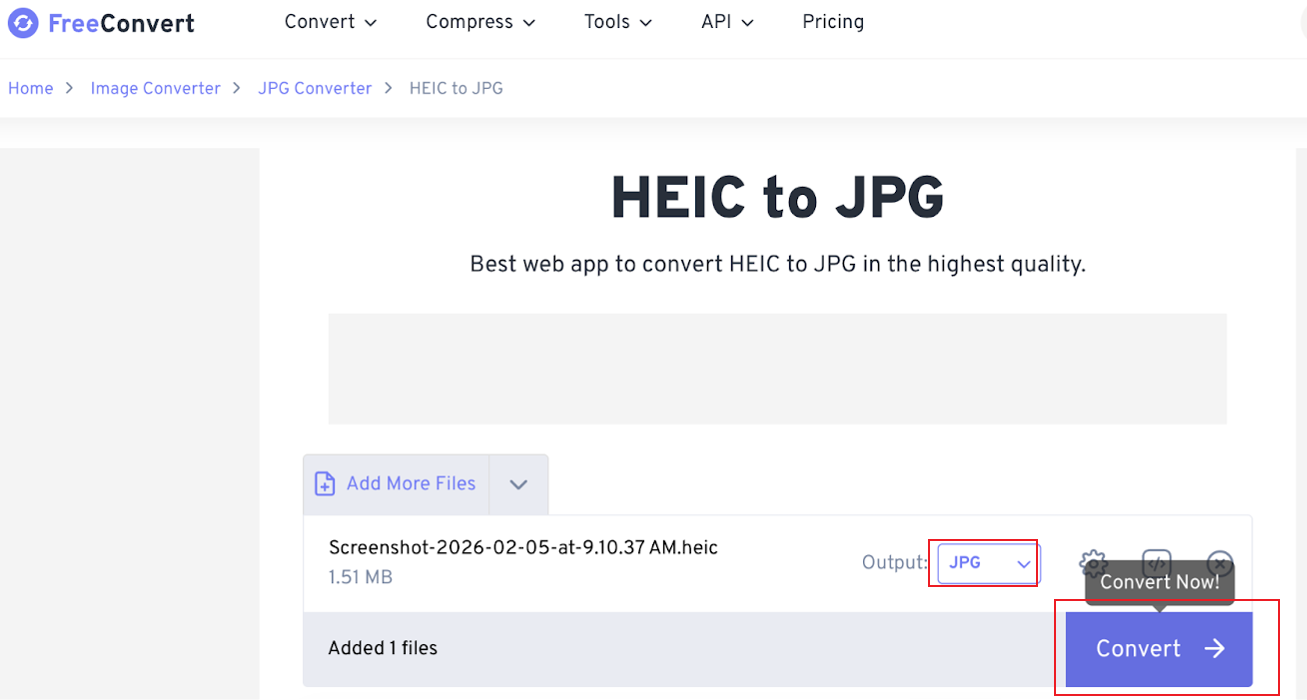
Step 4. After the status turns to Done, select the Download button to save your images immediately.
Automatically Convert HEIC to JPG When Transferring Photos
Beyond the free methods mentioned, you can set your device so it automatically saves photos as JPG instead of HEIC when sending images to your Mac. It’s best suited for users who consistently transfer photos to their Mac. Furthermore, it saves time by avoiding manual conversions and guarantees your photos are immediately in JPG format.
Here’s how to change iPhone settings to automatically convert HEIC to JPG when transferring photos on your Mac.
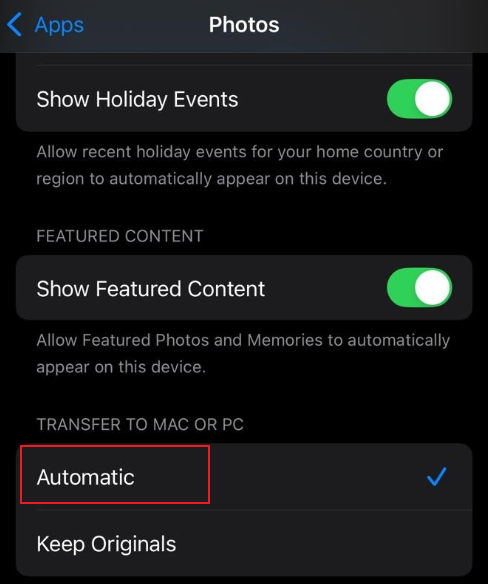
Step 1. Move to Settings on your iPhone and tap Photos.
Step 2. Then, at the bottom, select Automatic under Transfer to Mac or PC.
Step 3. For new photos, navigate to Settings and then choose Camera. Click Formats, then choose Most Compatible to save them as JPGs.
Final Words
Converting HEIC to JPG is simple when you understand exactly how to convert HEIC to JPG on Mac using the right method. Whether you choose built-in tools, online converters, or automatic settings, each method provides flexibility for various needs. Choosing the best approach helps maintain image quality and improve compatibility. Using these methods, you can quickly manage and share your photos across all platforms.