Can You Schedule an Email in Outlook?
While we can recall emails in Outlook, it doesn't always work. Instead of regretting that you sent an email at a bad time, it's better to schedule it in advance. Luckily, we can schedule send an email in Outlook, whether in Microsoft Outlook (New and Classic), Mac, web, or mobile apps. This feature allows you to arrange the sending time of emails to achieve better engagement, time management, and professionalism.
However, you should know that this feature is widely supported but has limitations. The details are in the step-by-step section below, as the restrictions vary by Outlook version.
Part 1. Schedule an Email in the Outlook Desktop App
Let’s first see how to schedule an email in Outlook app on Windows and Mac computers.
# Schedule Email in New Outlook
The New Outlook, launched in 2022, has a more straightforward interface than the previous one. However, the Schedule feature is not available for IMAP or POP accounts.
1. Compose your email as you usually would. You can upload and send large files via email.
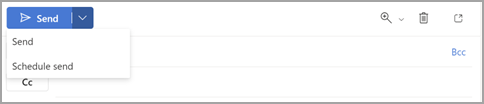
2. Find the Send button and click the drop-down arrow. Select Schedule send.
3. Choose a preset time or select Custom time to set a specific date and time.
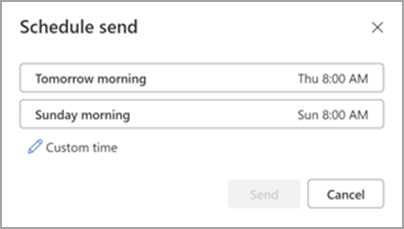
4. Click Send. The email will be sent to the Drafts folder until the scheduled delivery time.
Note:
- When you want to send the messages immediately, you can go to the Draft folder to find the message, click the pencil icon, and click Send Now.
- If you cannot find the Schedule send option, you can roll back to Classic Outlook as a workaround.
# Schedule Email in Classic Outlook
Classic Outlook is a traditional desktop application. It can also help you schedule an email to send at a later time.
1. Compose your email.
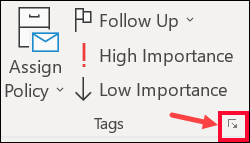
2. Select the More options arrow from the Tags group. Alternatively, you can choose Options in the ribbon, click More commands, and select Delay Delivery.
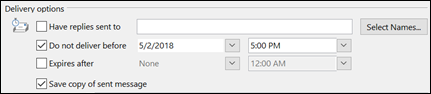
3. Under Delivery options, check Do not deliver before and select your desired date and time.
4. Click Close and then Send.
The email will stay in the Outbox until it is sent. To send the email immediately, follow these steps.
- Go to the Outbox folder and open the message.
- In the ribbon, click the Options tab. Choose More commands and Delay Delivery.
- Uncheck the Do not deliver before box.
- Click Close and send the email.
# Schedule Email in Outlook on Mac
If you use a Mac computer, follow the steps below to schedule your emails in the Outlook desktop app.
1. Compose your email. You can try AI email generators to save time.
2. Find the Send button and click the drop-down arrow. Select Schedule send (previously called "Send Later").
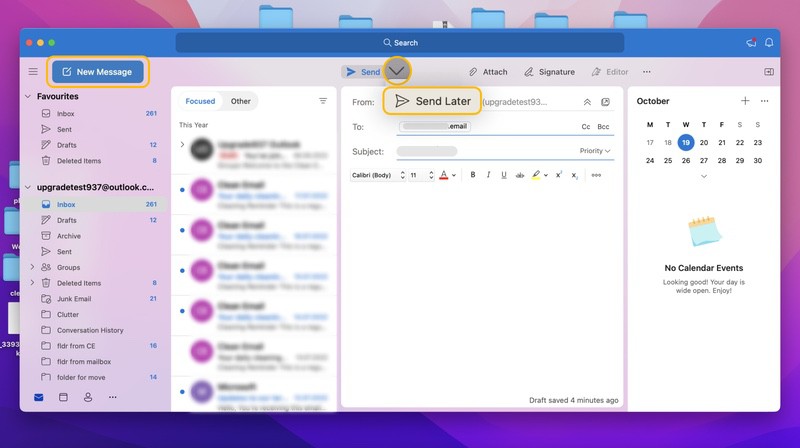
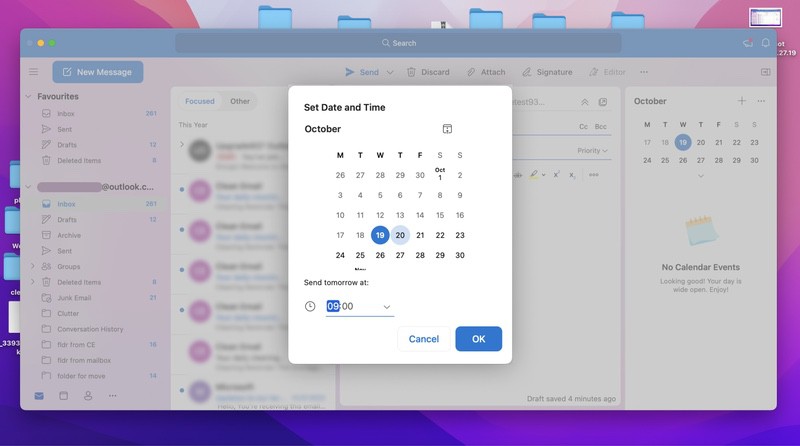
3. Select the desired date and time.
4. Finally, click Send. The email will be stored in the Drafts folder and will be sent automatically, even if Outlook is closed.
Part 2. Schedule an Email in Outlook on the Web App
Outlook on the Web is a web-based version of Microsoft Outlook that users can access from any web browser. It's a good option if you don't want to install the desktop app.
Here is how to schedule an email to send later in Outlook Web.
1. Compose your email.
2. Click the dropdown arrow next to Send. Select the Schedule send option.
3. Choose a suggested or Custom time to pick a specific date and time.
4. Click Send to confirm.
The scheduled email can be found in the Drafts folder until the scheduled time. If you want to send the message immediately, go to the Drafts folder, click the pencil icon, and then select "Send Now".
Part 3. Schedule an Email in Outlook on a Mobile App
It is also possible to schedule an Email on a mobile phone. Below is how to schedule an email in Outlook on iPhone. The steps for Android phones are similar.
1. Open the Outlook app and compose your email.
2. Tap More (three dots) or choose the Schedule Send option.
3. Choose a default time or tap Choose a time to set a custom date and time.
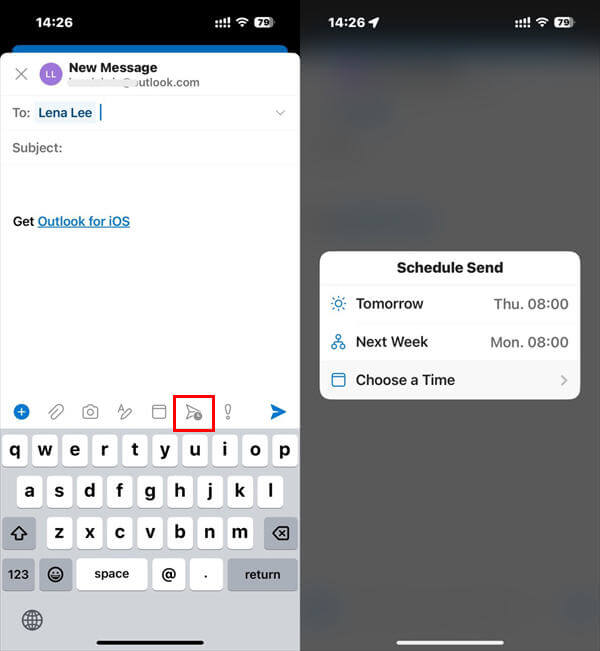
4. Tap Send to confirm.
The scheduled email will stay in the Drafts folder until the scheduled time. You can go to the folder to open the email and send it at any time.
Important Notes for Scheduling Email in Outlook
In the step-by-step section, we've provided some dos and don'ts. In addition to the points mentioned above, here are some more things to be aware of.
- You can only schedule emails from a shared mailbox if you have full access permissions.
- Time zone differences may affect the accuracy of delivery, so it's best to verify your Outlook calendar settings.
- The schedule is not supported by Microsoft 365 or Office 365 Groups email or distribution lists.
- If you have a Viva Insights or MyAnalytics subscription, Outlook may suggest scheduling based on the recipient's working hours or out-of-office status.
See also:

How to Change Signature in Outlook: Step-by-Step Guides
This post offers guides on how to change signature in Outlook on Windows, Mac, and online. It also gives instructions on how to create an Outlook signature.
READ MORE >Conclusion
That’s all about how to schedule an email in Outlook. Regardless of which Outlook you are using, following the steps is easy. Please ensure you're using the latest Outlook to avoid any trouble. I hope this guide is helpful!