
What is an email signature? What is its purpose in emails? An email signature is a block of text, sometimes including images or links, that automatically appears at the end of your emails. Think of it as a digital business card: it introduces you, provides contact details, and may include additional elements like social media links, disclaimers, or promotional information.
Having a clear and professional signature saves you time and adds credibility to your emails. Gmail is a professional mail service that enables you to send PDFs to email, add attachments, and more. With Gmail, you don't need to manually enter your personal information each time—Gmail will automatically add your signature. Now, let’s explore the exact steps to set up a signature in Gmail.
Why Create a Gmail Signature
Before diving into the exact steps to create a Gmail signature, let's explore the benefits of creating an email signature first.
- A signature can make your emails look intentional and polished.
- An email signature can help your email recipient get the same contact details, reducing miscommunication.
- A signature can reinforce your identity.
- A signature can save time by eliminating the need to re-enter phone numbers, websites, or job titles.
How to Create a Signature in Gmail on Desktop
Here, let’s walk through the steps for creating a Gmail signature on your PC.
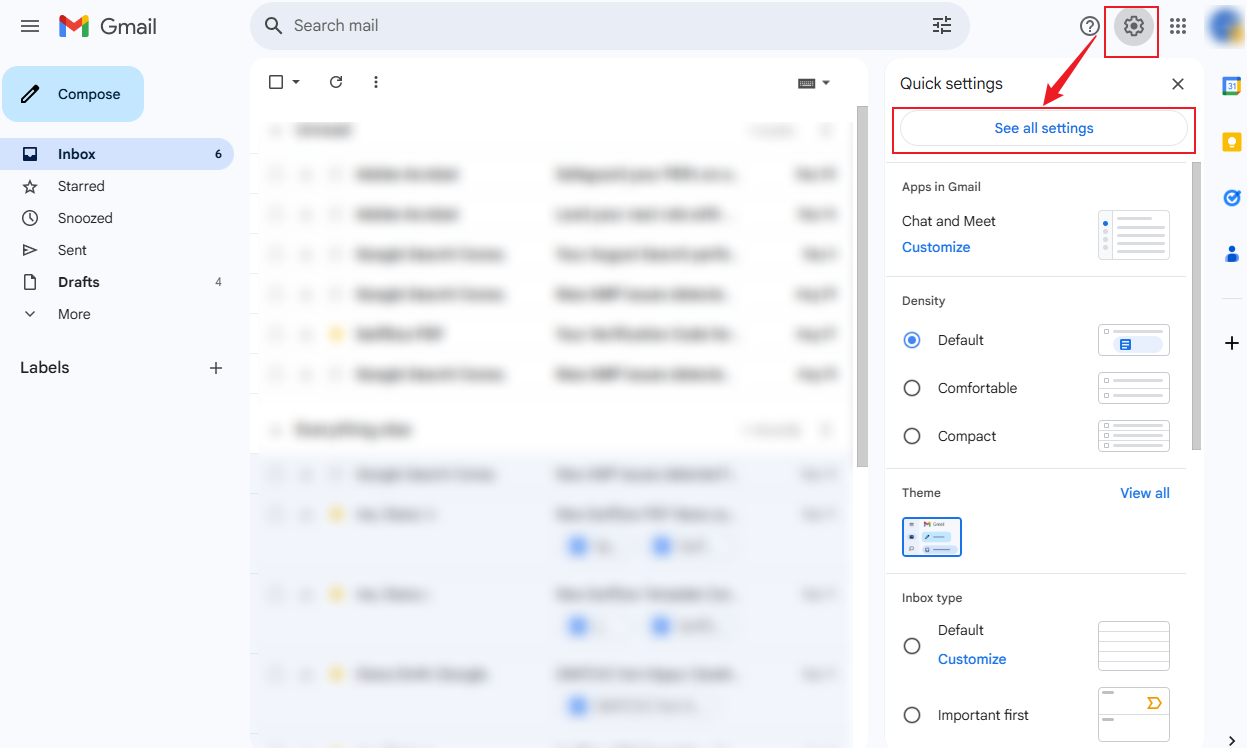
Step 1. Visit the official Gmail website and sign in to your Gmail account. Click the Settings option (a gear icon) in the top right and select the See all settings option.
Step 2. Stay on the General tab and scroll down until you see the Signature section. Here, click the Create new button. Then, type in your name and click the Create button.

Step 3. Next, you can see a text box where you can design your signature with the bottom formatting toolbar. For instance, you can type your name and title, add links, insert images, adjust font size, and more.
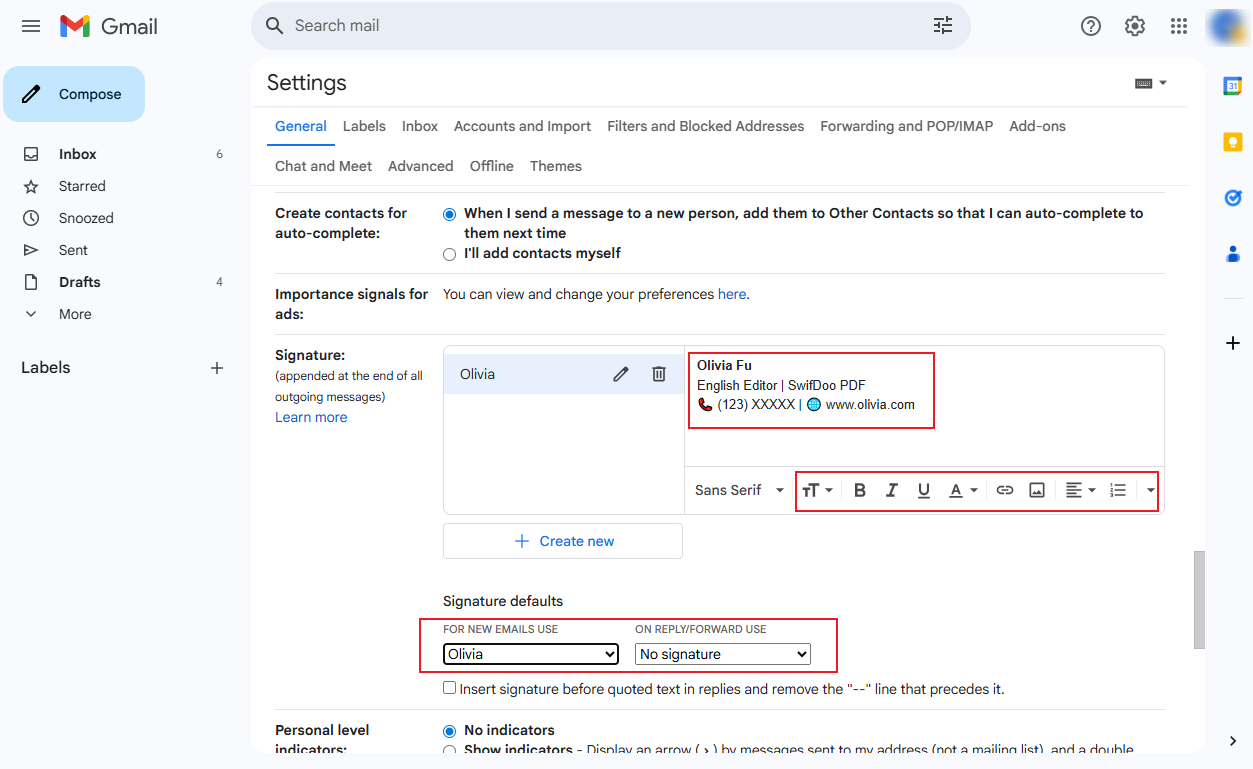
Step 4. Later, you can scroll to the bottom of the Settings page and click the Save Changes button to apply the changes for the Gmail signature.
How to Create a Signature in Gmail on Phone
Gmail also provides mobile versions for both Android and iPhone. How can you create a signature in Gmail on your mobile phone? Please refer to the steps below:
Step 1. Open the Gmail app on your phone. If you haven’t downloaded it, visit the Google Play Store or App Store to download and install it.
Step 2. On the upper left, tap on the menu icon (three horizontal lines). Next, scroll down and hit the Settings option.
Step 3. Select the account you want to add a signature to and then tap on the Mobile Signature button.
Step 4. Type in your name or other text information, like phone number and title.
Step 5. Finally, tap OK or Save.
What can you do if Gmail keeps stopping? You can try removing caches and reinstalling the Gmail app.
Useful Tips for Gmail Signatures
Here are some advanced tips and practices to enhance your Gmail signature.
- Apply some clickable social media icons, such as LinkedIn or Instagram.
- Add some text to promote a call-to-action.
- Make your signature mobile-friendly.
- Keep the signature concise and use one or two fonts.
- Avoid using huge images.
- Don’t input too much information.
- Avoid using too many colors so that your signature appears clean and professional.
Final Thoughts
It is an easy way to enhance your email communication in Gmail by creating a Gmail signature. In the content above, I have shown you how to create a signature in Gmail. You can design a personalized and professional signature in Gmail with just a few clicks. What’s more, Gmail provides flexible options to customize your signature needs. Take action now! Open Gmail, create your signature, and start sending emails like a pro!