What Is a Signature in Outlook?
An email signature in Outlook is typically a sign-off. It tells the recipients about your work profile and company (where you work). Your signature can be simple and include your company name and title/position.
However, when you set up an email signature in Outlook, you also get many customization options. Your signature can include any or all of the following elements.
- Text
- Images
- Logo
- Electronic business card
With this, you can even create a group email in Outlook. Once your signature is created, add it automatically to all emails or include it manually in the necessary emails.
How to Add a Signature in New Outlook
New Outlook lets you set up various signatures. When creating a message, you can select the one you want to use. Check out how to add a signature in Outlook.
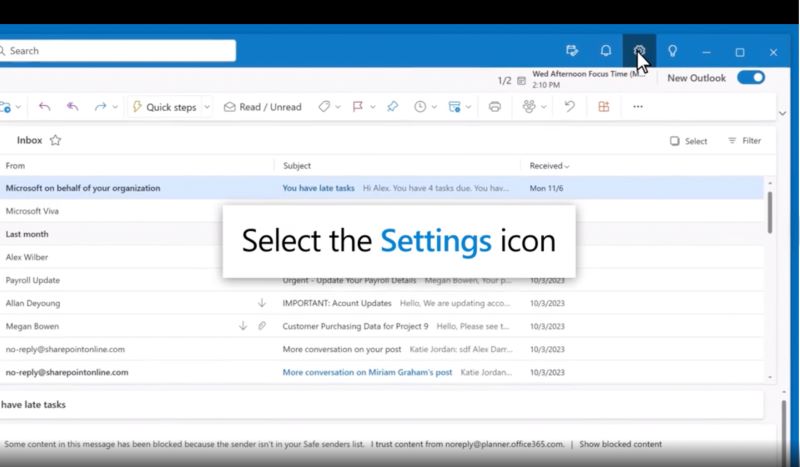
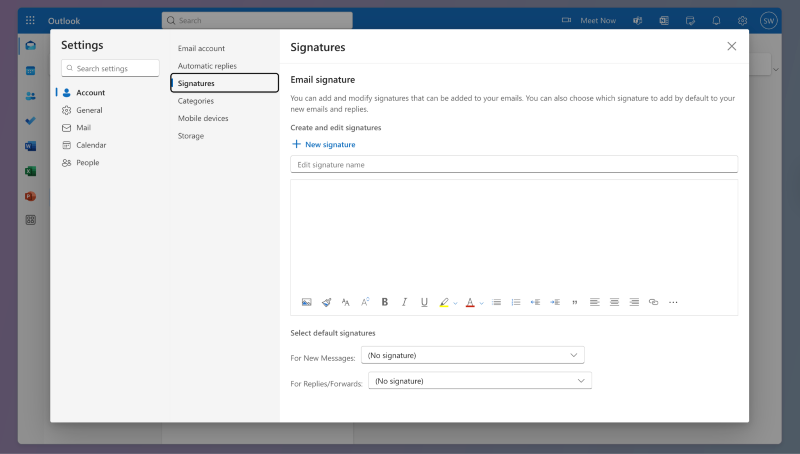
Step 1: Click Settings > Accounts > Signatures.
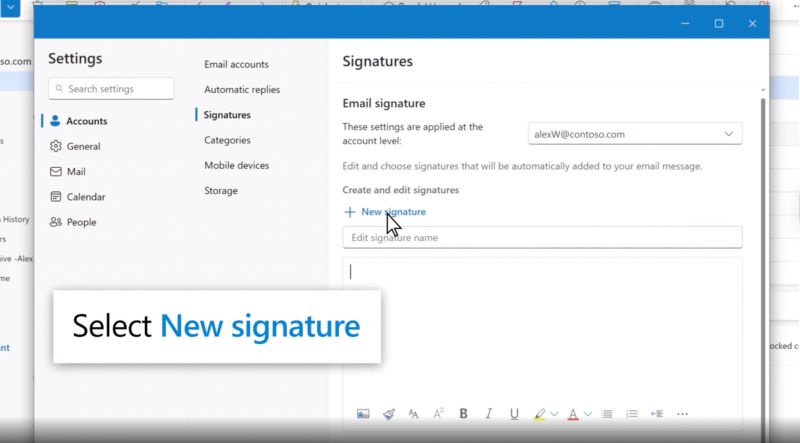
Step 2: If you have many accounts, choose one. And click New signature and name it.
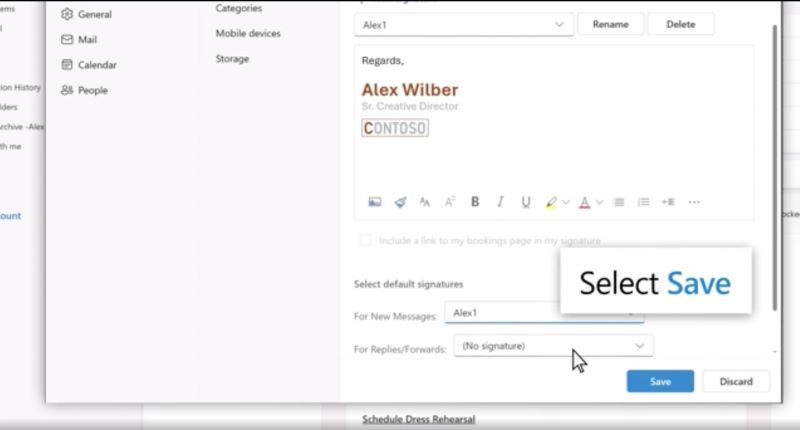
Step 3: Type and format your signature in the box. And click Save when finished.
Step 4: Select your signature. And set it as the default for new emails and replies if desired. Alternatively, leave it blank to add manually. Click Save again.
How to Add a Signature in Classic Outlook
Similar to the new Outlook, you can create your signature and choose when Outlook adds it to your messages. Find out how to add email signature in Outlook.
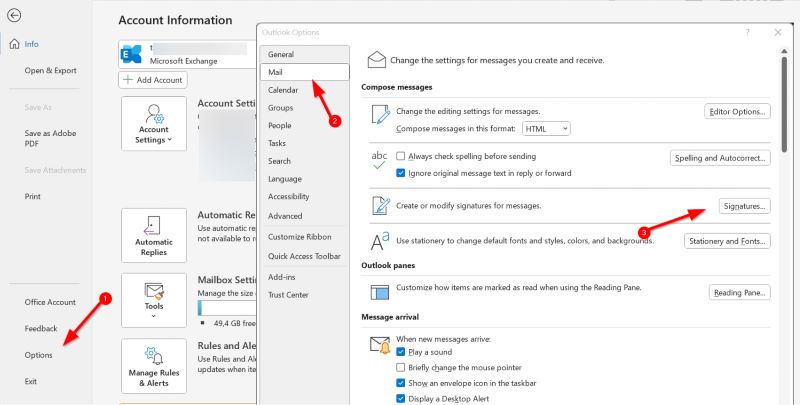
Step 1: Open a new email, then go to Message > Signature > Signatures. The location may differ based on your Outlook window size or message type.
Step 2: Under "Select signature to edit" > New. And name your signature. Then, type and format it under "Edit signature."
For advanced designs, create it in Word or use a template. Then copy and paste it into the box.
Step 3: Under Choose default signature, pick the email account. And then choose a signature for new messages (or select none if you prefer no automatic signature).
Step 4: To add your signature to replies and forwards, select one in the Replies/forwards drop-down, or leave it as (none). Type your signature, click OK to save.
How to Add a Signature on the Web or Outlook.com
You can also create an email signature in Outlook in the web or Outlook.com. Once done, you can add to all your outgoing messages or manually add to specific ones.
Check out how to add signature in Outlook app (web).
Step 1: Open Outlook Web app. And select Settings > Account > Signatures.
Step 2: Under Email signature, type your signature. And use the available formatting options.
Step 3: Pick a default signature for new messages and replies.
Step 4: Click Save once done.
How to Add Signature in the Outlook Mobile App
Besides all the above methods, you can also add an email signature in the Outlook app on Android or iPhone devices. Check out how to add signature in Outlook app (mobile).
Step 1: Open the Outlook app. And sign in to your account.
Step 2: Select your profile and move to Settings. Under the Quick Settings tab > Signature.
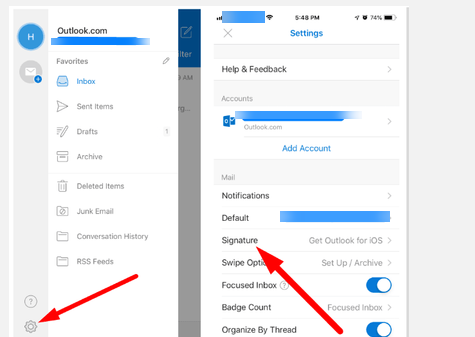
Step 3: Create a signature using the on-screen instructions.
Step 4: Click the checkmark icon to save the signature.
Note: You can change signature in Outlook using the customization options.
Bonus Tip: How to Send a Large File in Outlook
You’ve already seen how to add signature in Outlook using the practical steps. However, if you wish to send large files via email in Outlook, you may employ some of the best techniques.
Here’s a brief introduction to some of the feasible methods.
1. Compress the File
Firstly, compress or zip the file to reduce its size before you attach a file in Outlook.
2. Share via Cloud Storage
Secondly, you can use services like Dropbox, OneDrive, or Google Drive. This will assist you in uploading and sending a link instead of attaching the file directly.

3. Use Third-Party File Transfer Services
Thirdly, third-party file transfer services (e.g., Smash) can also help you send larger files in Outlook. After uploading, you’ll get a shareable link to include in your message.
Final Wrap Up
That's all, friends! Understanding how to add signature in Outlook allows you to make a strong impression with every send. It’s a simple way to showcase your identity, earn credibility, and speed up your emails. Give your emails the edge they deserve— create your Outlook signature today for a sharp, consistent style.