Outlook is a powerful email client widely used for managing communications, calendars, and tasks efficiently. Whether you need to attach a file in Outlook or manage various email formats, it offers seamless integration for everyday use. However, you may occasionally encounter issues, such as a PDF not opening in Outlook, which can disrupt your workflow. In such cases, it’s helpful to use SwifDoo PDF to open and view PDFs smoothly, ensuring you can access important documents without hassle while staying productive in Outlook.
How to Change Font in Outlook on Windows
Whether you’re using the New Outlook or the Classic Outlook interface, customizing your email font can enhance your communication style and readability. In the following sections, we’ll walk you through how to change font in Outlook across different versions.
First, we’ll cover the steps for Outlook 365, Outlook 2019, Outlook 2016, and Outlook 2013. Then, for those still using older editions like Outlook 2007 and 2003, we’ll guide you through the font customization process for those versions as well.
#Change Font in New Outlook
Let’s learn how to change the font for composing emails as well as for reading messages in New Outlook. Here are the steps to change the default font style and customize it for emails.
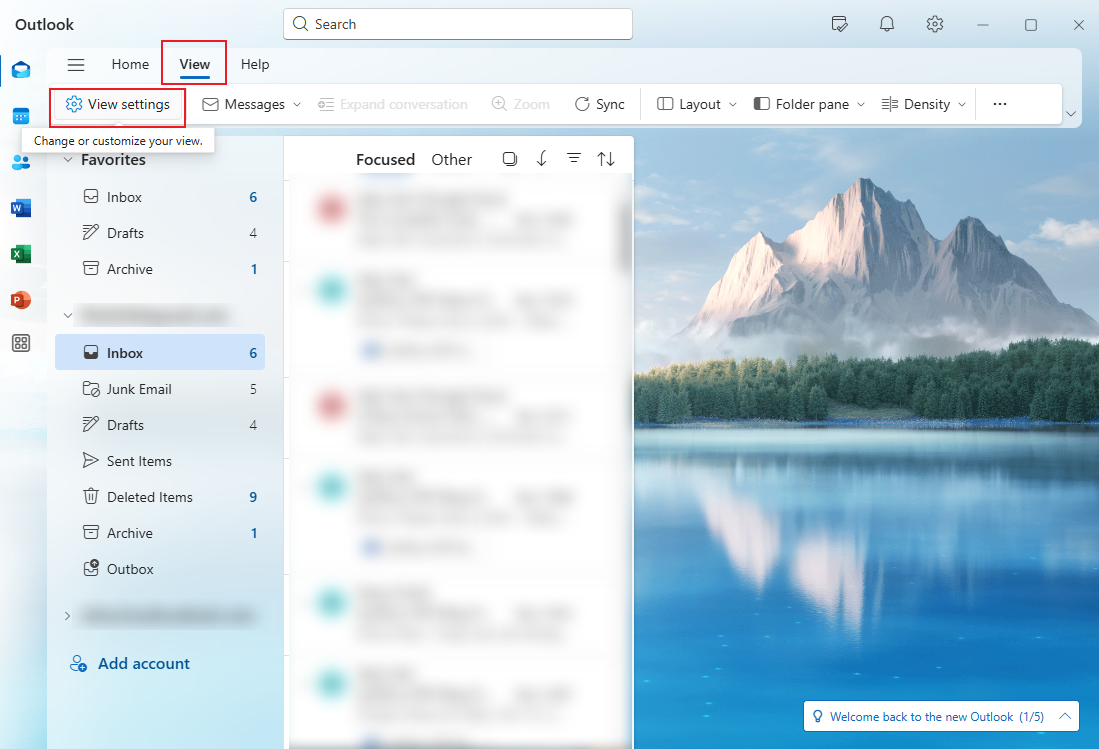
Step 1: Open Microsoft Outlook on your Windows computer. On the View tab, select View settings in new Outlook.
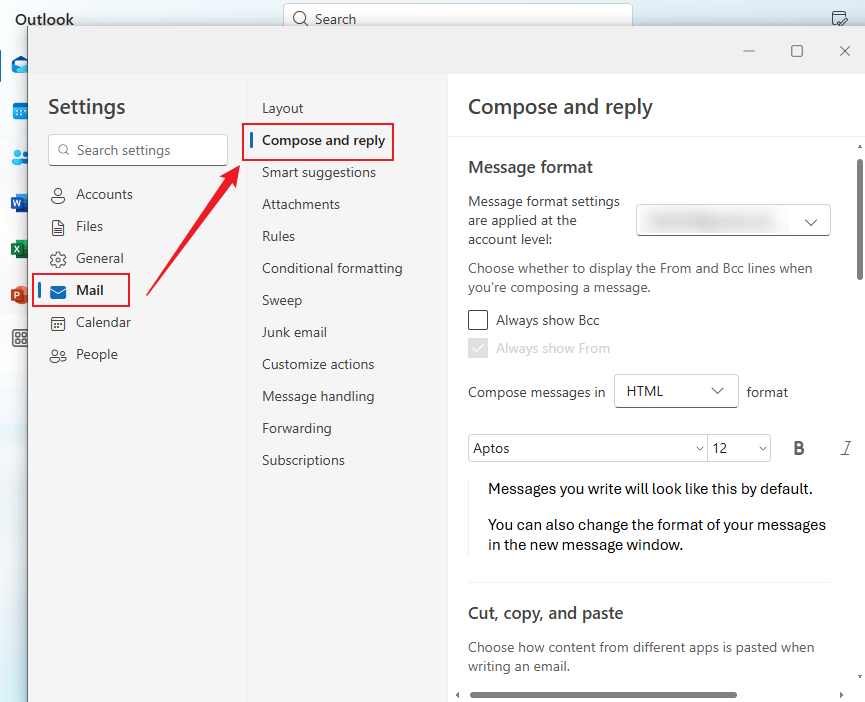
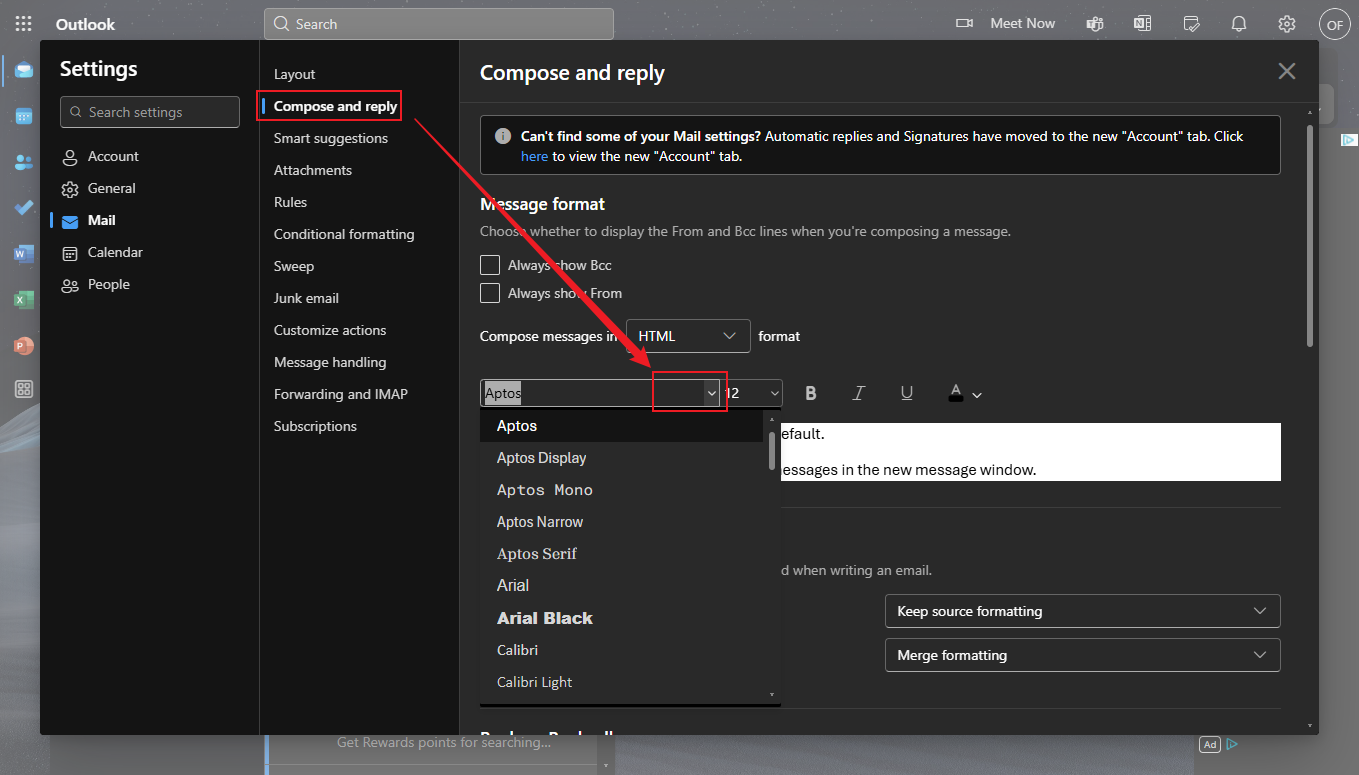
Step 2: Select "Mail" and then "Compose and Reply."
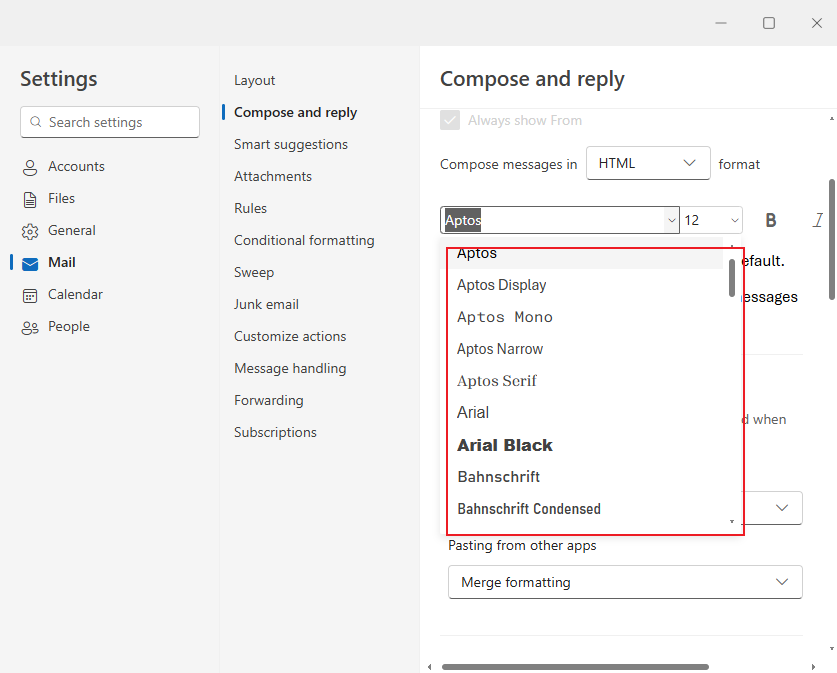
Step 3: Under Message format, select your desired font style, size, and color as you would like them. Then, select Save.
Now, to change the font size for reading messages in the new Outlook, follow the steps below. Using the Zoom feature, you can easily change the size of messages in the Reading pane.
Step 1: Go to your inbox and select a message. View it in the Reading pane.
Step 2: Select the View tab and then choose Zoom.
Step 3: You can choose the plus (+) button to Zoom in or select the minus (-) button to Zoom out.
Step 4: Once you click Reset, you can go back to the default view.
#Change Font in Classic Outlook
Here are the detailed steps on how to change the font for composing emails as well as for reading messages in Classic Outlook.
Step 1: Open Microsoft Outlook 2007 or 2003. Click Tools in the menu bar and select Options from the dropdown menu.
Step 2: In the Options dialog box, tap the Mail Format option. Then, under Stationery and Fonts, click Stationery and Fonts.
Step 3: Now, under New Mail Messages, click Font to set the font for new emails. Similarly, under "Replying or Forwarding Messages," click "Font" to customize the font of your replies.
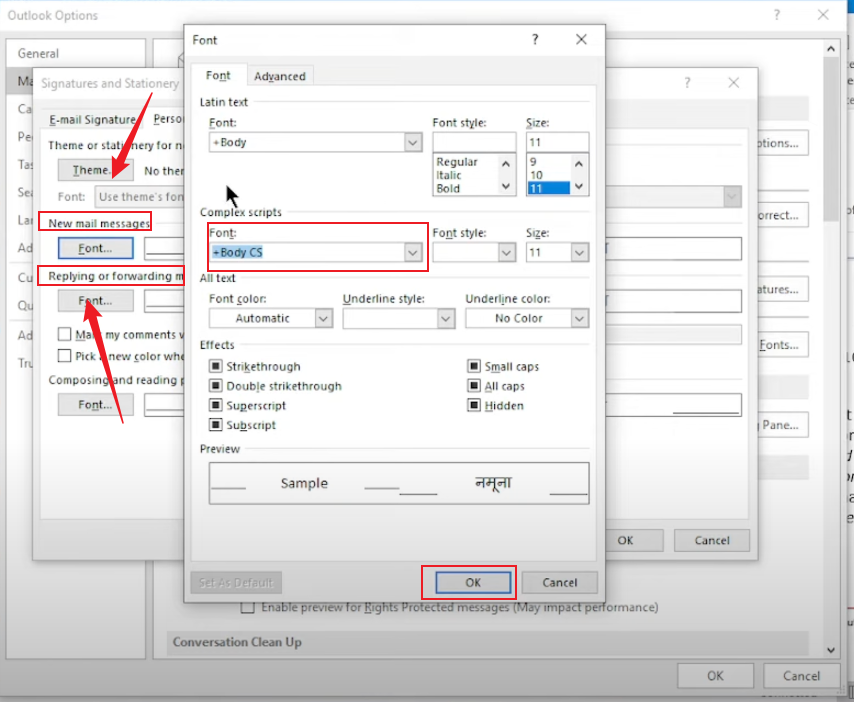
Step 4: Next, select your preferred font style, size, and color. A Font dialog box will appear where you can customize your preferences from the dropdown list.
Note: Outlook offers different font styles and also gives the feature of font coloring.
Step 5: Click OK to confirm the changes. Then, click Apply and tap OK again.
How to Change Font in Outlook on Mac
Check out the detailed steps on how to change the font in Outlook on Mac.
Step 1: Launch Microsoft Outlook on your Mac computer. Click Outlook at the top left corner in the menu bar and select Preferences… from the dropdown menu.
Step 2: Under the "Personal Settings" section, click the "Fonts" option.
Step 3: Tap the Font button next to new mail. Doing so, you will see that a new dialog box named Font will open.
Step 4: Select the desired Font from the drop-down list and adjust the font size (if necessary).
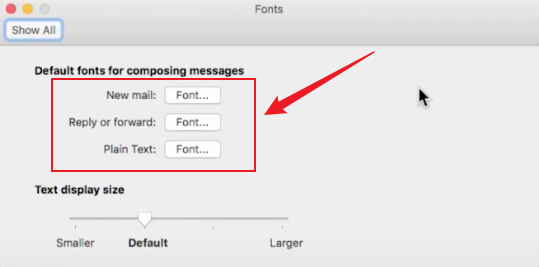
Step 5: Finally, click on OK to apply the changes, and these changes will be reflected when you write the email.
How to Change Font in Outlook for Web
Here are the detailed steps to change the font in Outlook Web App (OWA).
Step 1: Open your web browser and navigate to https://outlook.live.com/owa/. Then, click Sign in to sign in with your Microsoft account.
Step 2: Tap the Settings (gear icon) at the upper-right corner. Click View all Outlook settings at the bottom of the settings panel.
Step 3: Now, navigate to Mail and click "Compose and Reply." Scroll down to Message format.
Step 4: Select your preferred font style, size, and color from the dropdown list.
Step 5: Click Save to apply the new font settings. Then, close the settings window.
That’s it. Your new font settings will now be used for all new emails in Outlook Web.
The Bottom Line
Changing the font in Outlook allows you to personalize your emails, making them clearer and more professional. Whether you use the New Outlook or Classic version, adjusting fonts can improve readability and match your style. Remember, tools like SwifDoo PDF can complement your workflow by handling PDF attachments smoothly. With these tips, you’re now ready to customize your Outlook experience and communicate with confidence and style every time you send an email.