
Curve Text in Word Directly
Microsoft Word offers various customization and formatting options, enabling you to change the format and dimensions of text. With the built-in text effect feature, you can bend text easily using WordArt or Text Box.
Via WordArt
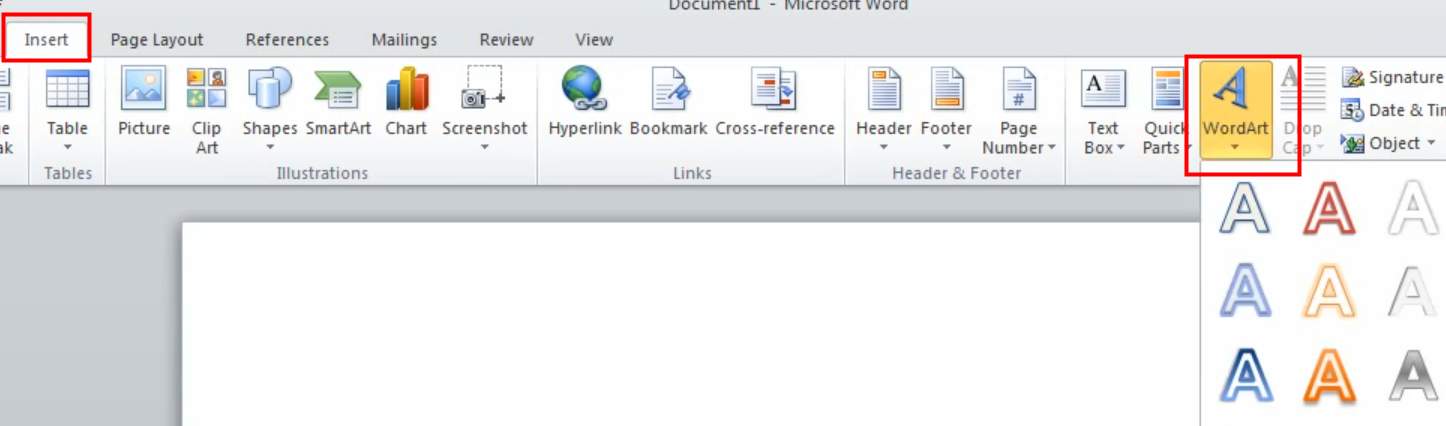
Let's begin with how to curve text in Word with WordArt. Microsoft Word's WordArt is a feature that allows you to add decorative effects to your text. It gives you a gallery of pre-designed styles, like shadows, reflections, or bends, that you can apply to your chosen text. You can further customize these styles by changing fonts, colors, and other formatting options.
Here's how to curve text in Word with it.
Step 1: Highlight the text you want to curve, click the WordArt button, and choose a style you prefer on the Insert tab;
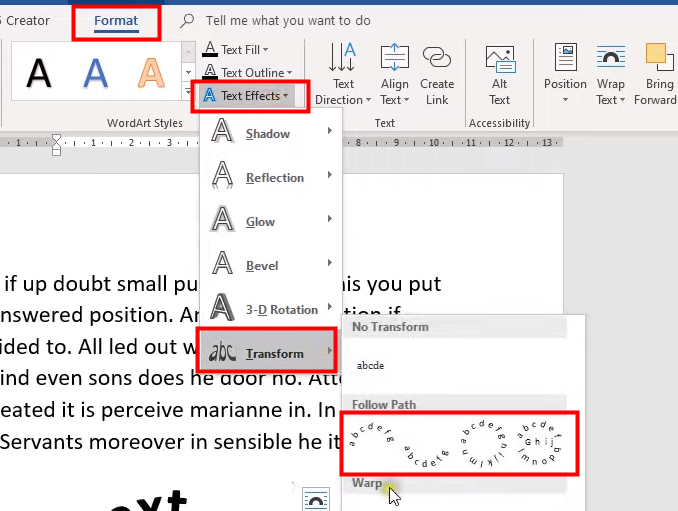
Step 2: Head to the Shape Format tab, click Text Effects, hover over Transform, and select a Follow Path effect to create curved text.

You can curve text in various ways: bending it upwards, downwards, or even circling a word in Word.

- Integrated AI tool to improve work efficiency
- Edit PDF documents like editing Word files
- Convert files to and from PDFs without losing formatting
Windows 11/10/8.1/7/XP
By Inserting Text Box
Text box is a feature that allows you to create a container for text independent of the main document flow. This container can be sized, positioned, and formatted freely. Text boxes can be placed anywhere on the page, independent of margins, for optimal layout and visual appeal. Here's how to curve text in Word by inserting a text box.
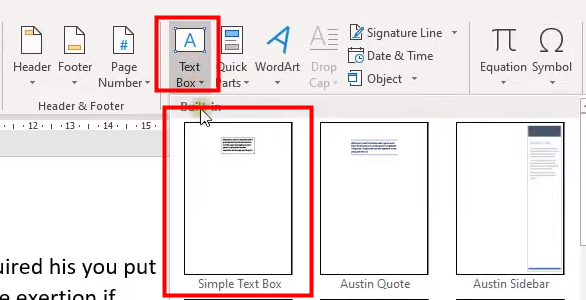
Step 1: Go to the Insert tab, tap Text Box > Simple Text Box to create a new text box;
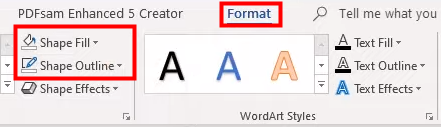
Step 2: Type the text you want to curve in the text box, select No Fill and No Outline respectively from the Shape Fill and Shape Outline dropdown menu on the Format tab;
Step 3: On the Format tab, click Text Effects, hover over Transform, and select an effect to curve a text box in Word.
Curve Text in Word Using InkPx Word Art Generator
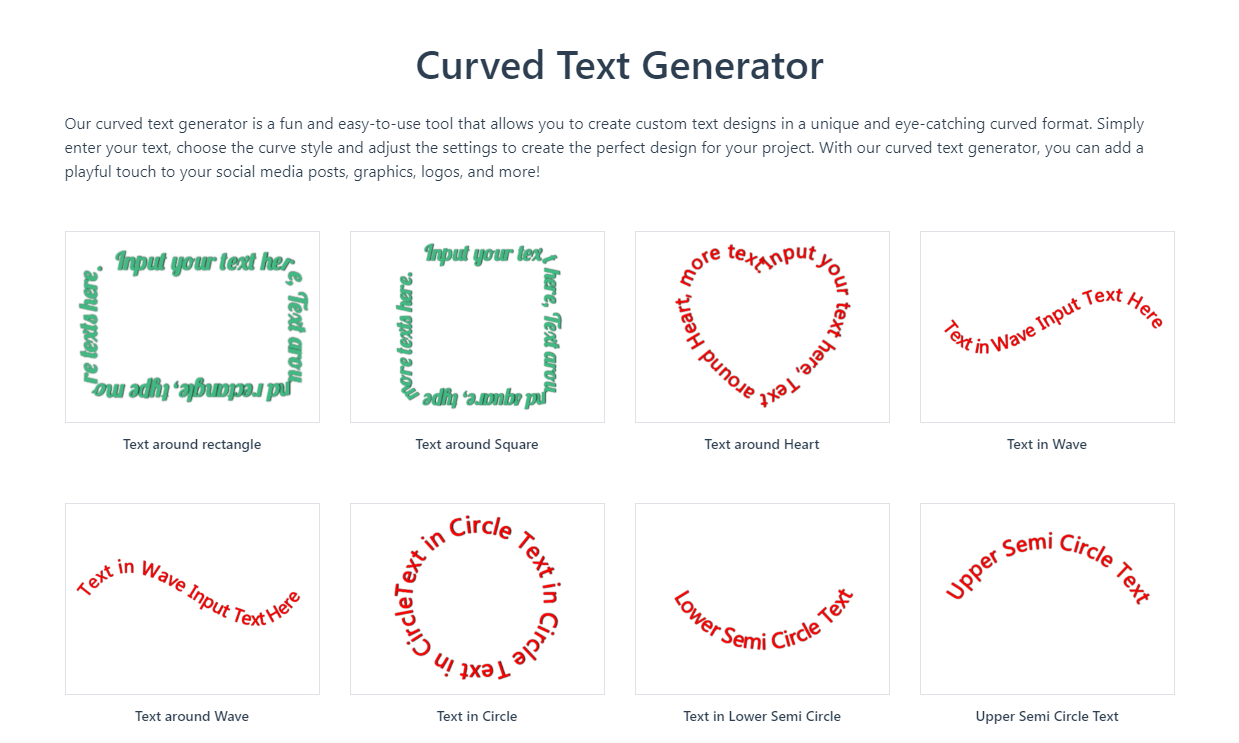
If you want to curve text in Word in a more creative way, consider using InkPx Word Art Generator. This free online tool lets you transform your text into visually appealing graphics perfect for social media posts, presentations, greeting cards, and more. You can unleash your creativity with a variety of styles like 3D effects, retro vibes, or metallic finishes. Further customize your design with a diverse color palette or by uploading your own image pattern.
Let's explore how to curve text in Word with it.
Step 1: Navigate to the InkPx website, select Curved Text Generator, then browse and select a format you prefer;
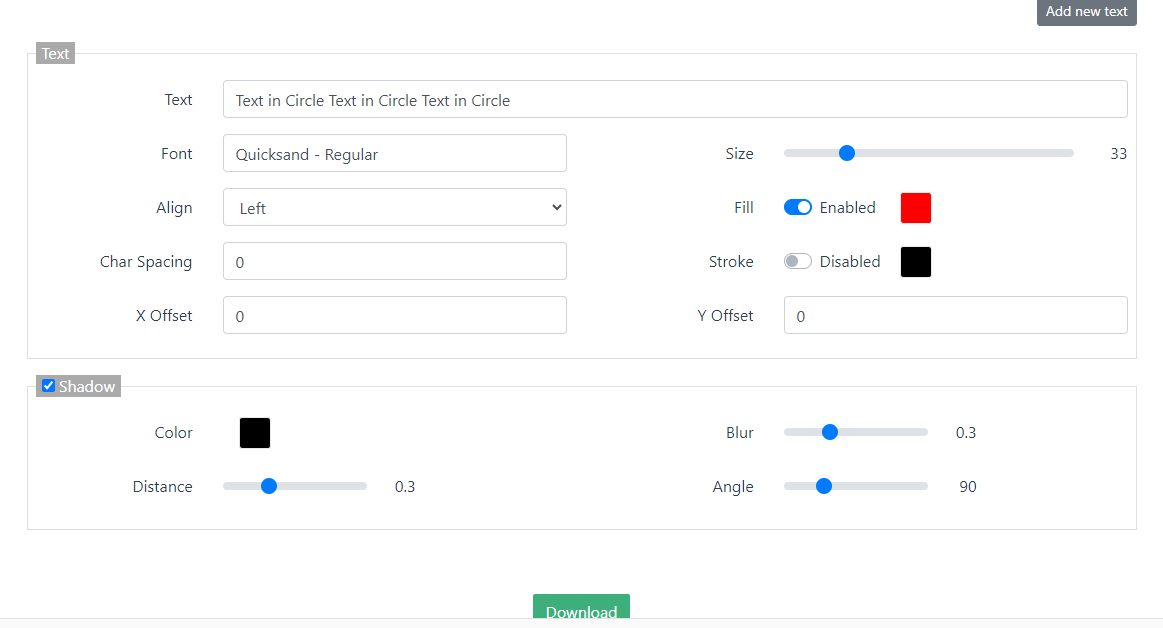
Step 2: Input the text you want to curve and adjust the path, font, and other settings as you prefer;
Step 3: Click Download to save the curved text as PDF or JPG to your device;
Step 4: Launch Microsoft Word, and hit Insert > Image to add the curved text to your Word document.
Save and Share Word as PDF to Ensure Formatting
Curving text in Word can add visual interest to your documents, but it can also lead to formatting problems when opened on different devices or software. To ensure consistent formatting and avoid these issues, consider saving your documents as PDFs.
Here are two common methods for converting your Word documents to PDFs:
- Using Microsoft Word's built-in Save As feature: This method offers a streamlined workflow and is ideal for basic PDF creation.
- Using a dedicated PDF editor like SwifDoo PDF: This option provides more advanced features like editing existing PDFs, encrypting them for security, and merging multiple PDFs into one.
Final Words
Curving text in Word adds a touch of creativity and visual interest to your documents. Whether you use the built-in options or explore third-party tools like InkPx Word Art Generator, the process is quite easy. Just experiment with different styles and colors to find the perfect fit for your project, and remember that the key is to maintain readability while enhancing your message.