How to Use Mac OS Preview to Crop a PDF
Primarily, you can crop a PDF in Preview on Mac without software download. The built-in Preview application also allows users to edit a PDF file on Mac in other ways. It lets you cut unwanted margins or edge content from one page or selected pages. You can access Inspector to set the crop box accurately in inches or other units. You can type the cropped values for each side.
How to crop a PDF on Mac in Preview for free:
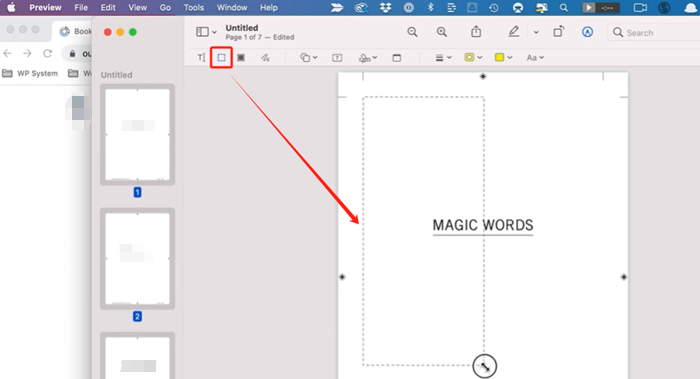
Step 1: Open your PDF in Preview, and bring out the markup toolbar by clicking View > Show Markup Toolbar;
Step 2: Choose the Rectangular Selection tool and click to draw around the area you need;
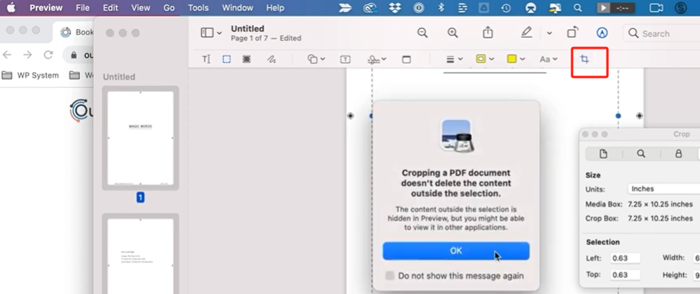
Step 3: Go to Tools > Show Inspector to adjust the margins you want to crop on PDF on the Mac;
Step 4: Click the Crop to Selection icon and hit OK to crop the PDF in the Mac Preview instantly;
Step 5: To crop all pages in the PDF on Mac, press Command + A to select all the pages;
Step 6: Repeat Step 2 or Step 3, and Step 4, or press Command+K to crop the PDF pages at once;
Step 7: Use the File > Save option to save the cropped PDF.
Note: Mac Preview cannot help permanently crop a PDF on Mac. Sometimes, when you open the cropped PDF in another software, you will still see the cropped space. But no worries; most applications won't show the extra parts.
How to Crop a PDF on Mac Using Adobe Acrobat
Adobe Acrobat is a lifesaver when you struggle to crop PDF files on Mac. It is reputed as a PDF reader, editor, signer, and printer. You can customize the pages to crop on and the margins to cut away. The software also lets you crop a PDF image on a Mac. The only downside is that it’s expensive if you don't have a subscription.
Dig into how you can crop a PDF on Mac in Acrobat Pro.
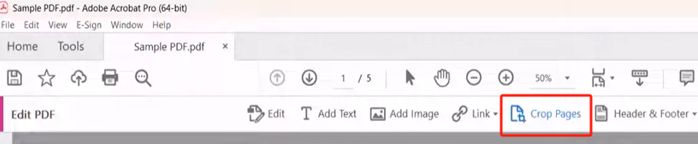
Step 1: Open the PDF file in Acrobat Pro, and choose Tools > Edit PDF > Crop Pages;
Step 2: Use your cursor to draw the portion you need to keep and double-click on it;
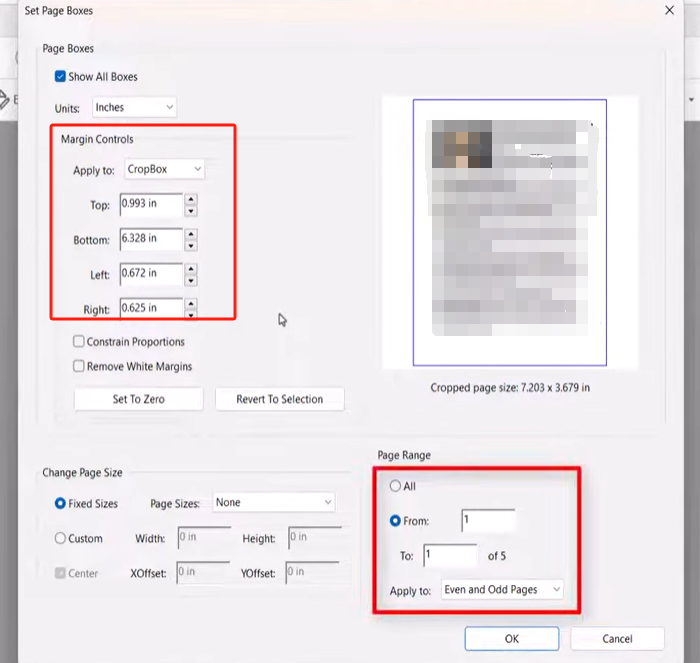
Step 3: Further finetune the cropping settings in the Set Page Boxes dialog box. You can specify the page numbers or page ranges to crop multiple pages in the PDF on your Mac;
Step 4: When you’re done, click OK to implement the PDF cropping on Mac and get rid of the excess material of your document;
Step 5: Save and export the PDF with only the required parts.
How to Crop a PDF File on Mac with Smallpdf
If you often crop a PDF document on a Mac, iPhone, or different platforms, Smallpdf would be the practical recommendation. The online tool is based on browsers and compatible with any device. You don't have the installation trouble. It can kill the entire page(s) of a PDF and redact PDFs to delete the hidden cropped area permanently.
Look at how to crop a PDF on a Mac online for free with Smallpdf.
Step 1: Choose the Crop PDF tool from the website and upload your file;

Step 2: Drag to cover the selection you need, and hit the checkmark that appears;
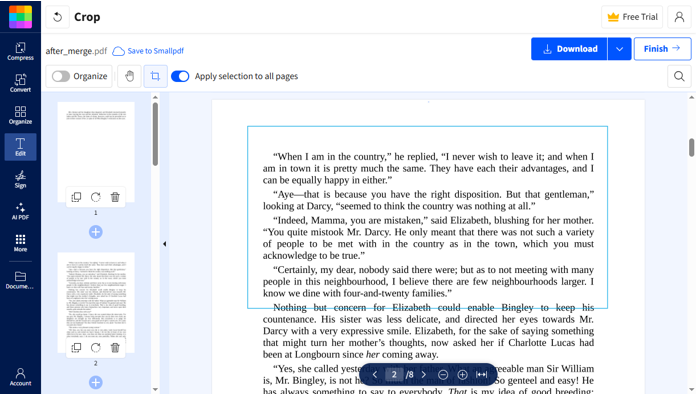
Step 3: By default, the web app will crop every page in the PDF to the selection that you outline;
Step 4: Download the cropped smaller PDF to save or share.
Bonus: Best PDF Reader & Editor for Mac - SwifDoo PDF
When you have finished Mac PDF cropping, you may need to make more edits and changes to the file. What is the best PDF editing software worth trying? The SwifDoo PDF for Mac will lead you to the answer.
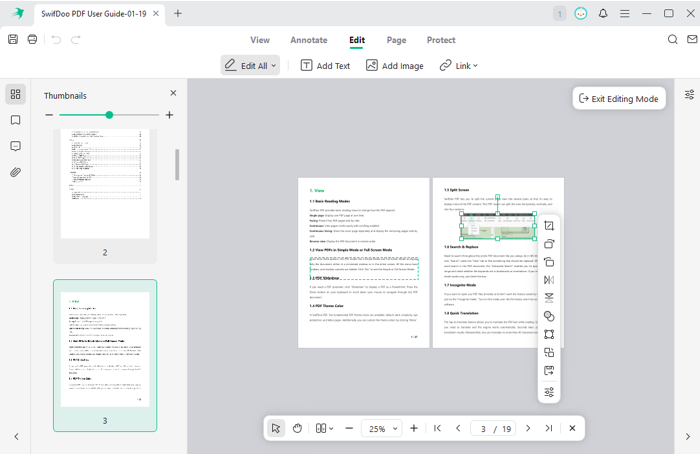
What you can handle with SwifDoo PDF after you crop PDFs on a Mac:
- Add regular annotations such as highlights, shapes, and lines, as well as sticky notes, attachments, and stamps.
- Add text boxes or directly type on the PDF.
- Insert, crop, delete, and deep edit images in the file.
- Add hyperlinks, pages, and protection passwords to your PDF.
- Rotate, split, and change page size.
Conclusion
Mac PDF users can crop all pages or just one page in a PDF like a breeze in the native Preview. But if you would like a more professional solution, turn to dedicated PDF software. Offline Adobe Acrobat, online Smallpdf, and some of the best PDF editors for Mac, such as PDF Expert, are good options. Consider whether you need text editing in a PDF when making your decision.