
What Is Redlining in Word?
In Microsoft Word, users can utilize the Track Changes feature to display edits made to a document, commonly referred to as redlining. This feature displays changes made to a document, including insertions, deletions, and formatting changes, in a way that makes it easy for reviewers and collaborators to view and review the changes. Additionally, users can manually redline a document.
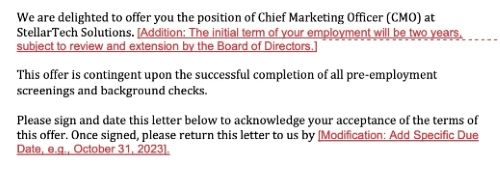
Redlining is commonly used in situations requiring a transparent revision history, such as legal document reviews, academic editing, and business collaboration. When you run redline in Word, the modified part will be shown crossed out or underlined in red:
- Strikethrough indicates deleted text
- Red Underline indicates added text
Benefits of Redlining in Word
Redlining in Word offers the key benefit of enabling transparent and efficient collaboration. By visually marking every change—whether it's an insertion, deletion, or formatting adjustment—it allows all contributors to see what's been modified, who made the change, and why.
This not only reduces the risk of miscommunication but also streamlines the review and approval process. It can maintain version control and ensure that everyone is working from the same, clearly documented source.
How to Redline in Word | Step-by-Step Guide
There are two ways to redline in a Word document: use the Track Changes feature or add redlines manually. When you need to make numerous modifications, you can opt for the former option. If you only need to make one or two modifications, you can manually add the redline.
Way 1. Redline in Word with Track Changes
Let's start learning how to redline a document in Word using the Track Changes feature. When Track Changes is enabled:
- Inserted text appears in a different color and is underlined or highlighted.
- Deleted text may show as a strikethrough or in the margin with a comment bubble.
- Formatting changes (such as bold or italic) are marked in the revisions pane or accompanied by a comment.
- Comments can be added alongside changes to explain or discuss them.
Of course, you can turn off Track Changes in Word at any time.
Steps to run a redline in Word automatically:
1. Turn on Track Changes
- Open your Word document.
- Go to the Review tab from the top menu.
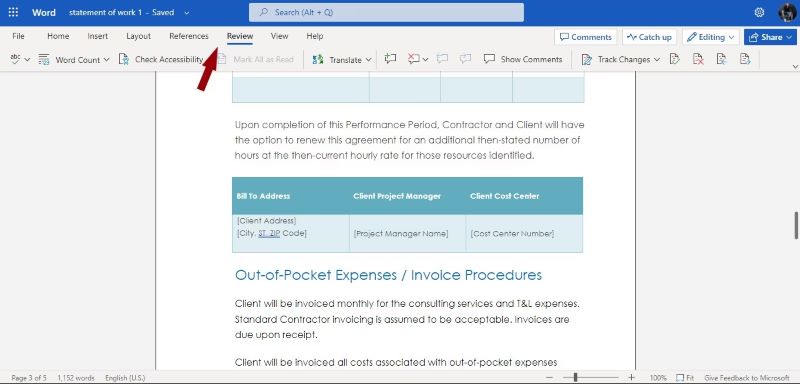
- Click Track Changes > Ensure it’s enabled.
2. Make Edits to the Document
Now just start editing — Word will automatically mark:
- Inserted text (underlined or colored).
- Deleted text (strikethrough or shown in the margin).
- Formatting changes (noted in the revision pane).
3. View Changes
Customize how changes appear as needed. In the Review tab, click the Display for Review dropdown and choose an option from:
- Simple Markup: clean view with red lines showing change locations
- All Markup: full detailed changes
- No Markup: preview without changes
- Original: view before changes
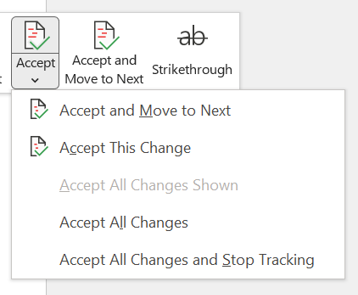
4. Accept or Reject Changes
- Go to the Review tab.
- In the Changes section, click Accept or Reject to make it.
Way 2. Redline in Microsoft Word Manually
Here is how to redline in Word manually:
1. In Microsoft Word, open the document you want to redline.
2. Make any necessary changes.
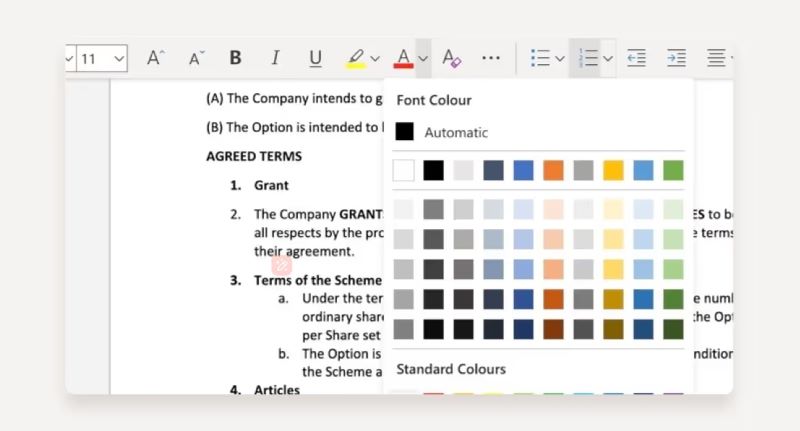
3. Now, you can change the text color and add a strikethrough or underline. For example, under Font, select "Strikethrough" and apply it to the text.
4. If needed, you can add comments by going to Review > New Comment.
5. Repeat the steps to redline all sections.
6. Finally, save the document.
Bonus Tip: How to Redline in PDF
From the above, you already know how to use redline in Word. Next, let’s examine how to redline a PDF. Why is this worth considering? Well, to a certain extent, PDF is more secure than Word.
Word documents are very easy to edit. What should you do if someone forgets to turn on track changes and makes modifications to the document? This could pose a huge risk. However, in a PDF document, you can easily track the edits. With a professional PDF editor like SwifDoo PDF, you can turn a Word document into a PDF and add notes for suggestions and mark text for deletion.
Here is how to redline in a PDF document:
1. Download, install, and launch SwifDoo PDF.
2. Open the PDF and make any necessary edits.
3. Click the Annotate button and select the desired tool.
- Select Text Markup to underline or strikethrough in a PDF.
- Click Callout to add a text note.
- Click Note to add more information.
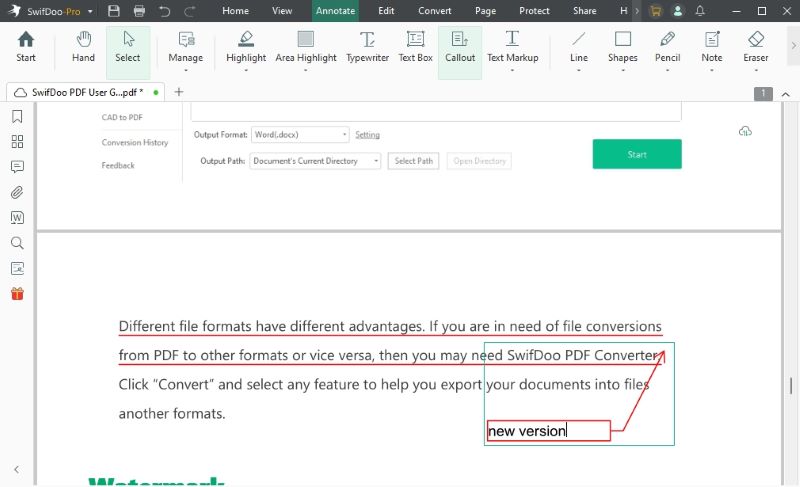
4. Finally, click the Save button to save the changes.
Conclusion
That’s all about how to redline in Word. Redlining shows exactly what has been added, deleted, or changed. It is a good option for coordinating across teams or departments. However, please note that the redline will only run automatically when the Track Changes feature is enabled. Therefore, it's always better to make a copy before editing.