1. Digitally Sign a PDF on Windows with SwifDoo PDF
Best For: Anyone who needs to easily add secure digital signatures to PDFs on Windows with a lightweight, user-friendly desktop PDF editor.
SwifDoo PDF is a lightweight, all-in-one PDF tool for Windows that enables users to view, edit, annotate, convert, and manage documents easily. Its signing feature lets you add electronic or digital signatures by typing, drawing, or using certificates.
You can securely sign a contract, approve forms, and protect document integrity, making SwifDoo PDF ideal for fast, professional, and legally compliant PDF workflows. It is ideal for businesses, freelancers, and teams managing everyday documents digitally with ease and confidence.
Discover how to digitally sign a PDF on Windows with SwifDoo PDF in a few simple steps.
Step 1. First, download and install SwifDoo PDF on your Windows PC. Launch the program and open the PDF you need to digitally sign.
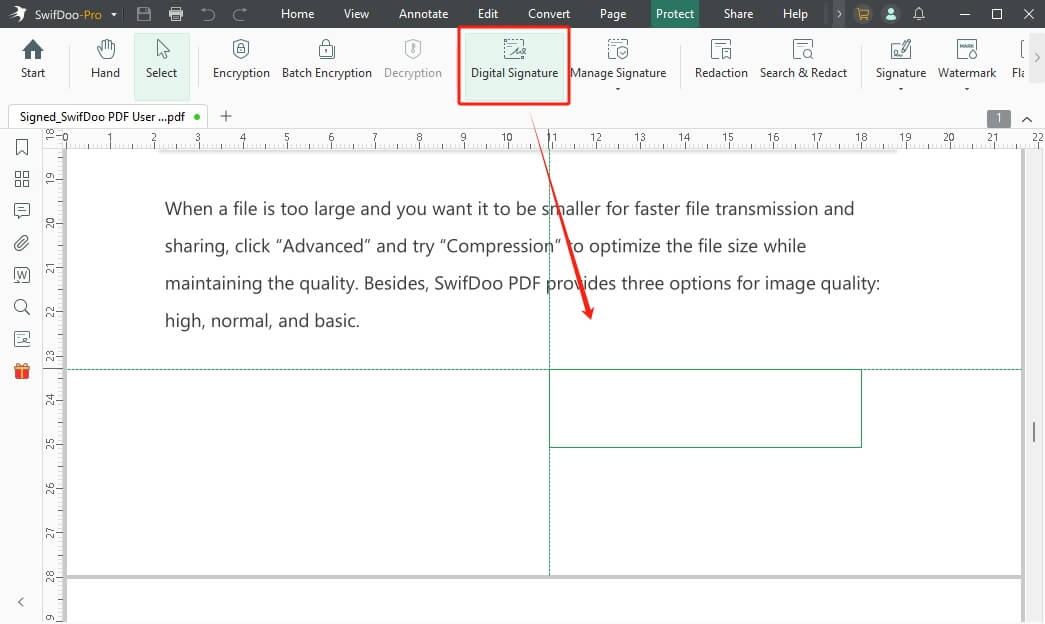
Step 2. Select Protect in the top menu bar and pick Digital Signature in the secondary menu. Place the signature field where you want.
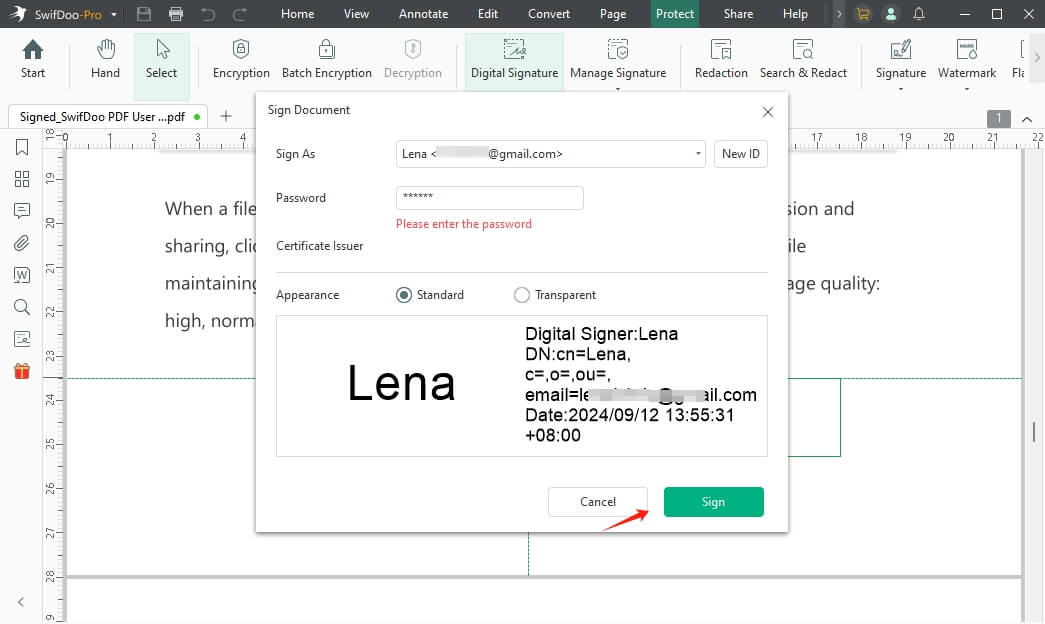
Step 3. And click New ID to select your digital certificate file from your computer. Select I want to create a new digital ID to create a fresh digital ID.
Step 4: Continue and return to the first small window. Then, click 'Sign' to apply your digital signature certificate to the PDF document.
In addition to digitally signing, you can set passwords in SwifDoo PDF to protect files, enhancing security and privacy. You can lock a PDF after signing to stop unauthorized edits, copying, or printing of your document.
With SwifDoo PDF, signed contracts and sensitive documents are kept tamper-proof, confidential, and securely distributed to clients, partners, or stakeholders in digital processes. TRY IT NOW!
2. Digitally Sign a PDF on Windows via Adobe Acrobat
Best For: Professionals and organizations applying certificate-based, legally valid digital signatures to PDFs on Windows for compliance and security.
Let’s find out how to digitally sign a PDF on Windows 11 using Adobe Acrobat with a detailed step-by-step guide.
Step 1. Get Adobe Acrobat by downloading and installing it on your PC.
Step 2. Once you launch the program, first you must create or add a digital ID to create a digital signature in Adobe.
- Click on the Menu option in the top-left corner. Select Preferences > Signatures.
- Go to Identities & Trusted Certificates > More… to access advanced digital ID and certificate settings.
- Select the Digital IDs, then tap the + icon (Add button).
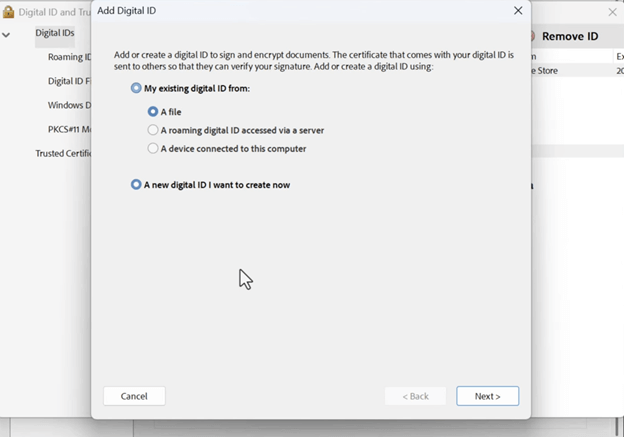
Note: If you already have a digital ID, select the "A file" option and continue. Alternatively, select the "A new digital ID I want to create now" option. Click Next.
- Select the default option in the appearing window and click Next.
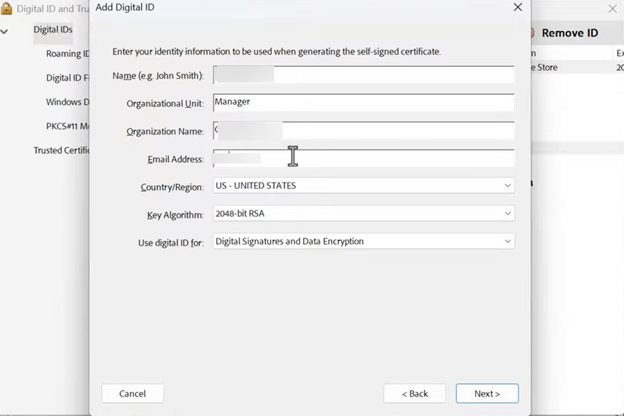
- In the Add Digital ID window, add all the necessary details such as Name, Organizational Unit/Name, Email Address, Country, while keeping the other options as they are. Click Next.
- Enter the secure password and confirm the same. Ensure saving it somewhere safe. Click Finish.
Step 3. Next, you must create the appearance of the digital signature.
- Click Menu > Open and import a PDF document. Then head to the free space in the file where you want your signature to appear.
- Tap the pen tip icon (last option) on the left side of the document in the floating menu pane.
- Select Add Signature.
Step 4. In the dialog box that pops up, you can choose to type, draw, or upload an image of your signature.

Note. You can choose Type, write your signature, change the style, and take a screenshot of it. Then, open it in Paint and save it as PNG/JPEG.
- After that, right-click on the same file, select Show More Options > Print.
- In the Print Preview window, uncheck the Fit picture to frame option, then click Print.
- Click Save to save your signature as a PDF.
Step 5. Now, in Adobe’s main interface, click Menu > Preferences > Signature. On the right side, locate Creation & Appearance > More…
Head over to the Appearance section and click New…
- In the appearing window, give your signature a Title. Then, under Configure Graphic, select the imported graphic option.
- Click File… and tap Browse… to navigate to the location where you saved the signature PDF (in Step 4). Select and open it. Then, click OK.
- In the Configure Text section, select everything you wish to include in the digital signature. Manage other necessary settings and click OK. Then, click OK again.
Step 6. On the application's homepage, click See all tools in the upper-right corner.
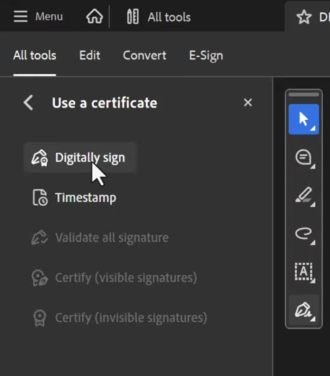
- Select Use a certificate and click Select a file on the appearing window.
- Choose and open the PDF document you wish to sign.
- In the document, head over to the section where you want to add the signature.
- Then, select the Digitally sign option in the left pane.
Step 7. Use the pointer to select the area where you wish to place the signature. A dialog box will open up. Select the digital ID with the signature you created above. Click Continue.
You will get a preview of the digital signature. Ensure to check the “Lock document after signing” box to prevent any changes after the document is signed. Enter the password (created in Step 2) and click the Sign button.
In the window that appears, save the document with a new name, then tap Save. Wait for a few seconds, and your digital signature will be added to the document.
3. Digitally Sign a PDF on Windows Using iLovePDF
Best For: Beginners and casual users who need to quickly add legally binding digital signatures to PDFs on Windows without installing complex software.
Want to sign a PDF in Chrome, Firefox, or Safari? An online tool is the way to go. Learn how to sign a PDF digitally on Windows using iLovePDF through your web browser in a few clicks.
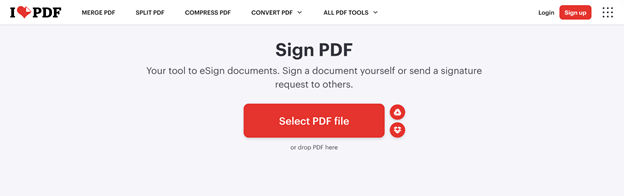
Step 1. Launch your browser and open the official iLovePDF website. Then, navigate to the Sign PDF tool.
Step 2. Click Select PDF file, then import the document you want to sign digitally from the local storage, Dropbox, or Google Drive. Alternatively, drag the PDF straight into the interface.
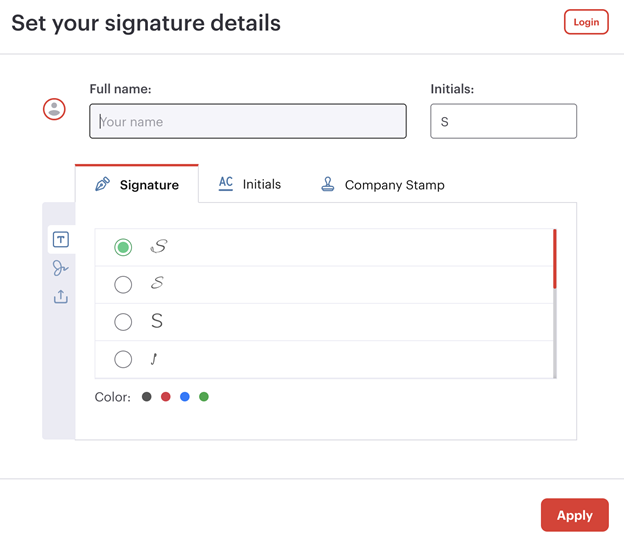
Step 3. Choose Only me when asked to sign the document yourself. Set your signature details such as Full name and Initials.
You can type, draw, or upload an image of your signature. Also, choose the font style and color of your signature. Press "Apply" to confirm your changes.
Step 4. In the signature options to the right, choose Digital Signature as your signature type. Then, drag and place the signature fields onto the PDF. You can also add your initials, name, date, and extra text.
Step 5. After that, click the "Sign PDF" button. Once signed, you can tap "Download" to save your signed PDF file to your computer.
Final Wrap Up
Learning how to digitally sign a PDF on Windows streamlines document workflows while ensuring security and legal validity. For signing contracts, approving forms, or protecting files, the right tool makes it simple and secure. Using the methods outlined, you can finalize PDFs confidently, protect document integrity, and maintain smooth digital workflows. Hope this guide is helpful.