Change Margins in Google Docs Directly
Margins refer to the blank space between a document's content and the page's edge. By default, the margins of the Google Docs file are one inch. There are two common ways to change margins in Google Docs:
Via Page Setup
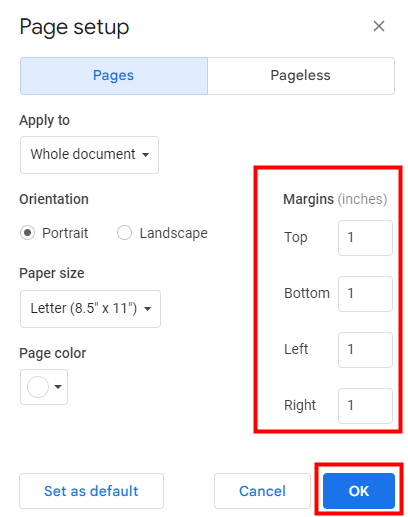
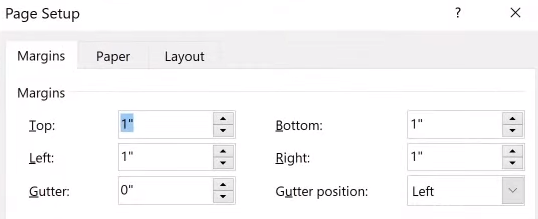
Page Setup offers a clear overview of all margins (top, bottom, left, right) for easy adjustment. It enables you to enter specific values in inches to achieve precise margin settings. You can set margins for the entire document or specific sections. You can also opt to set default margins for future documents.
Here's how to adjust margins in Google Docs in this way:
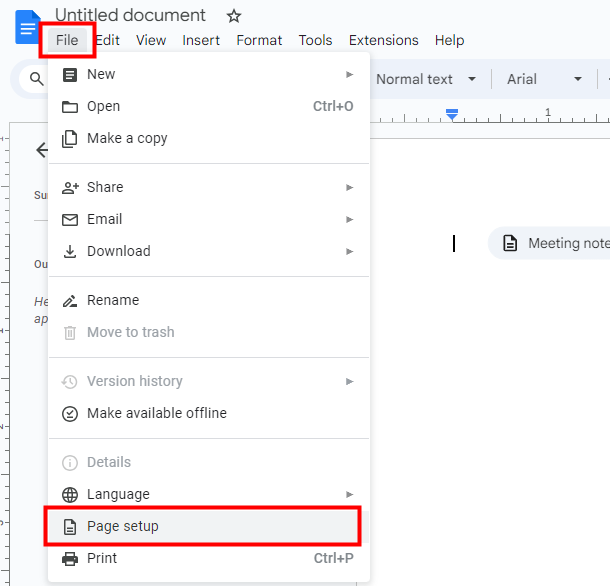
Step 1: Open your Google Docs document and click File > Page setup;
Step 2: Change each margin as you prefer and click OK.
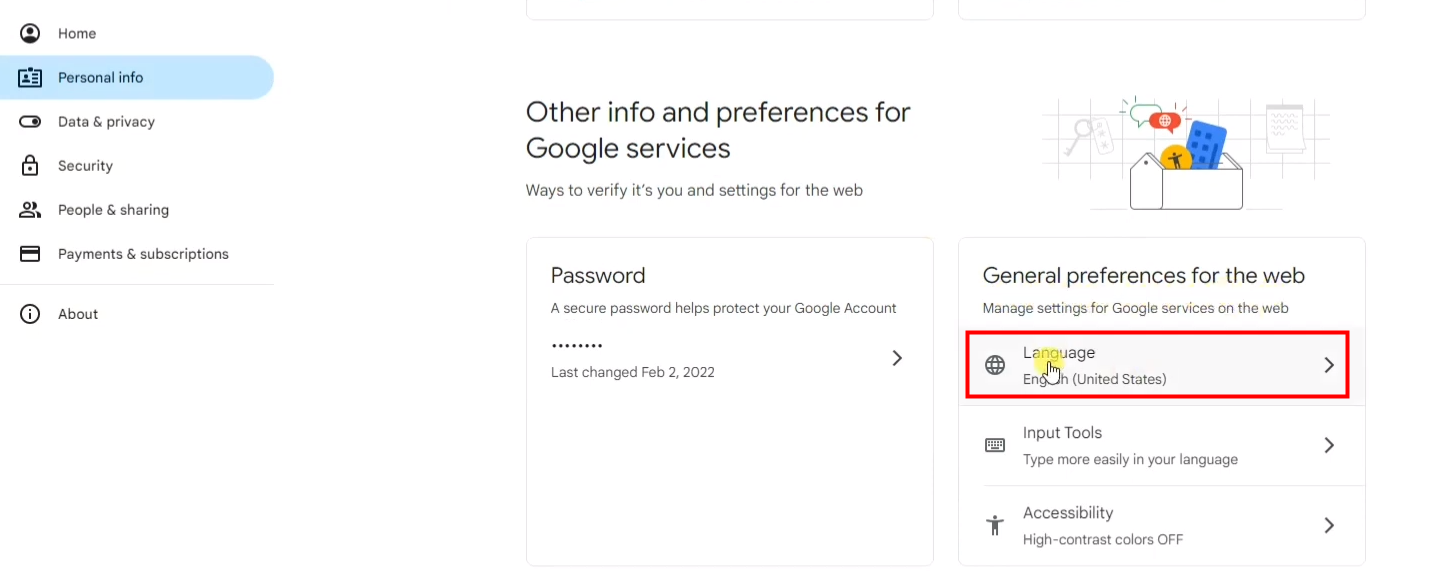
Whether margins are measured in centimeters or inches depends on the default language of your Google Account. If you want to change margins from inch to centimeter, click the three-dot icon on the top right of the page and select "Settings". Go to the Personal info tab and change the language to English (United Kingdom).
Rulers and margins will then both be in centimeters (cm). You may need to log out and resign to see the changes take effect.
Through Ruler
The Ruler feature provides a visual representation of the margins on the document. It lets you to make quick and easy adjustments by dragging the margin markers on the ruler. This tool will be useful for making fine-tuned adjustments while looking directly at the document.
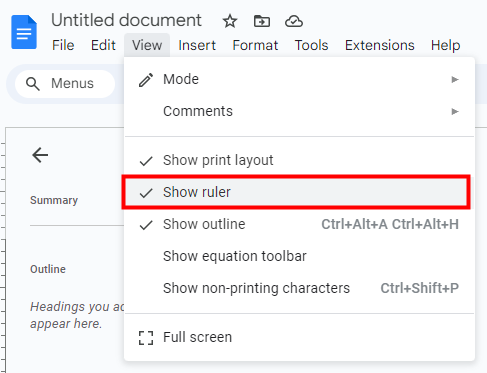
Usually, a ruler will appear on the top of and at the left side of the document. If you can't see them, go to View > Show ruler.
Using rulers to edit margins in Google Docs may not offer precise control like entering specific values. Besides, changing one margin might accidentally affect another.
Adjust Google Docs Margins with SwifDoo PDF
While adjusting margins directly in Google Docs is the most efficient method, converting the file to PDF and using a dedicated editor can be helpful in certain situations. This approach ensures consistent formatting, especially when sharing or printing the document. SwifDoo PDF is a great choice as it offers a one-stop PDF solution. Let's dive in.
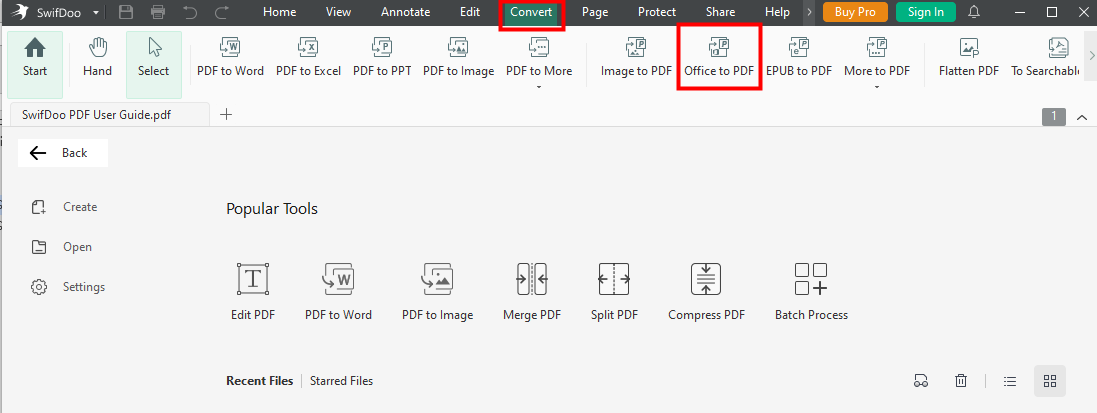
Step 1: Download and launch SwifDoo PDF, go to the Convert > Office to PDF;
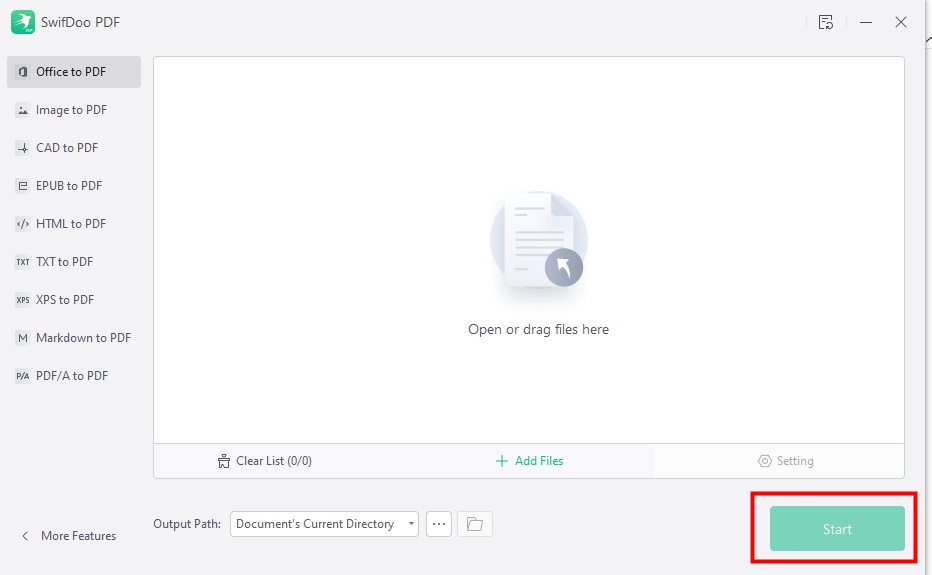
Step 2: Add your Google Docs file to it and click Start to convert it to PDF;
Step 3: Open the converted PDF file with this program and tap Page > Page Setup to set the margins.

After converting Google Docs to PDF and setting margins, you can continue to edit the document if needed. This best PDF editor lets you edit PDFs as easily as editing a Word file. It also enables you to password-protect your file if you want to restrict others from viewing or editing it.
Edit Google Docs Margins with Microsoft Word
As Google Docs and Word documents are both used for word processing, you can also use Microsoft Word to set margins in Google Docs;
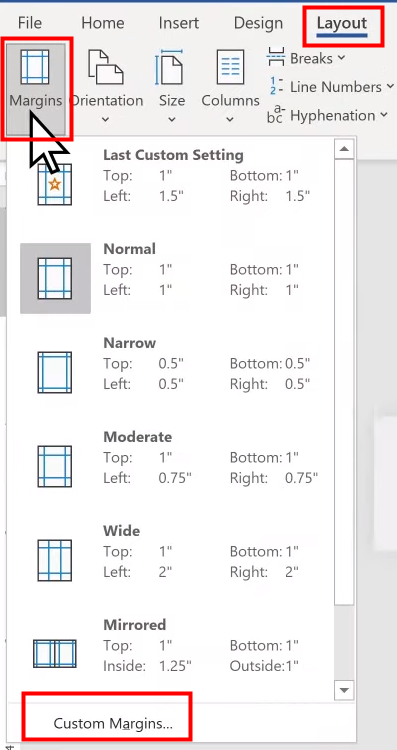
Step 1: Open your document in Word and tap Layout > Margins. Then, you can choose a preset margin or click Custom Margins for more flexibility;
Step 2: Enter the margins you want if you choose Custom Margins and click OK.
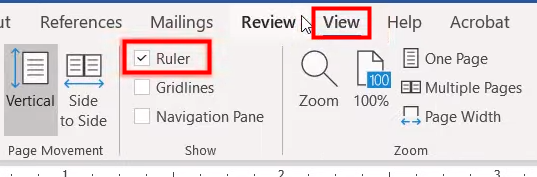
Similar to Google Docs, Microsoft Word also enables you to adjust margins by ruler. To enable this feature, go to the view tab and mark the "Ruler" checkbox. Then, you can drag the rulers to fix margins on Google Docs.
Final Words
In conclusion, changing margins in Google Docs is a straightforward process that can significantly enhance the presentation and readability of your documents. Whether you prefer the direct approach via Page Setup, the visual method using Rulers, or external applications like SwifDoo PDF and Microsoft Word, each method offers unique advantages.