
Add Fonts to Word on Windows
The process of adding a font to Word on Windows is straightforward. Simply download and install the font you like on your computer, then you will find the font in Microsoft Word. Now, get rid of the old Arial and Times New Roman and add fonts to Word as the following.
Step 1: Download the font you like from a trusted website. If your downloaded file is zipped, extract the font file (usually .ttf or .otf) using a decompression tool;
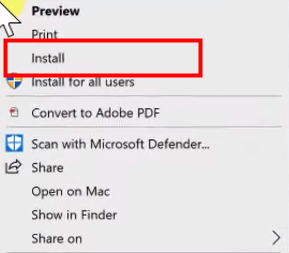
Step 2: Locate the extracted font file, right-click it, and select Install;
Step 3: Launch Microsoft Word, and you will find the new font from the Font dropdown menu.
Add Fonts to Word on Mac
If you're a font enthusiast, consider using a font manager to keep your collection organized and easily accessible. Font Book is a utility that comes with your Mac and allows you to see, manage, and install fonts you have on your device. You can use it to add fonts to Word on Mac easily.
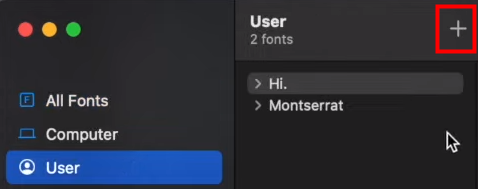
Step 1: Launch Font Book, select User, and click the plus icon;
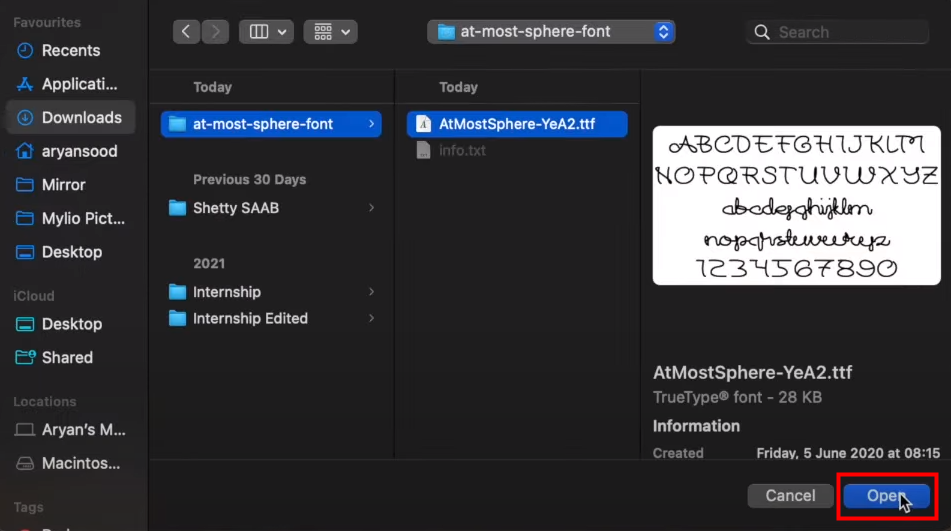
Step 2: Select the font file you want to add to Word and click Open;
Step 3: Then, the system will add the new font on your Mac. You can use it in Microsoft Word directly.
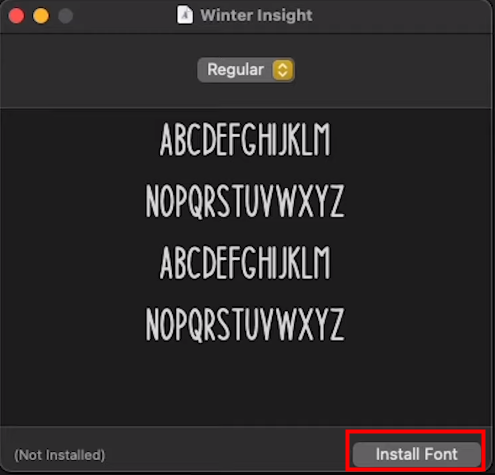
That’s how to add fonts to Microsoft Word on Mac. Similar to the case in Windows, you can directly install a new font in the Finder: Locate and double-click the font file to preview it, then click “Install Font”.
Save and Transfer Word Files as PDF
After you add fonts to Word and finish your editing work, consider saving and transferring it as a PDF. This ensures everyone who views it sees the fonts precisely as you intended, regardless of their device or software. Simply click "File" > "Save As", choose "PDF (*.pdf)" from the "Save as type" dropdown, and hit "Save".
For potential future edits or advanced features, consider a PDF editor like SwifDoo PDF. This tool enables you to access features like compressing Word files for efficient document management.
Website to Download Fonts for Free
From the content above, you may notice that in order to add fonts to Word, you need to download and install the font on your device first. Here, we will introduce some free and reliable font websites to you.
- Google Fonts: A vast library of free fonts curated by Google, perfect for web use with excellent cross-platform compatibility and easy embedding.
- Font Squirrel: A well-respected site focusing on high-quality, free fonts with clear licensing information.
- DaFont: A massive collection of fonts, including many unique and quirky options, with both free and paid fonts.
- FontSpace: A designer-centered site with a focus on professional and clean fonts, featuring a font generator and easy previews.
OTF Vs. TTF: Which Font Format Is Better
When you add fonts to Word, you may encounter an OTF or TTF file. Both of them are standard font formats compatible across Windows, macOS, and Linux. They scale seamlessly and support basic styles like bold and italic. However, OTF shines with its advanced features:
- Extensive features: Ligatures, alternates, small caps, fractions, ornaments, and broad language support.
- Rich glyph library: Holds up to 65,000 glyphs, ideal for complex languages and scripts.
- Smaller file sizes: Compressed efficiently, saving storage space.
- Smoother rendering: Especially at smaller sizes or on screens.
OTF's versatility makes it ideal for professional design and publishing. TTF remains popular for basic text editing, web compatibility, and older software due to its more straightforward structure.
Final Words
Adding fonts to Word is surprisingly easy, even if you are a tech novice. Whether you're crafting an impressive presentation, designing a compelling brochure, or simply adding a sense of personality to your reports, the right fonts can elevate your work from ordinary to extraordinary. Now, go ahead and explore the endless possibilities in Word!