Before you create a form in Excel, note that these forms allow structured data collection, maintain consistency in entries, and make it simple to review and analyze information. They are highly time-saving, reducing manual entry while lowering the risk of errors. Our Excel form tutorial helps streamline workflows, improve accuracy, and speed up and streamline data reporting.
How to Create a Data Entry Form in Excel
When you create a data entry form in Excel, it can dramatically simplify the management of large datasets. Knowing how to create a form in Microsoft Excel helps you enter information quickly, reduce errors, and keep your data organized effortlessly.
Check out how to create a form in Excel for data entry in a few clicks.
Step 1. Create a table structure.
First, you must create a table structure to turn your data into an official Excel table.
- Open Excel.
- In Row 1, enter your column titles.
- Select the headers.
- Press Ctrl +T (Windows) or Cmd+T (Mac).
- Tap OK.

Step 2. Add the “Form” button to the Excel
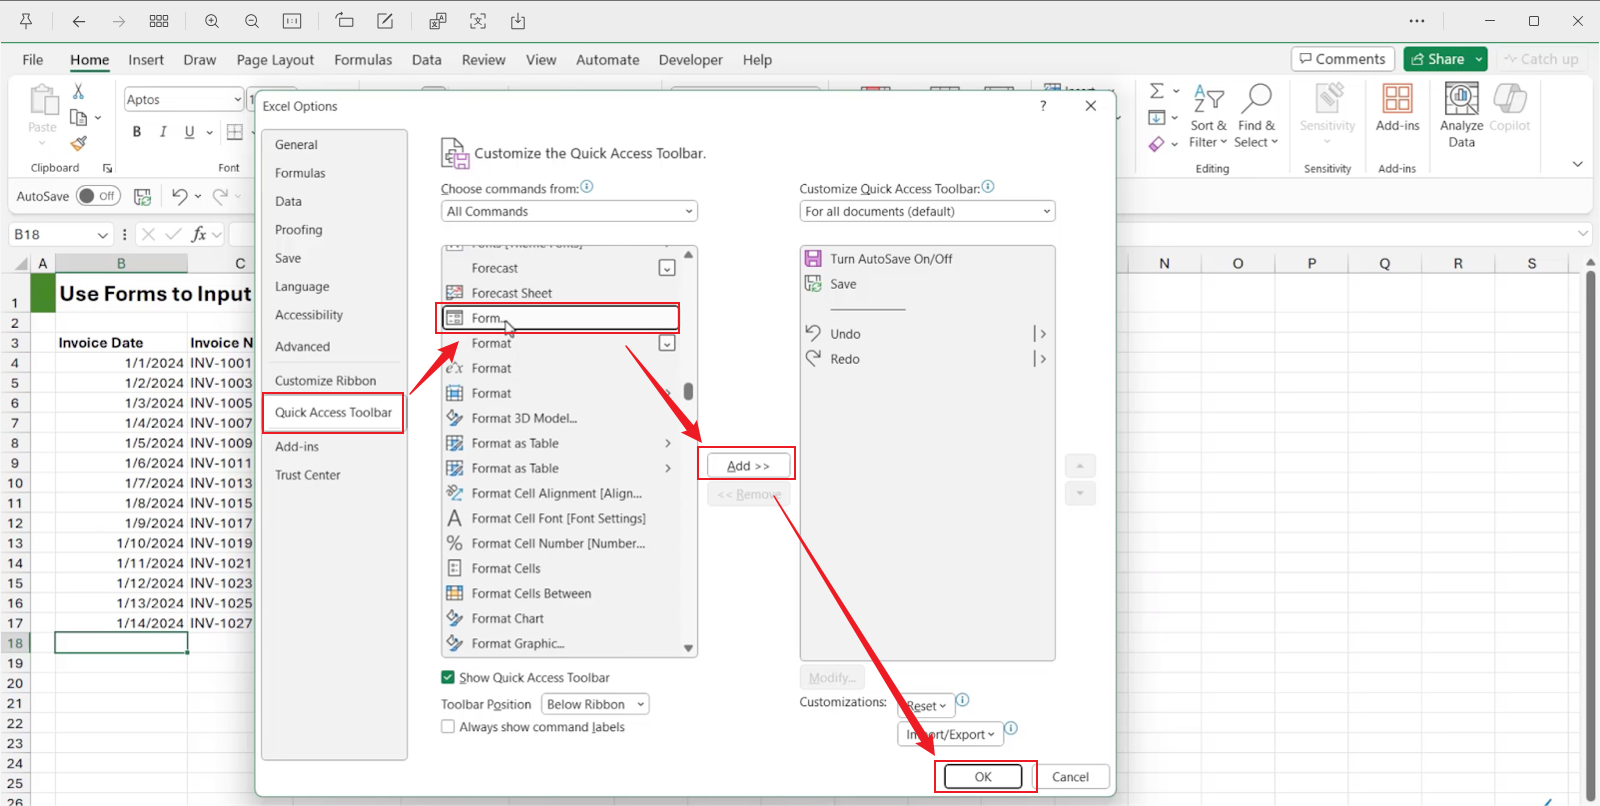
Now, add the Form button to your spreadsheet. By default, the Form button is hidden. Here’s how you can add it and see a Form icon at the top of Excel.
- Click File > Options.
- Select Quick Access Toolbar.
- Under the Choose commands from section, select the Commands Not in the Ribbon option.
- Scroll down and find Form…
- Click Add and tap OK.
Step 3. Open the Form.
Now, click anywhere inside your table. Press the Form button to view your Excel form. You’ll see that each field matches your column headers.
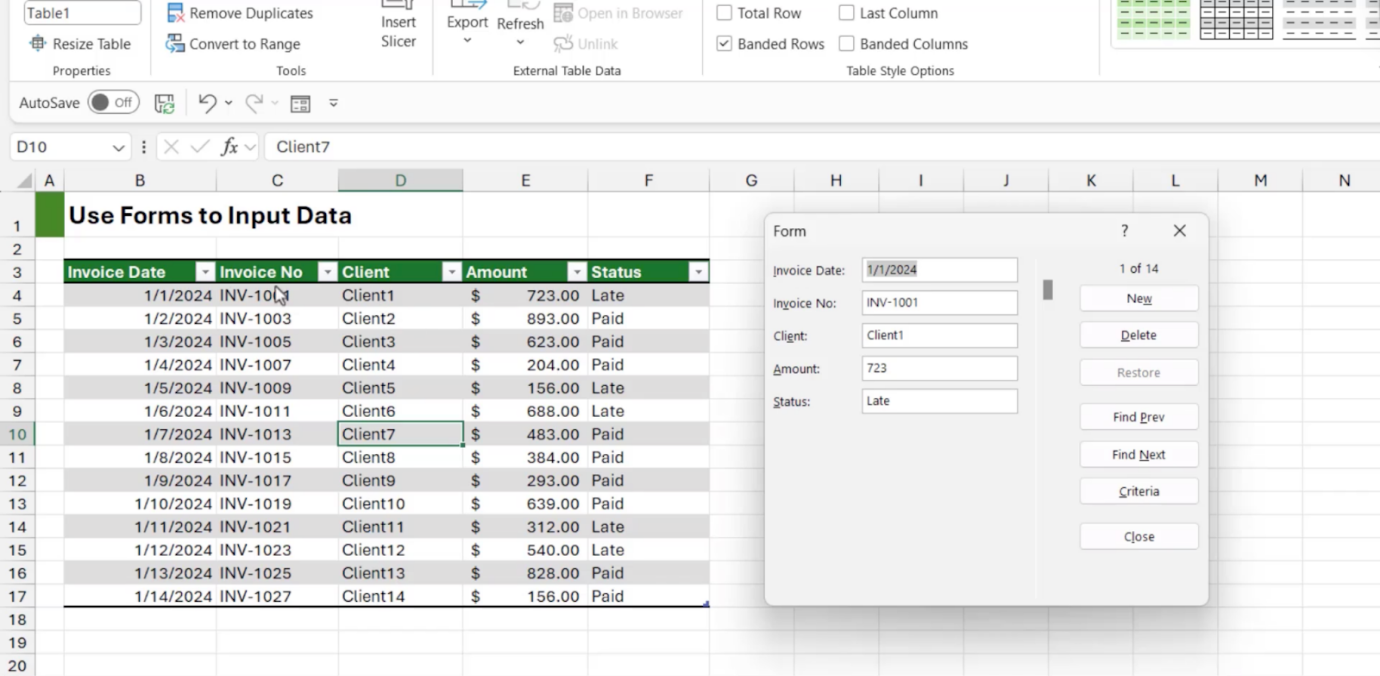
Step 4. Use the Form.
Now, to use the form, you can perform various activities. For instance,
- Click New to enter new data.
- Press Enter to save your entry.
- Use Find Prev/Find Next to search records.
- Click into a field and change it to edit records.
- Click Delete to delete any unwanted records.
Note. Excel automatically puts the data into the table rows.
Step 5. Save and share your data.
Once you’ve entered and managed your data using the form, make sure to save your Excel file to avoid losing any information.
You can distribute the file to coworkers or upload it to cloud storage for collaborative data entry. This makes sure your data stays secure, can be accessed easily, and is ready for analysis whenever necessary.
How to Create a Fillable Form in Excel
Excel is more than just a tool for numbers. It’s also possible to design interactive forms for easier data gathering. Learning how to create fillable PDFs from Excel allows you to change spreadsheets into neat, interactive forms that others can complete digitally.
Here’s how to create a fillable form in Excel in a few clicks.
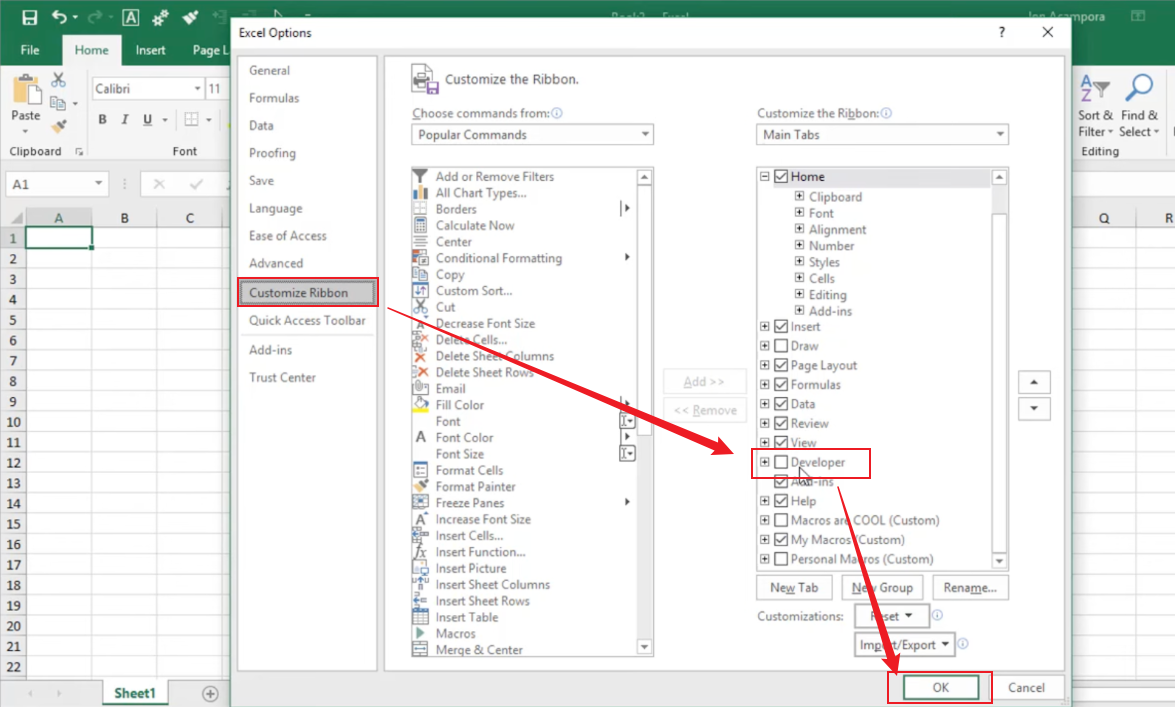
Step 1. Enable the Developer Tab.
First, you must enable the Developer tab.
- Go to File and click Options.
- Select Customize Ribbon.
- Check Developer in the right column.
- Press OK.
Step 2. Insert Form Controls.
After that, it’s important to insert different types of form controls for your Excel form.
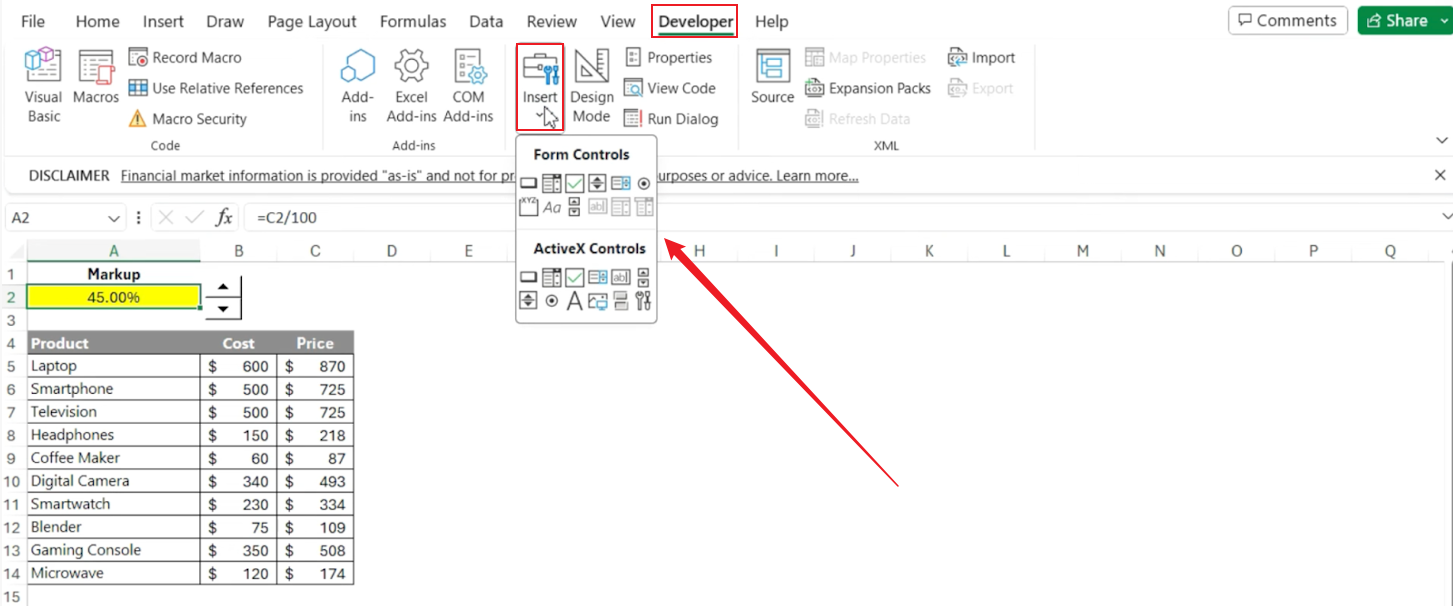
- Navigate to the Developer tab.
- Select Insert and then select Form Controls.
- Choose from options such as Text Box (for free-text input). You can also pick the Check Box option to insert checkboxes in Excel. Likewise, you can choose the Combo Box or Drop-down List for multiple-choice responses.
Step 3. Customize the Form Controls.
After you have added the Form controls, you can personalize them to meet your desired settings and preferences.
- Right-click the Form Control.
- Select Format Control.
- Link each control to a specific cell to capture input.
Step 4. Protect Your Form.
Once you have finished setting up and customizing the form, the next essential step is to protect it. This guarantees that users are able to fill in required fields without accidentally altering headers, formulas, or the spreadsheet’s structure.
- Navigate to the Review tab.
- Select the Protect Sheet option.
- Pick options so users can enter data in the form without changing headers or formulas.
How to Create a Form in Excel Using Microsoft Forms
You can also create dynamic forms in Excel using Microsoft Forms, which makes data collection even easier. This process enables you to design surveys or questionnaires that feed responses into your Excel workbook for simple, seamless analysis.
Learn how to create a Form in Excel using Microsoft Forms.
Step 1. Sign in to Microsoft Forms using Microsoft 365 school credentials, work credentials, or a Microsoft account such as Hotmail, Live, or Outlook.com.
Note: You can also sign in to Office.com, find the Microsoft 365 icons on the left, and then click Forms.
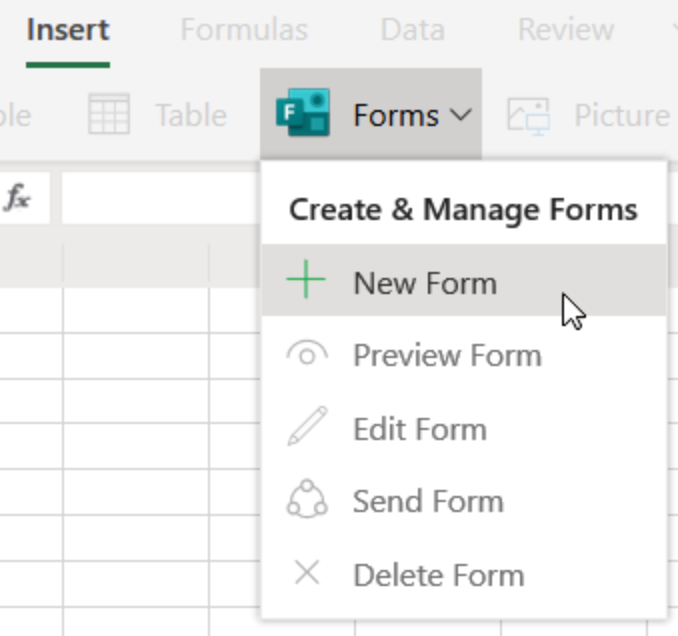
Step 2. Select the + New Form option.
Step 3. Title your form. And, if required, add a description of it.
Note: Form titles can have up to 90 characters. Descriptions can have up to 1,000 characters. Your form is saved automatically while you create it.
Step 4 (optional). Select + Add new to include another question in your form.
Choose the type of question you want to add. You can include Choice, Text, Rating, or Date question types.
Select More question types for Ranking, Likert, File upload, or Net Promoter Score question types.
Click Section to organize your questions into separate sections.
Step 5. Select the Preview icon to preview how users will interact with your form.
Note. You can also test out the form by answering the questions in Preview mode. And then, select Submit.
Tips for Optimizing Excel Forms
To fully leverage your spreadsheets, make sure to optimize Excel forms for improved efficiency and accuracy. Minor refinements can streamline data entry, cut down errors, and improve overall usability.
Here are some handy tips to improve your Excel forms.
- Make column headers clear and consistent to avoid creating confusion.
- Utilize data validation to restrict input to acceptable options.
- Keep the layout of your form simple and organized for easier navigation.
- Use drop-down lists for repetitive data to speed up entry.
- Secure the form to stop users from modifying headers or formulas by mistake.
- Include user instructions or notes directly in the form.
- Review and test your form before sharing to verify proper functionality.
Final Wrap Up
Understanding how to create a form in Excel for data entry lets you save time, prevent errors, and optimize your workflow. Whether you want to create a fillable form in Excel or utilize Microsoft Forms, following the right process simplifies and streamlines data collection. Begin applying these tips today to make your Excel forms more efficient and user-friendly.